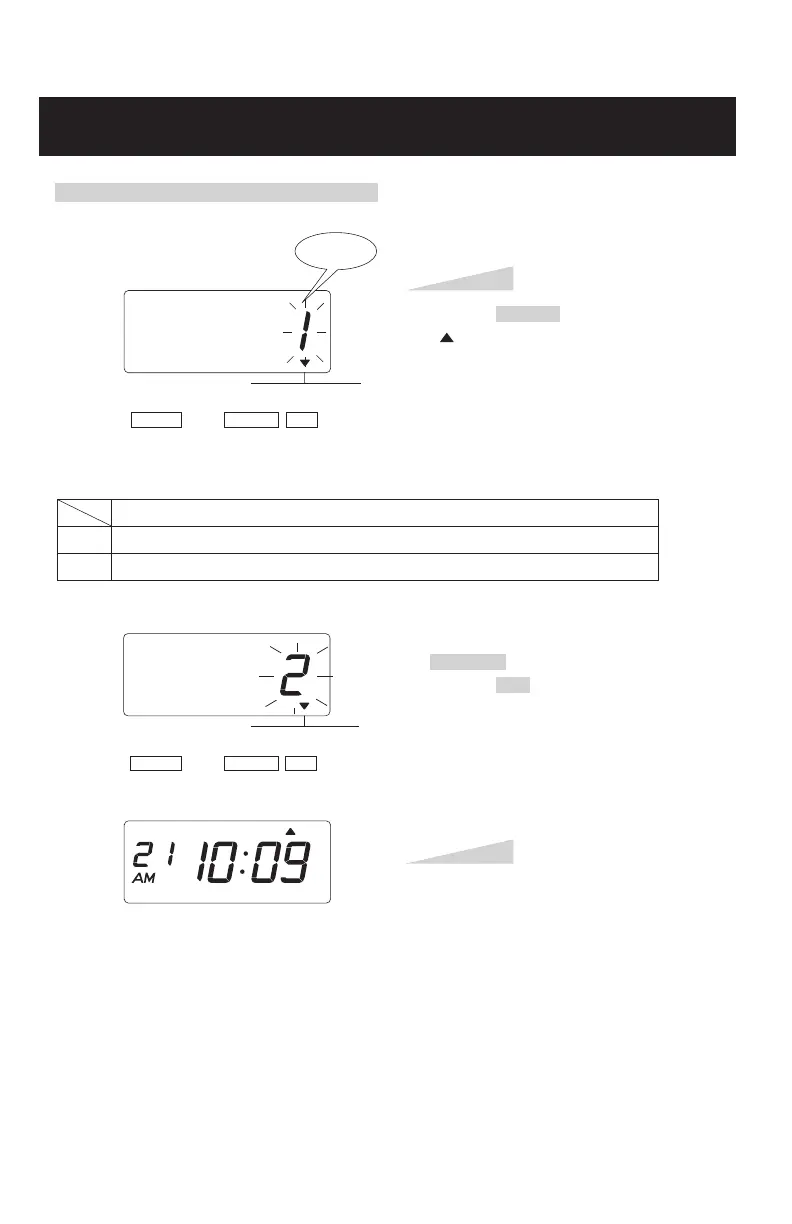
SETTING THE PRINT DIRECTION
Example: Change the print direction to "Left".
Press the SELECT button and position the
" " mark at the "PRINT DIRECTION".
At that moment, the flashing digit at the
left indicates "Order Options" of the print
direction. (The flashing means it can be
changed.)
In case of the example, press the
CHANGE button to set at "2". And then
press the SET button.
Step 1
Step 2
PRINT DIRECTION
SELECT CHANGE
SET
Print
direction
PRINT DIRECTION
SELECT CHANGE
SET
1.
2.
Order Options
Right
Left
Change the "Print Direction".
TU WE TH FR SA SUMO
Now the print direction setting has been
completed. Replace the cover and lock.
IMPORTANT: If you do not complete
Step 1, the clock will not print.
SETTING THE STARTING DATE OF DAYLIGHT SAVING TIME
Example: Daylight saving time starts on Sunday, March 11, 2018.
Press the SELECT button and position
the " " mark at the "D.S.T. START".
At that moment, the "Year" flashes.
(The flashing means it can be changed.)
Change the "Year".
In case of the example, press the
CHANGE button to set at "18". And then
press the SET button.
At that moment, the flashing changes
from "Year" to "Month".
Step 1
D.S.T.
START
SELECT CHANGE
SET
SETTING THE DAYLIGHT SAVING TIME
Automatic DST correction (recommended)
By default, the daylight saving time is already set to start on the second Sunday of March and to
end on the first Sunday of November. However, if you once disabled this function and want to
set it again or change starting and/or ending date, please change dates as follows.
Once you reset the unit, setting of daylight saving time will return to the default value.
Example: Start date Sunday, March 11, 2018.
End date Sunday, November 4, 2018.
If you set as the above, the time clock remembers the start date as the second Sunday of
March and the end date as the first Sunday of November. Once set, the time clock
automatically updates the settings every year thereafter. No further manual setting is necessary.
Year
Date
Month
D.S.T.
START
SELECT CHANGE
SET
23
19