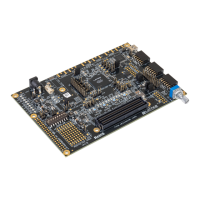
MachXO2 Dual Sensor
Interface Board
Run the Demonstration
After the AC adapter is plugged in and the HDMI/DVI cable is connected, the DSIB sensor’s
input will be seen on a monitor. When the DSIB is running, the two LEDs on the DISB will
be on, indicating that the device and sensor are running correctly.
Other DSIB Features
• FTDIUSBforprogrammingtheMachXO2device.ThisisonlypossibleiftheDSIBis
powered-up by the HDR-60 Base Board.
6. Run Lattice Diamond
®
Programmer software on the PC and program the LatticeECP3™
FPGAontheHDR-60BaseBoardwiththeparallel-to-HDMIbitstreamwhichcanbefound
at www.latticesemi.com/dualsensorbridge. The MachXO2 device on the DSIB is prepro-
grammed to support one 9MT024 NanoVesta sensor. For details on supporting two sensors
or other NanoVesta boards, go to www.latticesemi.com/dualsensorbridge.
Visit www.latticesemi.com/dualsensorbridge for further information on the DISB and the latest
design software or to download EB69, MachXO2 Dual Sensor Interface Board User’s Guide.
HDMI/DVI Cable
Done!
Congratulations! You have successfully connected and demonstrated the MachXO2 Dual
Sensor Interface Board. Please refer to the MachXO2 Dual Sensor Interface Board User’s Guide
available on the Lattice website at www.latticesemi.com/dualsensorbridge for the following:
• Schematicdetails
•GerberPCBlayoutartwork
• DocumentationforsupportingtwosensorsandotherNanoVestasensorboards
• JEDEClesfortheMachXO2tosupportotherNanoVestaboards

 Loading...