A STEELFORT PRODUCT
5
ASSEMBLY
When assembling this machine, please follow the
instructions for assembly printed.
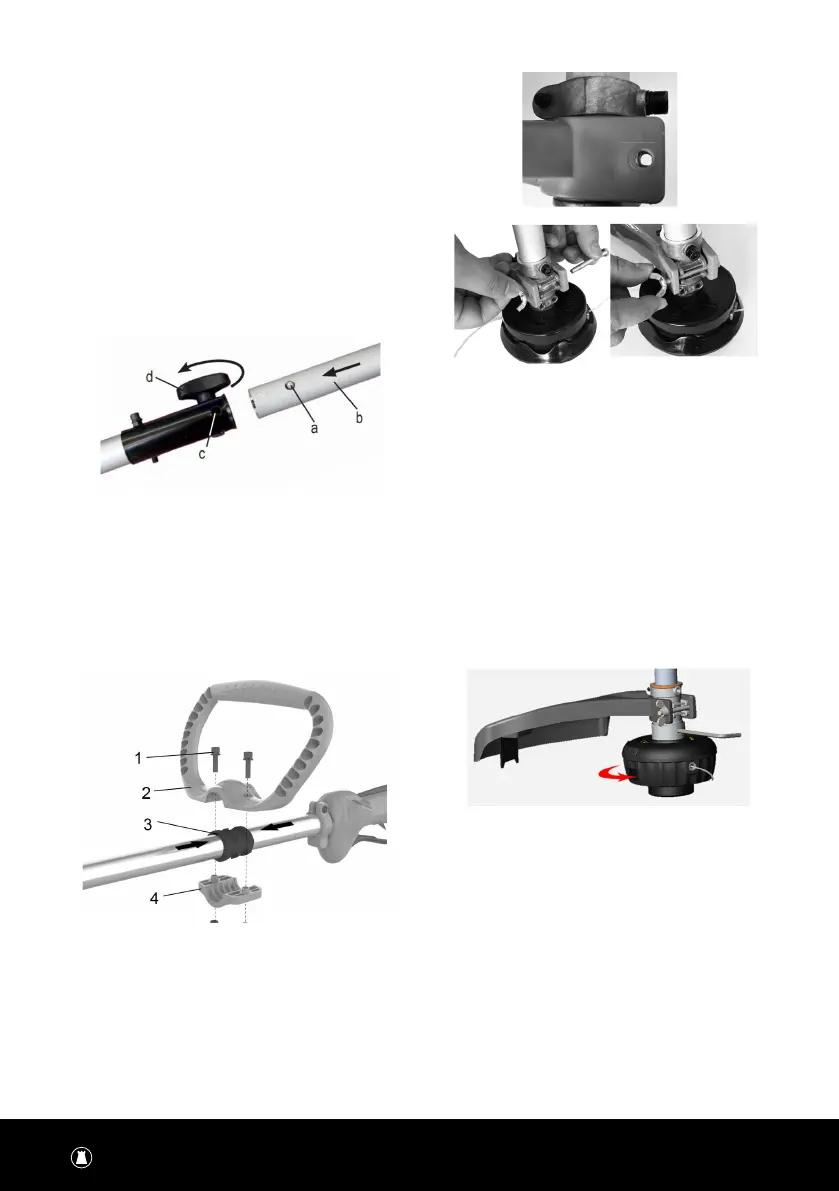
MOUNTING THE SHAFT
• Push the lower part of the shaft (b) right down
until the stop pin (a) slots into the hole (c) in
the shaft. This is easier to do if you rotate
the bottom of the shaft (b) slightly in both
directions. The pin (a) is in place when it is
completely lodged in the hole.
• Lastly, tighten the knob (d) securely
ASSEMBLE THE HANDLE
• Put left handle rubber cover (3) on the shaft
between the two arrow positioning label, x the
upper handle (2) with lower handle (4) to the
tube with screws (1) and nuts (5) tightly enough.
ASSEMBLE THE SAFE GUARD
• Align the hole of the guard with the hole of
metal connector, insert the screw into hole of
guard and connector, tighten it.
WARNING
Use only original manufacturer’s replacement parts,
accessories and attachments. Failure to do so can
cause poor performance, possible injury and may
void your warranty. Never use the machine without
the guard assembled!
ASSEMBLE THE NYLON HEAD
• Insert the hex wrench into the hole to x the
connector, then put the nylon head to the
connector shaft, turn the nylon head clockwise
till it is assembled tightly enough.
WARNING
Please make sure the cutting head has been
assembled correctly before use.
NOTE: The packaging material is made of recycle
materials. Dispose of packaging materials in
accordance with regulations.