76
1
2
3
6
78
5
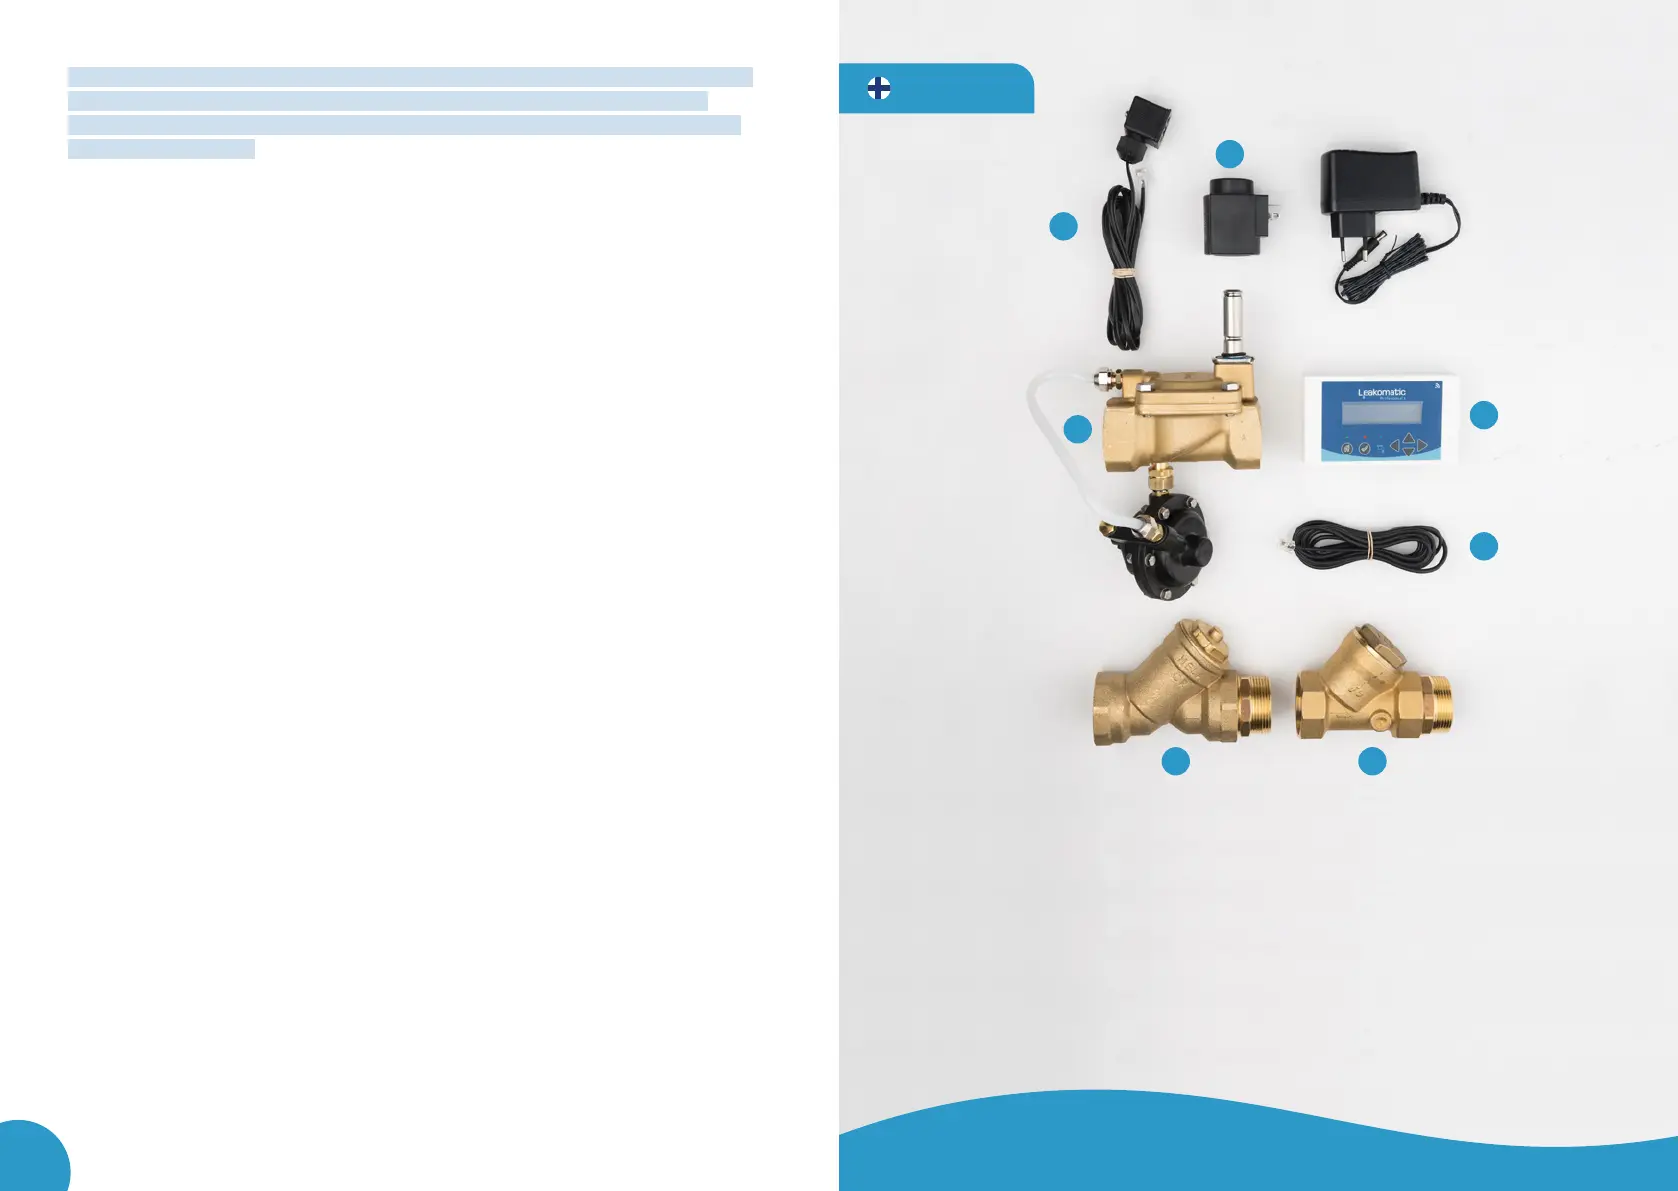
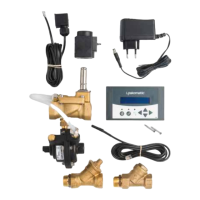
TUOTEPAKETTI SISÄLTÄÄ
1. Magneettiventtiili + mittausyksikkö
2. Magneettiventtiilin puola
3. Näyttöyksikkö
4. Virta-adapteri ja ruuvit
5. Magneettiventtiilinkaapeli, ruuvi ja
kumitiiviste
6. Anturikaapeli
7. Hiukkassuodatin kaksoisnipalla
8. Takaiskuventtiili Kaksoisnipalla
9. Käyttöohje
10. Quickguide
11. Asennusohje
SUOMI
Normally the sensor cable is installed fully inserted to the bottom of the sensor
unit channel. Should the flow indicator on the display unit indicate a flow,
although no water is flowing through, the sensor cable can be pulled out for a
couple of millimetres. Note that the system normally has a delay of few seconds.
The blue LED lights up and remains on when there is a flow; after the flow is
stopped, the light goes out after a moment.
The troubleshooting and leak detection guide are available on our website at
www.lea komatic.com.
In User manual´s section “Settings menu” the procedure of i.e. changing the lan-
guage, time, and test settings is explained. The section also describes the procedure
of activating the intakes and outputs when any possible additional equipment is
connected.
ANNUAL MAINTENANCE
9 The dirt filter should be cleaned once a year. Remove the strainer of the dirt
filter and rinse it with clean water.
9 To clean the back flow check valve open the inspection part and take out its
content. Clean the sealing surfaces of the rubber and the back flow check valve
with fresh water. Assemble the parts in the reverse order.
9 After maintenance always check that the valve unit correctly cuts off the flow of
water. Set the Leakomatic in Away mode, let the water flow, and check that the
solenoid valve closes after the set period of time.
MAINTENANCE AS REQUIRED
• If the time on the display is incorrect after a power cut, replace the button cell.
Pro1 sets the time display automatically, when the unit connects to the cloud
service.