4
Fill the primer feed tray. View help video here for loading primers into tray: leeprecision.com/pro-1000-help-videos.html
Don’t let the primer level fall below the tray level. Running out of primers will cause a mess inside your shell plate carrier. Once the last primer
has exited the folding tray, replenish the primer supply, else you will load cases without primers.
DANGER: Use only CCI™ or Remington™ brand primers. Other brands, espec ially Federal™, can explode with sucient force to seriously injure the
user or persons nearby.
ALL PRIMERS ARE DANGEROUS and it should be anticipated that the primers in the tray could explode through accident, misuse or spontaneously. Should
an explosion occur, our tests have demonstrated that safety glasses will normally prevent serious injury to the user if CCI™ or Remington™ primers are
used, because the explosion is minimal. Other primers, however, can explode with sucient force to seriously injure the user, or persons nearby. We do not
take any position with respect to the quality of performance of primers available on the market. However, ONLY those primers manufactured by CCI™ or
Remington™ are recommended for use in the Pro 1000—and when loading those primers—safety glasses and hearing protection must be used. NO OTHER
PRIMERS should be used with the Pro 1000.
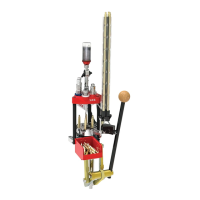
Slide the flow
control to
OPEN.
Randomly
deposit
primers.
Lift tray so output spout touches table,
shake tray side to side to upright all the
primers. Allow cover to naturally fold
up, notice how the primers glide across
hinge upright themselves and work
their way to wards the outlet.
Fold cover over, slide the flow control
to LOCK position, feel for the detent.
Grasp the top and bottom of the flow
control valve using your thumb and
index finger above and below tray.
NOTE: make sure it is in the LOCK
detent position, else primers may
spill.
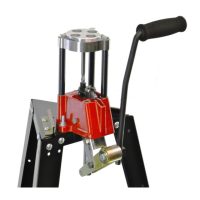
Slide the tray into the trough. Slide the
flow control to the ON position. Tap the
side of the tray several times to fill the
trough.
tap
10
A
B
C
D
E
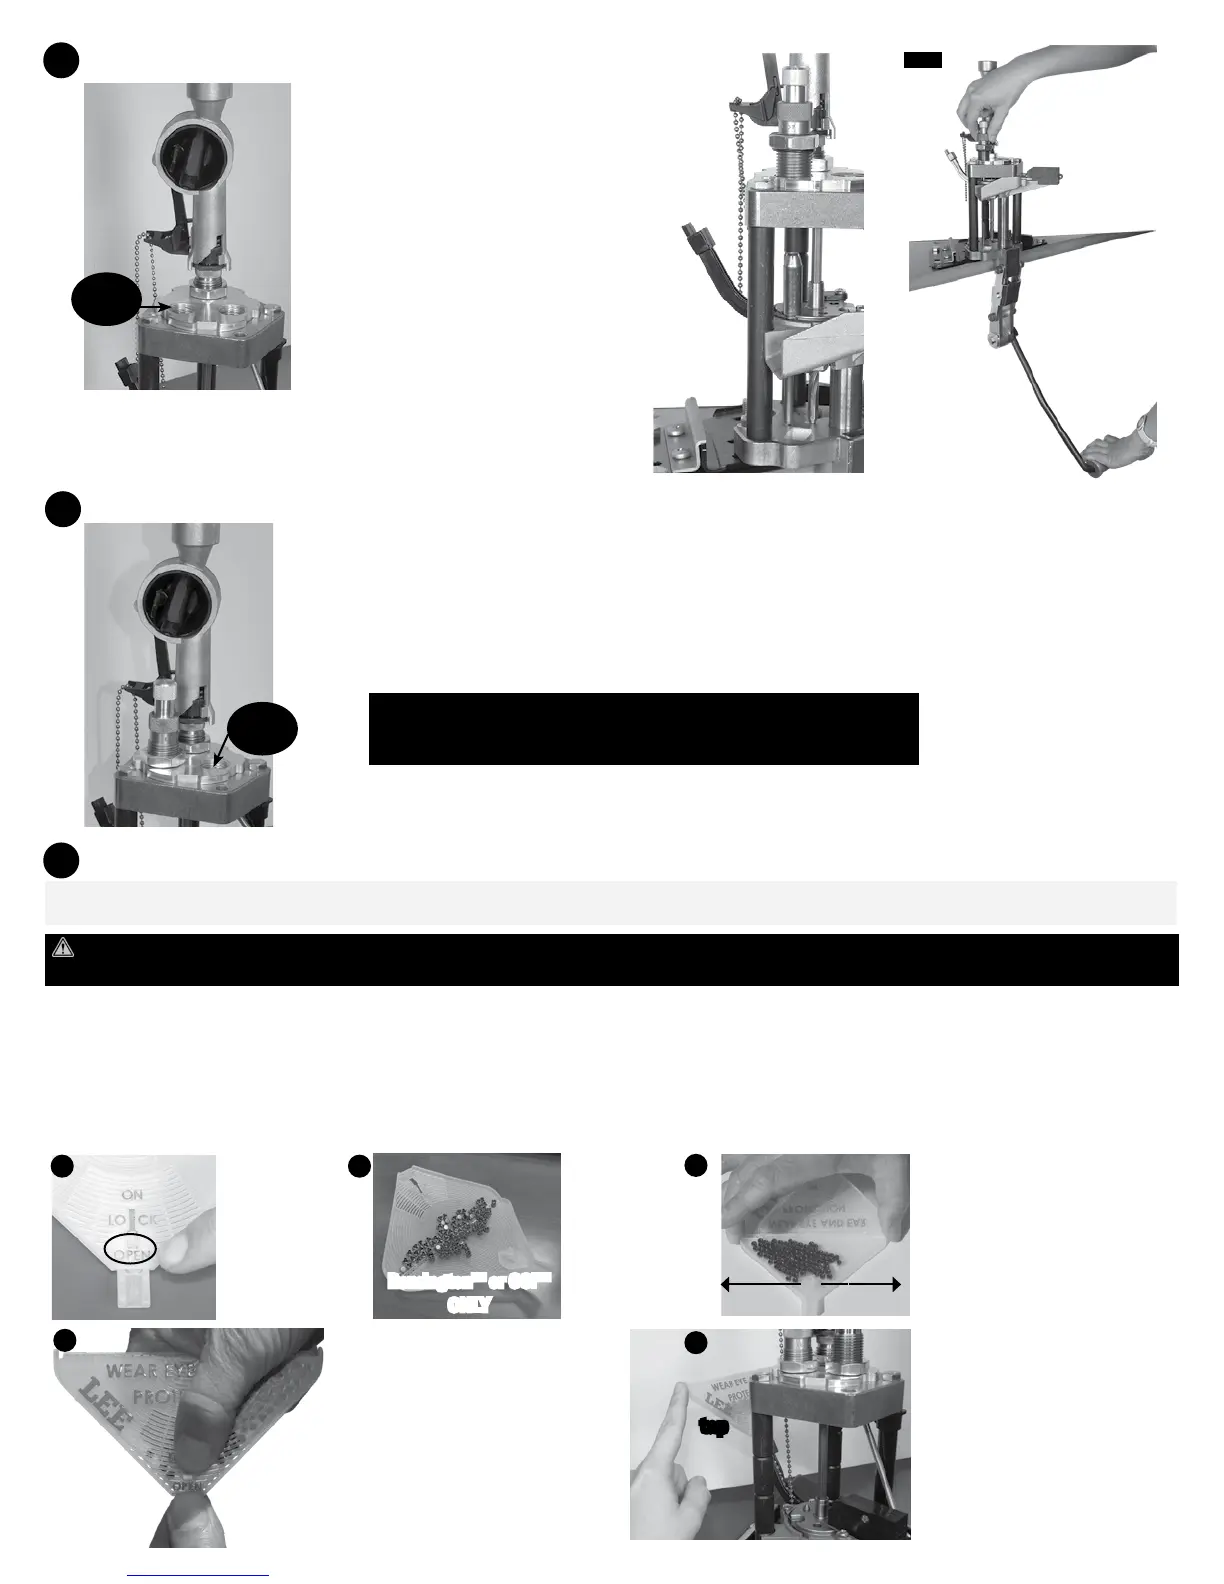
Lower the press lever (shell plate carrier up).
Screw the full length sizer in to position # 1 until it touches the shell plate, lower the shell plate
carrier, screw the die in an additional turn. Raise the shell plate carrier and tighten the lock ring
finger tight.
9
position
1
Remington™ or CCI™
ONLY
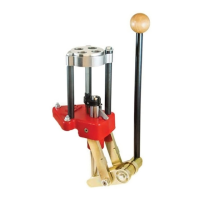
Spin the lock-ring up to the top of the die
and unscrew the adjusting screw out five full
turns. Put the press lever in the up position
(shell plate carrier down). Place a loaded
round that you wish to duplicate in turret
position # 3.
[FIG 11] Raise the shell plate carrier to the top
of its stroke and hold (shell plate carrier up).
Screw the bullet seating die in until it stops
turning, lower the shell plate carrier slightly,
thread die in an additional 1/8 turn. Finger
tighten the lock ring. Now raise the shell plate
carrier to the top of its stroke, screw the bullet
seating adjusting screw in until you feel it
touch the tip of the bullet.
position
3
8
FIG 11
Consult your powder measure instructions and reloading die instructions for
setting the charge on your (Auto-Drum Powder Measure, instructions pg. 2) or
(Pro Auto-Disk Powder Measure, back side of instruction sheet)
Full Length Sizing Die (position # 1)
BULLET SEATING DIE (position # 3)