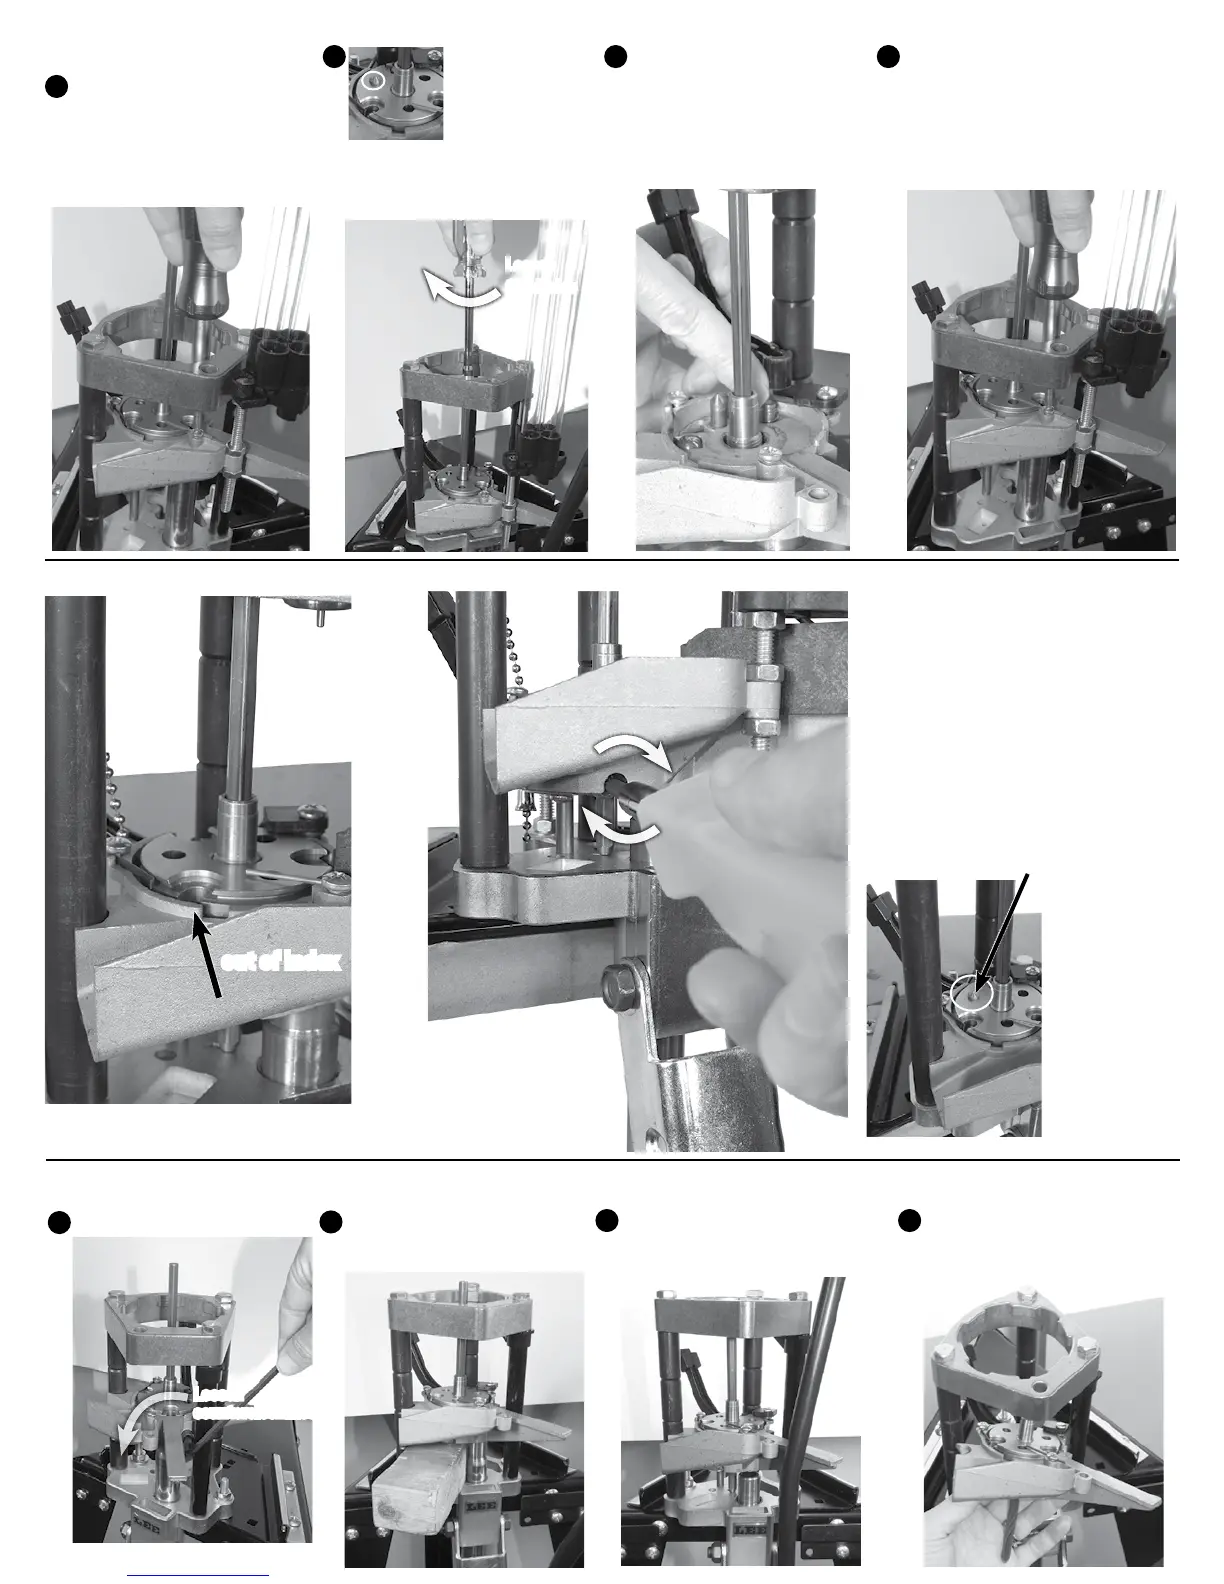
CHANGING THE SHELL PLATE CARRIER
Remove turret, primer tray, z-bar and case slider block.
Loosen 3/16” socket head screw.
Place wood block under carrier
and pull up on handle to lower
ram.
Push down the action rod
towards base approx. 2 inches to
ease in removal.
6
A
B
C
D
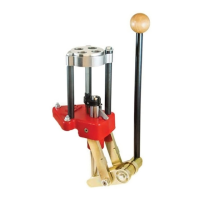
Rotate and remove shell plate
carrier.
Loosen
counterclockwise
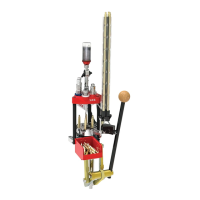
CHANGING SHELL PLATE ONLY
With your case slider block
removed, and shell plate carrier
at mid-stroke position, loosen
Phillips screw that holds the
case ejector and remove ejector.
DO NOT LOSE IT!
A
B
C
D
Lower carrier so
carrier pin pases
through shell plate
to prevent shell
plate from rotating.
Loosen the drive bolt by rotating
the action rod clockwise with a
1/4” nut driver.
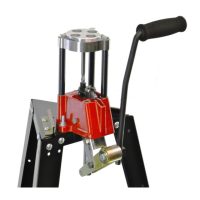
Remove the trough and
priming pin and clean out any
accumulated primer dust or
powder. Install correct
(small or
large) primer trough and primer pin
before installing a new shell plate.
Install shell plate and tighten the
drive bolt by rotating the action rod
counterclockwise. Re-adjust the
zero index as explained under “Zero
Adjustment” below.
Loosen
Clockwise
Raise and lower the shell plate carrier, if
the alignment pin does not pass through
the shell plate it is out of index. Raise and
lower the shell plate carrier again. Rotate
the Phillips adjusting screw clockwise
until the shell plate snaps into position.
If the alignment pin is projecting through
the shell plate, your index is set. Do not
continue to rotate the screw, you’ll strip out
the ratchet gear.
ZERO ADJUSTMENT FOR SHELL PLATE INDEXING
out of index
Proper index, alignment pin passes through shell
plate