Keor MOD
Installation and maintenance manual
75
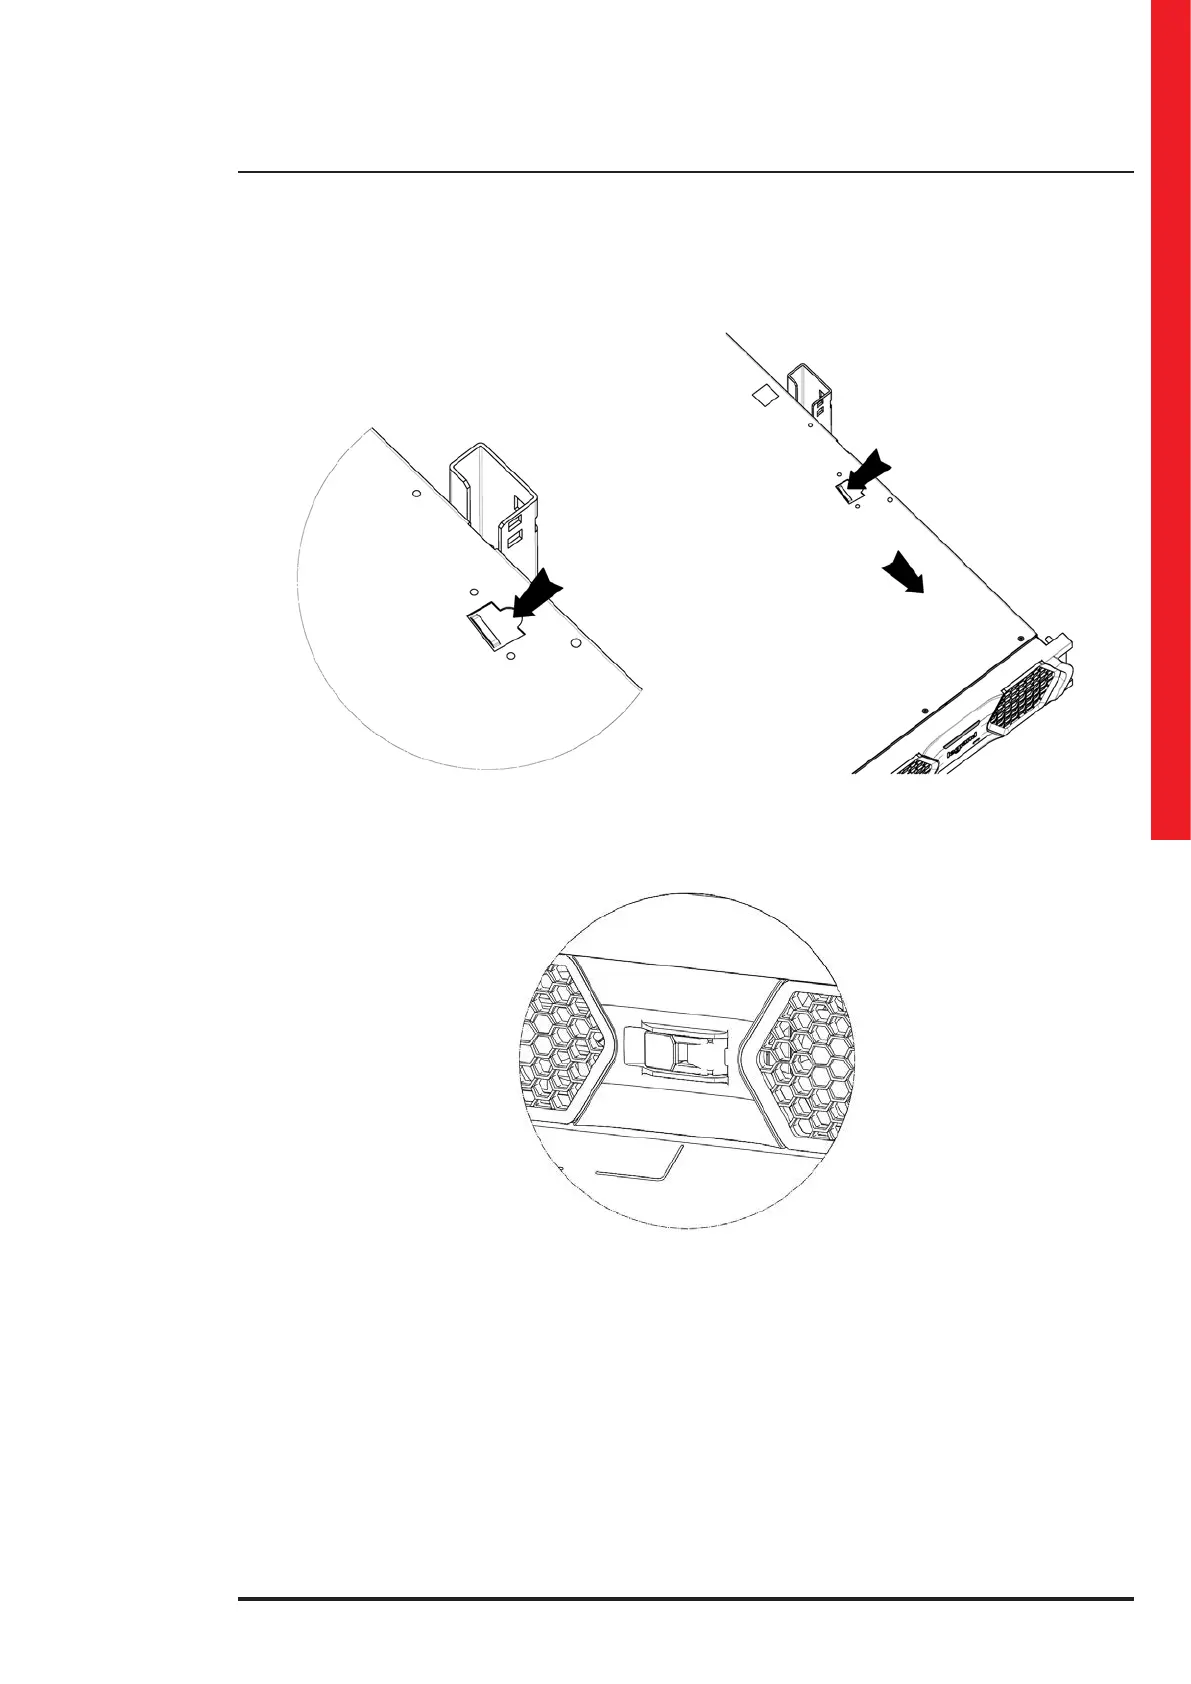
8. Push the safety hook located on the top right of the PM to unlock the block and pull the PM to finalize the extraction.
9. Insert the new PM on the free slot making sure that the frontal switch is open and that the module is in abutment.
10. Fix the PM to the cabinet using the screws previously unscrewed.
11. Close the frontal switch of the PM.
12. The LED on the PM turns red. After the boot of the PM, the LED turns blue. Next, the PM starts in battery mode (yellow
LED). Finally, the LED turns green and the PM is powered by the mains.
INDICATION
If one or more screws are lost, use only hex socket M6x16 screws along with M6 toothed washers to fix the power modules.
INDICATION
In case of emergency, e.g. if the display does not work, it is possible to perform a hot-swap replacement by simply open-
ing the frontal switch of the PM. Wait until the LED turns white to replace the PM.
When the frontal switch of the PM is open, it is not possible to restart the PM by simply closing it. It is necessary to extract
the module.

 Loading...