Wattstopper
®
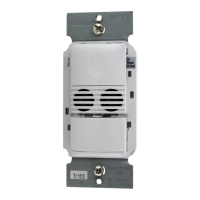
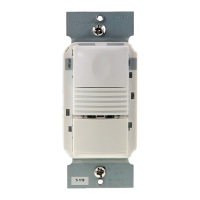
Passive Infrared Multi-Way Switch Occupancy Sensor
Interrupteur mural multiple à infrarouge passif Détecteur de présence
Sensor de ocupación con interruptor a la pared de múltiples vías y
tecnología de infrarrojo pasivo
Installation Instructions • Instructions d’Installation • Instrucciones de Instalación
No: 29123 – 05/20 rev. 1
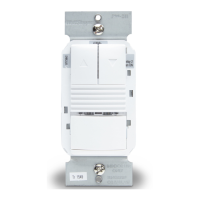
Catalog Numbers • Les Numéros de Catalogue • Números de Catálogo: PW-301/PW-302
Country of Origin: Made in China • Pays d’origine: Fabriqué en Chine • País de origen: Hecho en China
PW-301 and PW-302 models ending in -U are BAA and TAA compliant (Product produced in the U.S.)
DESCRIPTION AND OPERATION
The PW Passive Infrared Wall Switch sensors use advanced passive infrared (PIR) technology.
PW sensors have Multi-Way available on all models. A “Walk-Through” mode can turn lights OFF after only 3 minutes, if no activity is
detected after 30 seconds following an occupancy detection.
The PW-301 has one relay and one ON/OFF button. The PW-302 contains two relays and two ON/OFF buttons to allow control of one
or two loads independently. Pressing a button toggles the state of the corresponding relay.
PW sensors contain a light level sensor. If adequate daylight is present, the sensor holds the load OFF until light levels drop, even if the
area is occupied. In the PW-302, light level only affects the load on Relay 2. Users can overrule the hold OFF function by pressing the
ON/OFF button. See the Light Level Adjustment section.
Turning Load(s) ON (ON Mode)
The relays are programmed independently for either Auto ON or Manual ON. In either mode, the load can be turned ON or OFF using
the ON/OFF button.
Manual ON
DIP 8 ON for Relay 1
DIP 9** ON for Relay 2
With an ON Mode DIP switch in the ON position, the occupant must press the ON/OFF button to turn ON
the load. The sensor keeps the load ON until no motion is detected for the selected time delay. There is a
30 second re-retrigger delay. If occupancy is detected during the delay, the sensor turns the load back ON.
After the re-trigger delay elapses the ON/OFF button must be pressed to turn ON the load.
Auto ON
DIP 8 OFF for Relay 1
DIP 9** OFF for Relay 2
With an ON Mode DIP switch in the OFF position, the load turns ON and OFF automatically based on
occupancy. If the load is turned OFF manually, Presentation Mode operation applies. This prevents the
load from turning ON automatically after it was deliberately turned OFF. Pressing the button to turn lights
ON returns the sensor to Auto ON Mode.
** PW-301: Switch 9 is not used. PW-302: Switch 9 default is ON to comply with CA Energy Commission Title 24 bi-level switching
requirements.
Model # Relay Default ON Mode DIP switch # Setting
PW-301 1 Manual ON 8 ON
SPECIFICATIONS
Voltages .............................................................120/240/277 VAC, 50/60 Hz
Load Limits for relay 1:
@120 VAC ................1000-W tungsten ballast, E-ballast, LED, 1/4 HP
@240/277 VAC ........................1200-W ballast, E-ballast, LED, 1/4 HP
Load Limits for relay 2:
@120 VAC ..................800-W tungsten ballast, E-ballast, LED, 1/6 HP
@240/277 VAC ........................1200-W ballast, E-ballast, LED, 1/6 HP
Time Delay Adjustment .........................................................5 to 30 minutes
Walk-Through Mode .............................. 3 minutes if no activity after 30 sec.
Test Mode ...................................................... 10 min. with 5-sec. time delay
PIR Adjustment ........................................................................... High or Low
Light Level Adjustment ..............................................................8fc to 180+fc
Alerts ..................................................................Selectable Audible & Visual
Signal Wire .................................................................................Both models
Multi-Way Capability ...................................................................Both models
PW-301 PW-302