Do you have a question about the LEGRAND WattStopper DW-100 and is the answer not in the manual?
Adjustable time delay from 5 to 30 minutes for automatic light shut-off after no motion.
Shortens the time delay to 3 minutes if no activity is detected after 30 seconds following initial occupancy.
Sets a 5-second delay for initial power-up or DIP switch reset to verify operation.
Allows selection between High and Low sensitivity settings for the Passive Infrared sensor.
Adjustable sensitivity for the Ultrasonic sensor, from Minimum to Maximum, including an Off setting.
Sets a threshold for ambient light levels (8fc to 180+fc) to prevent lights from turning on when daylight is sufficient.
Provides selectable audible warnings before the load turns OFF, such as whistles, chirps, or beeps.
Load turns ON and OFF automatically based on occupancy. Manual OFF reverts to Auto ON after 5 minutes.
Occupants must press the ON/OFF button to turn ON the load. Sensor keeps load ON until no motion is detected.
The sensor holds the load ON until no motion is detected for the selected time delay.
Records occupancy patterns to select optimal time delay (7-30 mins) and enables a 5-second Test Mode.
Allows setting fixed time delays of 5, 15 (default), or 30 minutes via DIP switch settings.
Configures the Walk-Through mode (enabled/disabled) to shorten time delay after brief occupancy.
Adjusts PIR sensor sensitivity to High (default) or Low (50%) to optimize coverage and reduce false triggers.
Enables or disables audible alerts that warn before the load turns off.
Four options (Standard, A, B, C) for determining occupancy using PIR and/or Ultrasonic sensors.
Details the PIR sensor's two-tiered Fresnel lens with a 180-degree field of view.
Instructions for using opaque tape to mask sections of the PIR sensor's lens to eliminate unwanted coverage.
Describes the two ultrasonic transceivers and adjustable sensitivity via trimpot.
Crucial warning to turn OFF power at the circuit breaker before installation or working on the load.
Wiring diagram for DW-100 and DW-100-347 models, showing connections to electrical supply.
Wiring diagram for DW-200 Bi-Level configuration with primary and secondary load connections.
Wiring diagram for DW-200 Dual Circuit configuration, detailing primary and secondary load connections.
Sets Time Delay to Auto/Test, 5, 15 (default), or 30 minutes.
Enables or disables the Walk-Through mode.
Sets PIR sensor sensitivity to High (default) or Low (50%).
Selects occupancy detection logic: Standard, Option A, Option B, or Option C.
Enables or disables audible alerts.
Sets Relay 1 to Auto On or Manual On.
Sets Relay 2 (DW-200 only) to Auto On or Manual On.
Instructions for removing and reinstalling the button cap for sensor adjustments.
Steps to enable, set, and disable light level control for preventing lights ON in daylight.
How to reset the sensor to factory settings, clearing occupancy history and disabling light control.
Troubleshooting steps when motion is detected but lights remain OFF.
Troubleshooting steps when no motion is detected and lights remain OFF.
Diagnosing and resolving issues where lights remain ON after motion ceases.
Tips for adjusting PIR sensitivity and masking the lens to avoid unwanted motion detection.
Catalog numbers for DW sensors and cover plates, including color options.
Details the five-year warranty against defects in materials and workmanship.
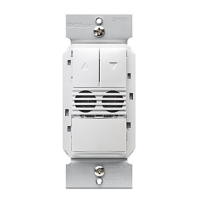
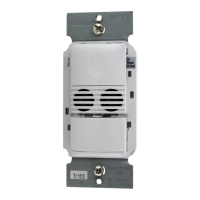
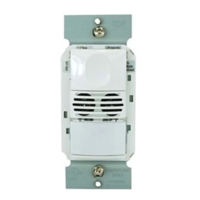
The DW-100/DW-100-347/DW-200 Dual Technology Wall Switch Occupancy Sensor combines advanced passive infrared (PIR) and ultrasonic technologies to eliminate false triggering in various applications. This integrated design allows the sensor to detect occupancy using both methods, ensuring reliable performance even in challenging environments.
The sensor's primary function is to automatically control lighting loads based on occupancy. It can turn lights on when a space is occupied and hold them on as long as occupancy is detected. After no movement is detected for a user-selected time delay, the lights will switch off. A "walk-through" mode further refines this by turning lights off after only 3 minutes if no activity is detected after 30 seconds following an initial occupancy detection, making it efficient for brief entries and exits.
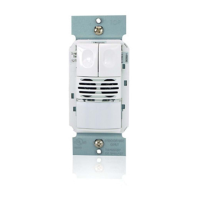
The DW-100 model features a single relay and one ON/OFF button, controlling one load. The DW-200, on the other hand, includes two relays and two independent ON/OFF buttons, enabling control of one or two separate loads. Pressing an ON/OFF button toggles the state of its corresponding relay.
An integrated light level sensor allows the DW sensor to hold the load OFF if sufficient daylight is present, even when the area is occupied. In the DW-200, this light level control specifically affects the load on Relay 2. Users can override this function by manually pressing the ON/OFF button.
The DW sensor offers flexible operating modes, allowing relays to be programmed independently for either Auto ON or Manual ON.
Time delays are adjustable, allowing users to select between 5, 15 (default), or 30 minutes. The sensor can also utilize a SmartSet™ feature, which records typical occupancy patterns and automatically adjusts the time delay from 7 to 30 minutes for optimal efficiency. A Test Mode with a 5-second delay is available for quick setup and verification.
PIR sensitivity can be adjusted to "High" (default) for most applications or "Low" (50% reduction) for situations where the PIR might detect movement outside the desired area or respond to heat sources.
The DW sensor can provide audible alerts as a warning before the load turns OFF. These alerts include "Whistles" twice (at one minute and 30 seconds before OFF), "Chirps" (10 seconds before OFF), and "Beeps" three times (10 seconds before OFF in Walk-Through mode).
Four occupancy trigger options are available, set via DIP switches, to determine how the sensor deems an area occupied:
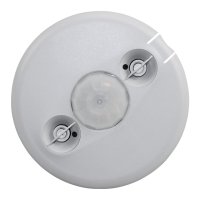
The sensor's coverage patterns are designed according to NEMA WD 7 guidelines, with optimal performance in spaces not larger than 18' x 15'. The PIR sensor features a two-tiered, multi-cell Fresnel lens with a 180-degree field of view, and a red LED flashes upon PIR detection. Opaque adhesive tape is provided to mask sections of the PIR lens, allowing users to eliminate coverage in unwanted areas and troubleshoot coverage issues. The ultrasonic sensor has two transceivers operating at 40kHz, with sensitivity adjustable via a trimpot located under the ON/OFF buttons.
Adjustments to the sensor, such as PIR sensitivity, time delay, and trigger mode, are made using DIP switches located under the button cap. The ultrasonic sensitivity is adjusted via a trimpot.
Light level adjustment is a key maintenance feature. To set the threshold, users ensure the room is appropriately lit, put the sensor into TEST mode, then press and hold the Relay 1 ON/OFF button for 3 seconds until a beep sounds. After 25 seconds, another beep confirms the threshold is set. This setting is retained even if power is lost. To disable light level control, the Relay 1 button is held for 7 seconds until a double beep tone sounds.
The device can be reset to factory settings by pressing and holding the Relay 1 button for 10 seconds until a triple beep sounds. This action resets the sensor's occupancy history and disables light level control.
Troubleshooting guidance is provided for common issues:
For persistent issues, technical support contact information is provided.
| Category | Accessories |
|---|---|
| Material | Plastic |
| Color | White |
| Type | Occupancy Sensor |
| Voltage | 120/277 VAC, 60 Hz |
| Coverage Area | 1000 sq ft |
| Sensor Technology | Passive Infrared (PIR) |
| Mounting Type | Wall Mount |
| Gang | Single-Gang |