Do you have a question about the Leica DM2700 M and is the answer not in the manual?
Explains text symbols, pictograms, and their meanings used in the manual.
Provides general safety instructions for operating the microscope and its accessories.
Details electrical safety precautions, supply voltage, power input, and fuse specifications.
Guidelines for safely transporting and storing the microscope, including weight and environmental conditions.
Safety precautions when handling light sources, noting irradiation risks and heat.
Advises on safe handling of immersion oil, including skin contact and safety data sheets.
Emphasizes caution when using acids or other aggressive chemicals with the microscope.
Instructions for disposing of the microscope and its components according to regulations.
Shows examples of the microscope's type labels with technical specifications.
Provides the physical dimensions of the Leica DM2700 M microscope in millimeters.
Details requirements for the installation location, such as dust-free environment and temperature stability.
Describes how to disassemble and package components for safe transportation of the microscope.
States the weight of the fully equipped microscope, exceeding 18 kg.
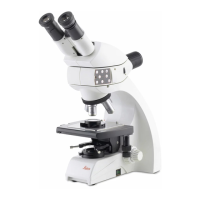
Instructions for installing the microscope stage and specimen holder.
Guides on mounting the coaxial pinion to either side of the stage and securing it.
Steps for inserting and securing the condenser into the microscope's condenser holder.
Procedure for installing the incident light illuminator before mounting the tube.
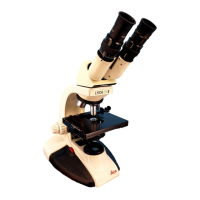
Details on mounting the tube and inserting the eyepieces into the observation tubes.
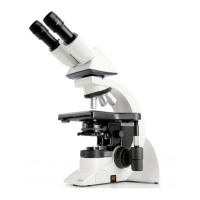
Instructions for selecting and mounting objectives, ensuring correct rotation and thread type.
Details on connecting lamp housings, including LED lamp housing LH113.
Procedure for removing and replacing the halogen lamp in the 107/2 lamp housing.
Safety precautions and procedures for working with xenon burners and gas discharge lamps in the 106z housing.
Instructions for inserting filter and reflector cubes into the incident light turret disk.
Steps for installing the analyzer and polarizer components onto the microscope stand.
Procedure for attaching the lambda plate compensator to the microscope base.
Information on factory-mounted condenser prisms and adjustment for first use.
Details on connecting cameras via adapters and calculating magnification on the monitor.
Final step to connect the microscope and lamp housing to the power supply using the correct cable.
Instructions for switching on the microscope, with a caution for gas discharge lamps.
Procedure for setting up Köhler illumination for transmitted light bright field.
Procedure for setting up Köhler illumination for incident light bright field, including aperture diaphragm adjustment.
Procedure to check and re-center phase contrast light rings for objectives.
Procedure to check and adjust condenser prisms, especially after transport.
Centering and adjusting light sources specifically for the 106z lamp housing.
Detailed steps for centering the Hg 50W mercury lamp using adjustment windows and knobs.
Steps for centering Hg 100W and Xe 75W lamps, including cautions about overheating.
How to switch on the microscope for operation, noting external supply units for gas discharge lamps.
Instructions for lengthening the coaxial pinion and adjusting stage torque for X and Y movement.
Details on coarse and fine focusing wheels, their placement, and height adjustment.
How to set a focus stop by locking the knurled wheel on the right-hand focus knob.
Procedure for adjusting the torque of the focus drive using the knurled wheel.
Guides on adjusting interpupillary distance and viewing angle for various tube types.
Explanation of beam splitting settings for EDT22, BDT25+, and HC L 2TU photo tubes.
Instructions for using eyepieces, including aperture protectors and correction for vision problems.
Procedure for changing objectives, checking settings, and using immersion objectives.
Adjusting brightness for LH113 lamp housing and notes on other light sources.
Explains the function of the aperture diaphragm and how it affects resolution, contrast, and depth of field.
Matching color markings on the condenser with objective color rings for aperture diaphragm settings.
Setting the aperture diaphragm to match the objective's colored ring for incident light.
Using the field diaphragm to protect the specimen and enhance contrast, requiring adjustment for magnification changes.
Covers Bright Field (RL), Oblique Illumination (RL), Polarization (RL), Interference Contrast (RL), Dark Field (RL), and Fluorescence.
Basic setup for bright field illumination using incident light, including component settings.
Procedure for activating and adjusting oblique illumination for enhanced contrast.
Detailed steps for setting up polarization contrast using polarizers and analyzers.
Procedure for setting up Interference Contrast (ICR) using objective prisms.
Setting up dark field illumination using a darkfield objective and reflector.
Steps for setting up fluorescence observation, including selecting filter cubes and aperture diaphragm.
Covers various transmitted light methods like bright field, phase contrast, dark field, polarization, and oblique illumination.
Procedure for setting up bright field illumination using transmitted light, including filters and Köhler illumination.
Setting up phase contrast for transmitted light, including objective selection and aperture diaphragm.
Steps for setting up dark field for transmitted light using appropriate condensers and light ring slides.
Procedures for achieving relief-like contrast using oblique illumination in transmitted light.
Instructions for setting up polarization contrast in transmitted light, including analyzer and polarizer use.
Detailed steps for setting up Differential Interference Contrast (DIC) using polarizers and prisms.
Required tools and procedure for performing linear measurements using the microscope.
Method for measuring object thickness using transmitted light, considering refractive indices.
How to use the object marker to scribe circles on the specimen for marking objects.
Solutions for the microscope not responding, checking voltage, connections, and fuses.
Addresses issues like a dark image or uneven illumination, lamp checks, and centering.
Solutions for specimen not coming into focus and uneven illumination in brightfield.
Addresses issues with no definite darkfield contrast and uneven illumination.
Solutions for no phase contrast, covering specimen thickness, refractive indices, and light rings.
Addresses issues with no polarization contrast, checking polarizer/analyzer alignment.
Solutions for no transmitted light interference contrast, related to specimen and refractive indices.
Addresses no incident light interference contrast, covering specimen, cover glass, and prisms.
Solutions for dark fluorescence images or weak fluorescence, including lamp checks.
Instructions for using the dust cover to protect the microscope and accessories from dust.
Guidelines for cleaning coated parts, optical surfaces, and avoiding harmful thinners.
Precautions when using acids and aggressive chemicals, avoiding contact with optics and mechanical parts.
Procedure for changing fuses, emphasizing correct fuse types and replacement warnings.
Instructions for removing the base plate and inserting filters into the filter magazine.
Procedure for equipping condenser disks with light rings, compensators, or lenses.
Steps for inserting DIC prisms into condenser disks, ensuring correct orientation and labeling.
| Brand | Leica |
|---|---|
| Model | DM2700 M |
| Category | Microscope |
| Language | English |