12
Chapter 3 Frame Mortise & Tenon Jig User Guide
THE FMT PRO JIG
3-5
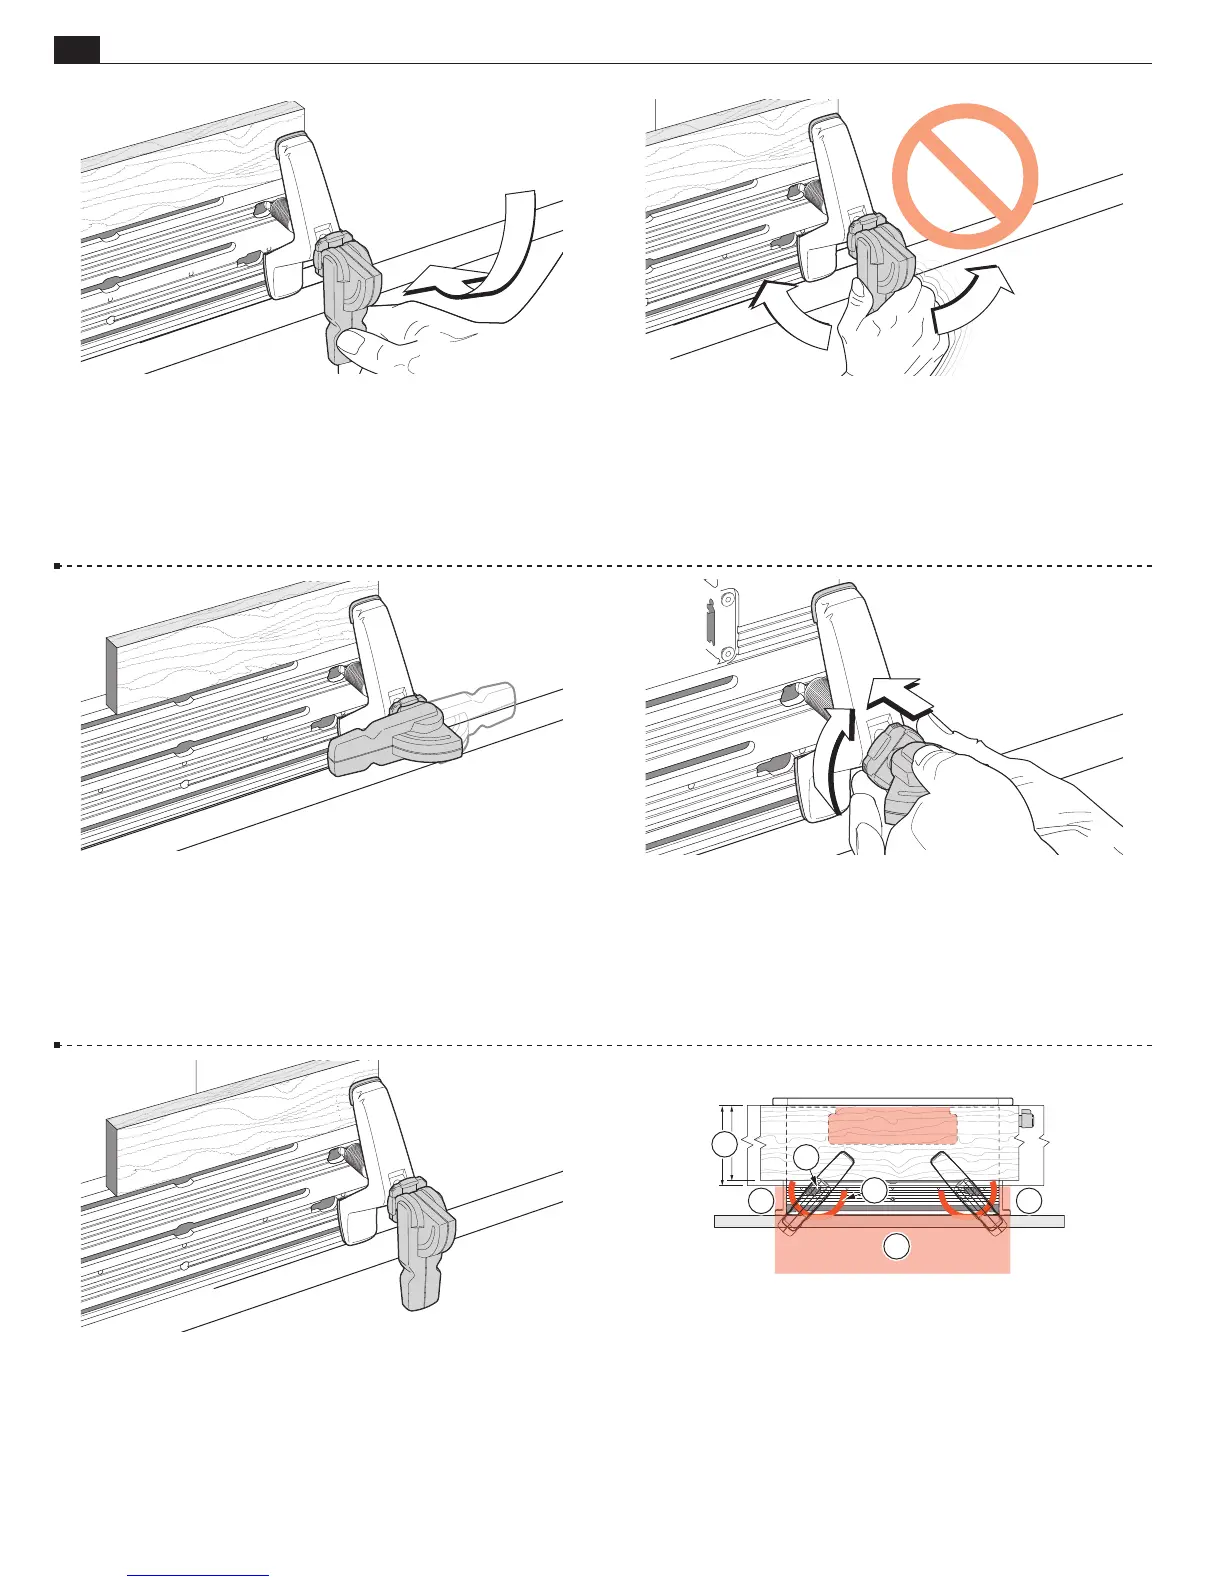
A smooth, firm action is enough to engage the clamp.
Rule of thumb: if you can’t throw the lever comfortably by strong
thumb pressure, reduce the tension. A few minutes of trial and error
testing will soon give you the feel for the correct clamp tension.
3-6
Do not use the lever as a torque arm!
Adjust the clamp pressure only with the clamp disengaged.
3-7 The clamping pressure is the same whichever of the two
directions the lever is thrown. But if the lever is uncomfortably
positioned at the correct clamping pressure...
3-8 ...release the clamp, remove the workpiece and turn the
step-washer a quarter turn. The step height in the step-washer is
one quarter of the thread pitch.
3-9 Then adjust the clamp until the lever is in the correct posi-
tion at the required pressure.
3-10 The clamp T-Bolt Slots and “keyholes” allow for full clamp-
ing coverage. The two lower keyholes
➀
are for the rare requirement
to clamp mortise boards between 4
3
⁄4"[120mm] and 5
1
⁄2"[140mm]
wide
➁
. Always clamp with the heel and toe of the clamp over
the surface area of the clamp plate
➂
.
m Never allow the clamp arm heel pad in these red shaded areas
➃
,
even if (particularly if) the mounting board or bench is there.
2
4
4 4
1
3