13
Chapter 3Frame Mortise & Tenon Jig User Guide
THE FMT PRO JIG
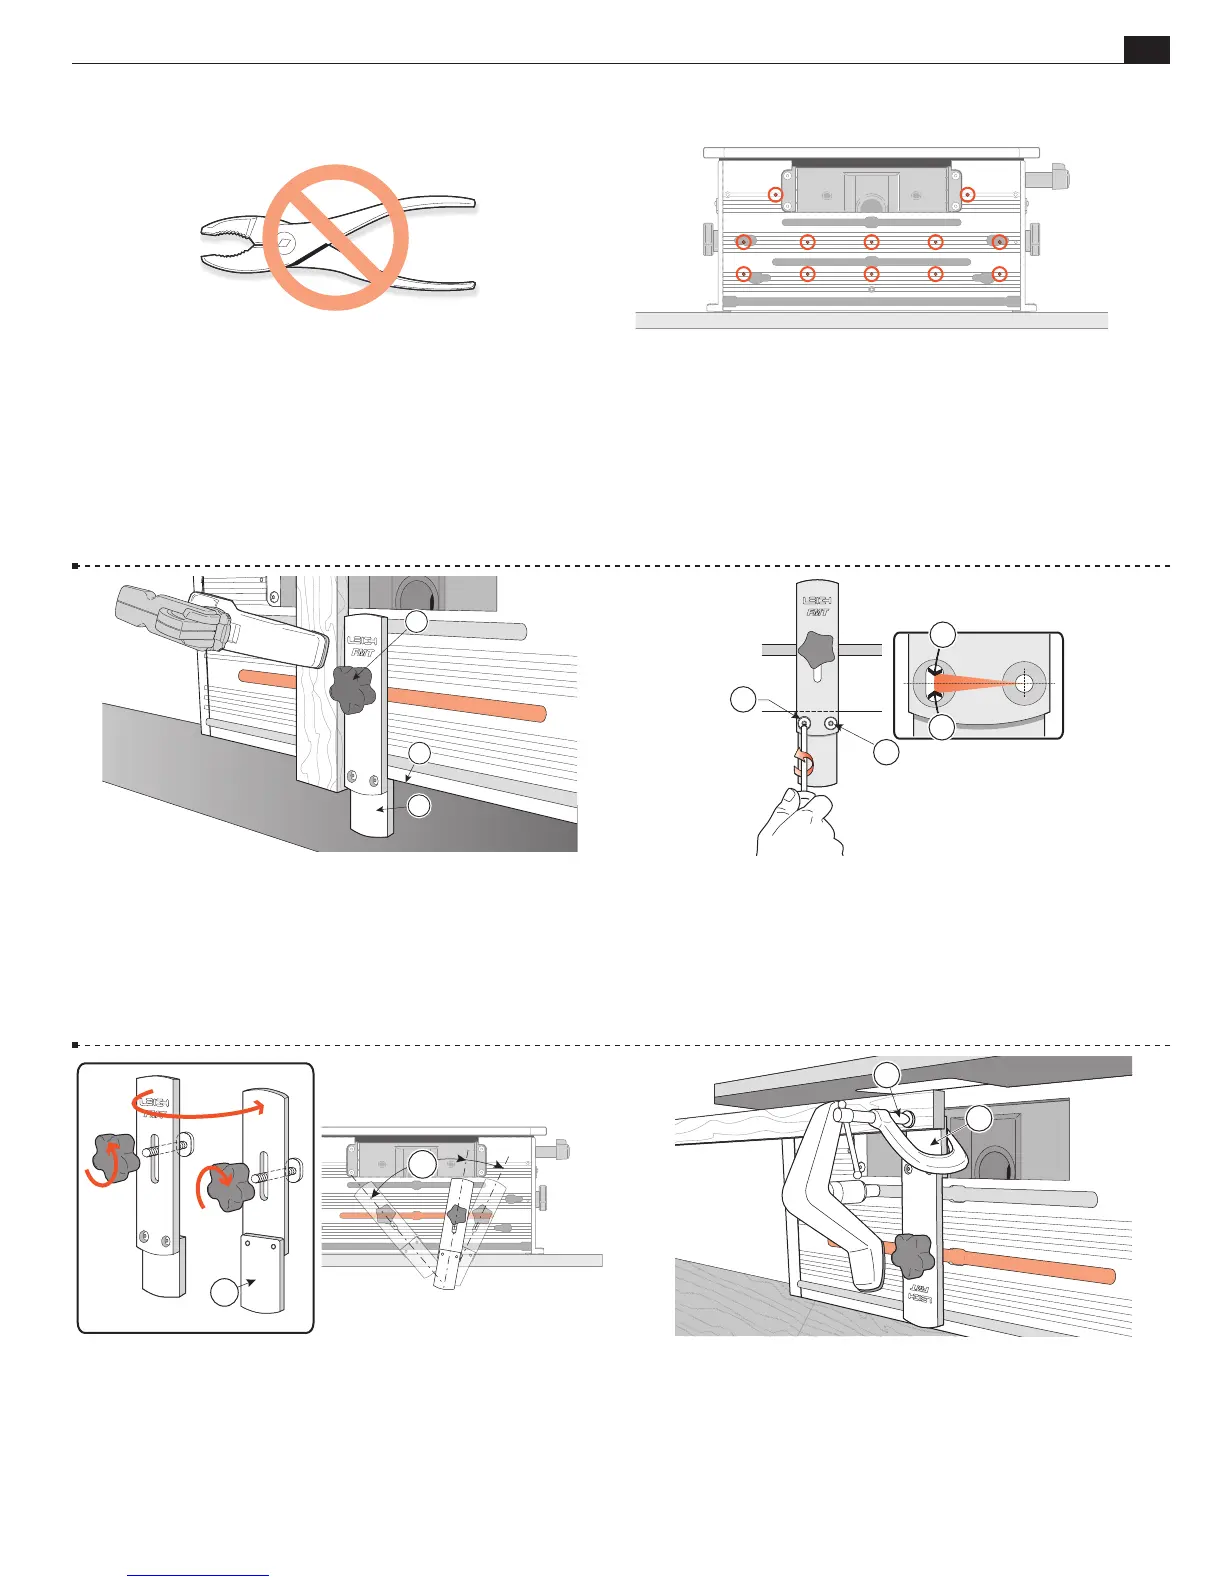
3-11 The clamp T-bolts nuts need only be lightly finger tightened
to prevent accidental clamp movement. The nuts are knurled to
provide a good finger grip.
Never use a tool to tighten these nuts!
3-12 The clamp plate is provided with twelve through-holes.
If for any reason a facing board is required to be attached to the
clamp plate, No.8 or M4 wood screws (not supplied) may be used
from the rear. See chapter 4, Small Joints.
3-13 The FMT Pro’s sidestop fence is attached in all modes by a
single knob and T-bolt inserted to the center clamp plate slot
➀
.
Most tenon pieces are routed vertically, and for that purpose the
short part of the fence
➁
acts as a T-square against the edge of the
clamp plate
➂
. In this mode the Leigh logo faces toward you.
1
3
2
3-14 The sidestop fence is squared at the factory, but check your first
test joints. If your router/bit is not perfectly perpendicular to the table
adjust the sidestop fence: slightly loosen the 'pivot' screw
➀
and the 'lock'
screw
➁
. Adjust the angle
➂
to match the bit and retighten. Rout test
joints to confirm correct setting. Once locked in this position it should
never need adjusting when used with that same router.
1
2
3
3
3-15 Angled Joints: Remove the knob and T-bolt. Reverse the fence so
the short end faces toward you
➀
. The fence may now be set at any angle
along the center clamp plate slot
➁
by tightening the knob.
m NOTE: Never rout tenons with the short part of the fence to the top, in
the bit opening.
2
1
3-16 'Mortise steady': When routing mortises in small stock the piece
may 'flutter' causing poor joint fit. Invert the fence with the short end
up in the bit opening
➀
. Clamp the mortise piece against the face of the
short fence
➁
which is perfectly flush with the clamp plate face
➀
. When
routing mortises at the end of a board, always move the table as far as
possible left or right to minimize the length of unsupported workpiece.
2
1