22
Chapter 4 Frame Mortise & Tenon Jig User Guide
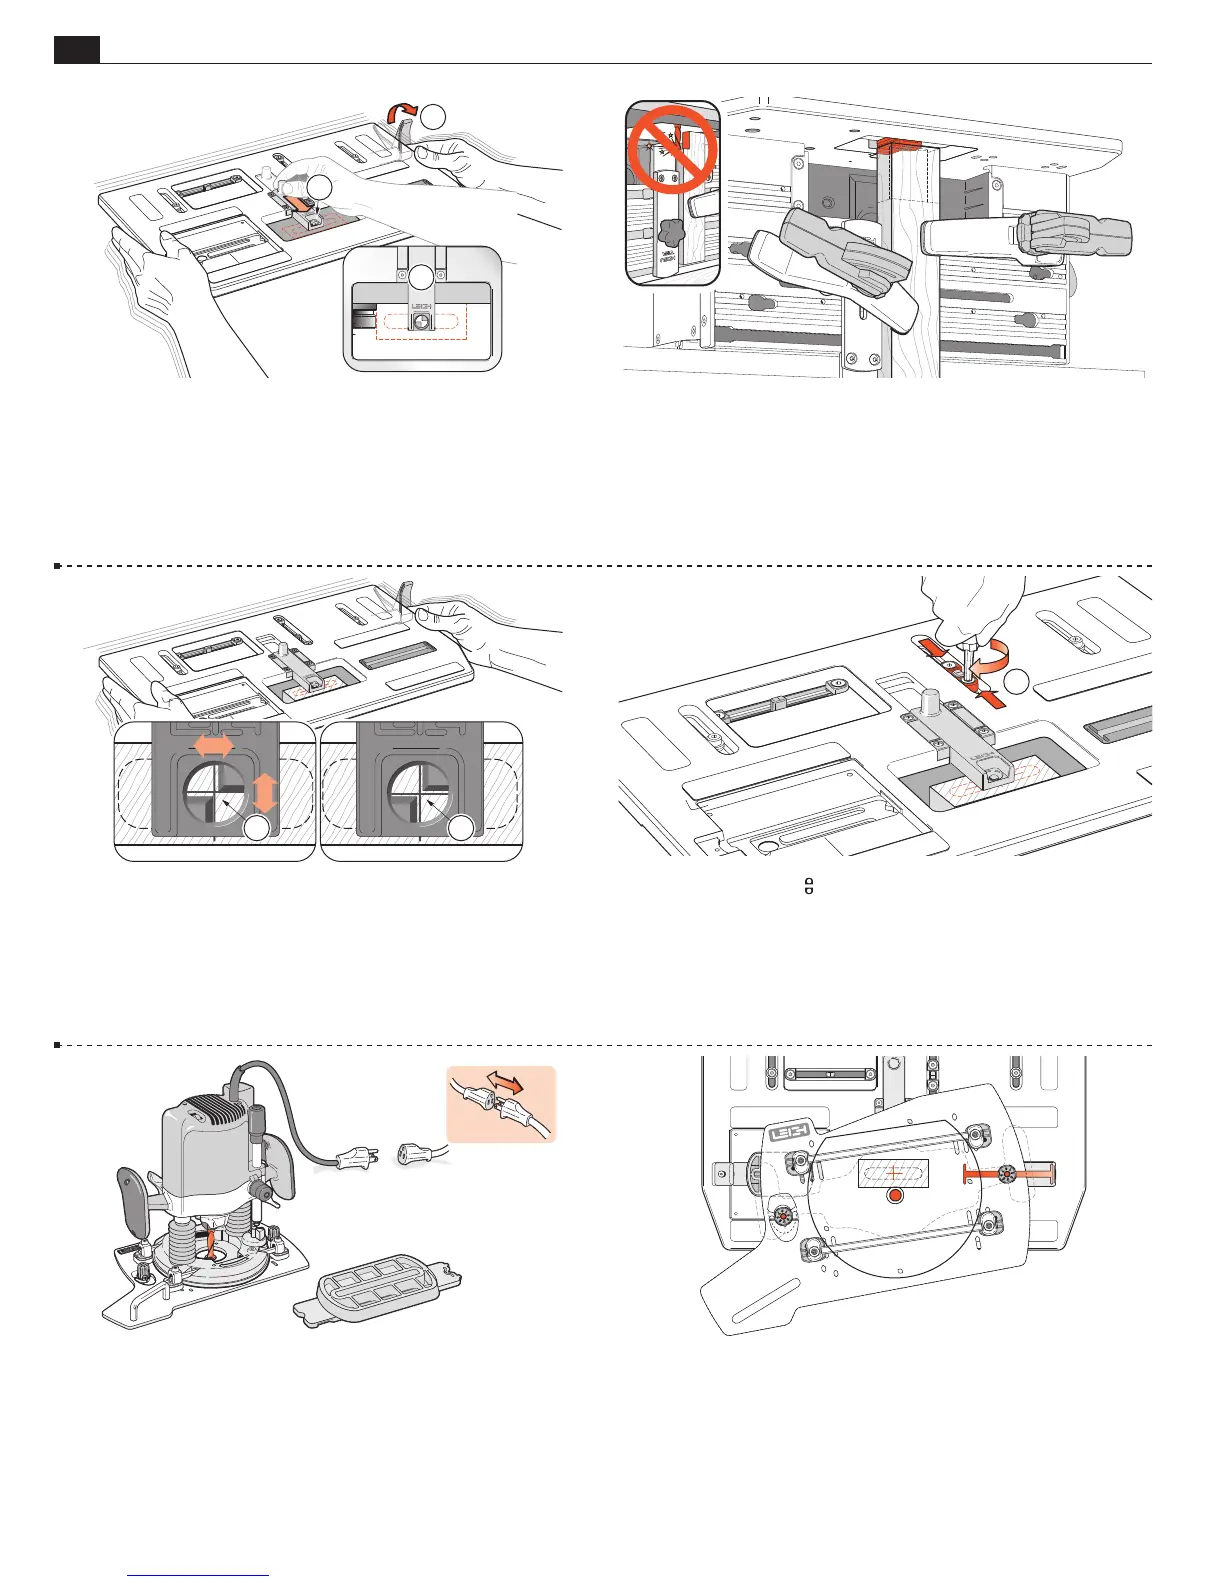
4-3 If you have not yet mounted the side stop fence, do so now
(see 3-13 to 3-15). Place it off center by about half the width of the
tenon piece; either side, it doesn’t matter. Pull the table sight forward
to its stop
➀
. Release the table clamp
➁
and move the table to posi-
tion the sight over the approximate tenon piece position
➂
. Lock
the table. Always lock the table before positioning workpieces.
2
1
3
4-4 Clamp the tenon piece with the end edge lightly touching
the underside of the sight. Its side edge should touch the previ-
ously set side stop fence, with the marked side toward the clamp
plate.
4-5 Release the table clamp and move the table until the sight open-
ing is positioned equally around the cross lines on the workpiece. Lock
the table. Because the human eye excels at comparisons, differences
as small as 0.004" can be perceived in the space between the edges of
the line and the triangles as shown here
➀
. You can readily center the
sight using slight table movements until the spaces appear the same
➁
.
4-6 Unlock the two
front/back limit stops. Move both so
they touch the Stop Post and tighten both stops
➀
. This prevents
front-to-back movement of the table when later sighting the mor-
tise. Retract the sight.
1
4-7 Unplug the router. Insert the selected guide to the guide
recess and matching diameter bit to the router.
4-8 Make sure the two guide pins are turned up two full turns
from the lowest position!
Place the router on the jig table, the right hand guide pin in the
right side track, the left hand guide pin in the near side of the
guide recess.
MORTISE & TENON ROUTING PROCEDURES