23
Chapter 4Frame Mortise & Tenon Jig User Guide
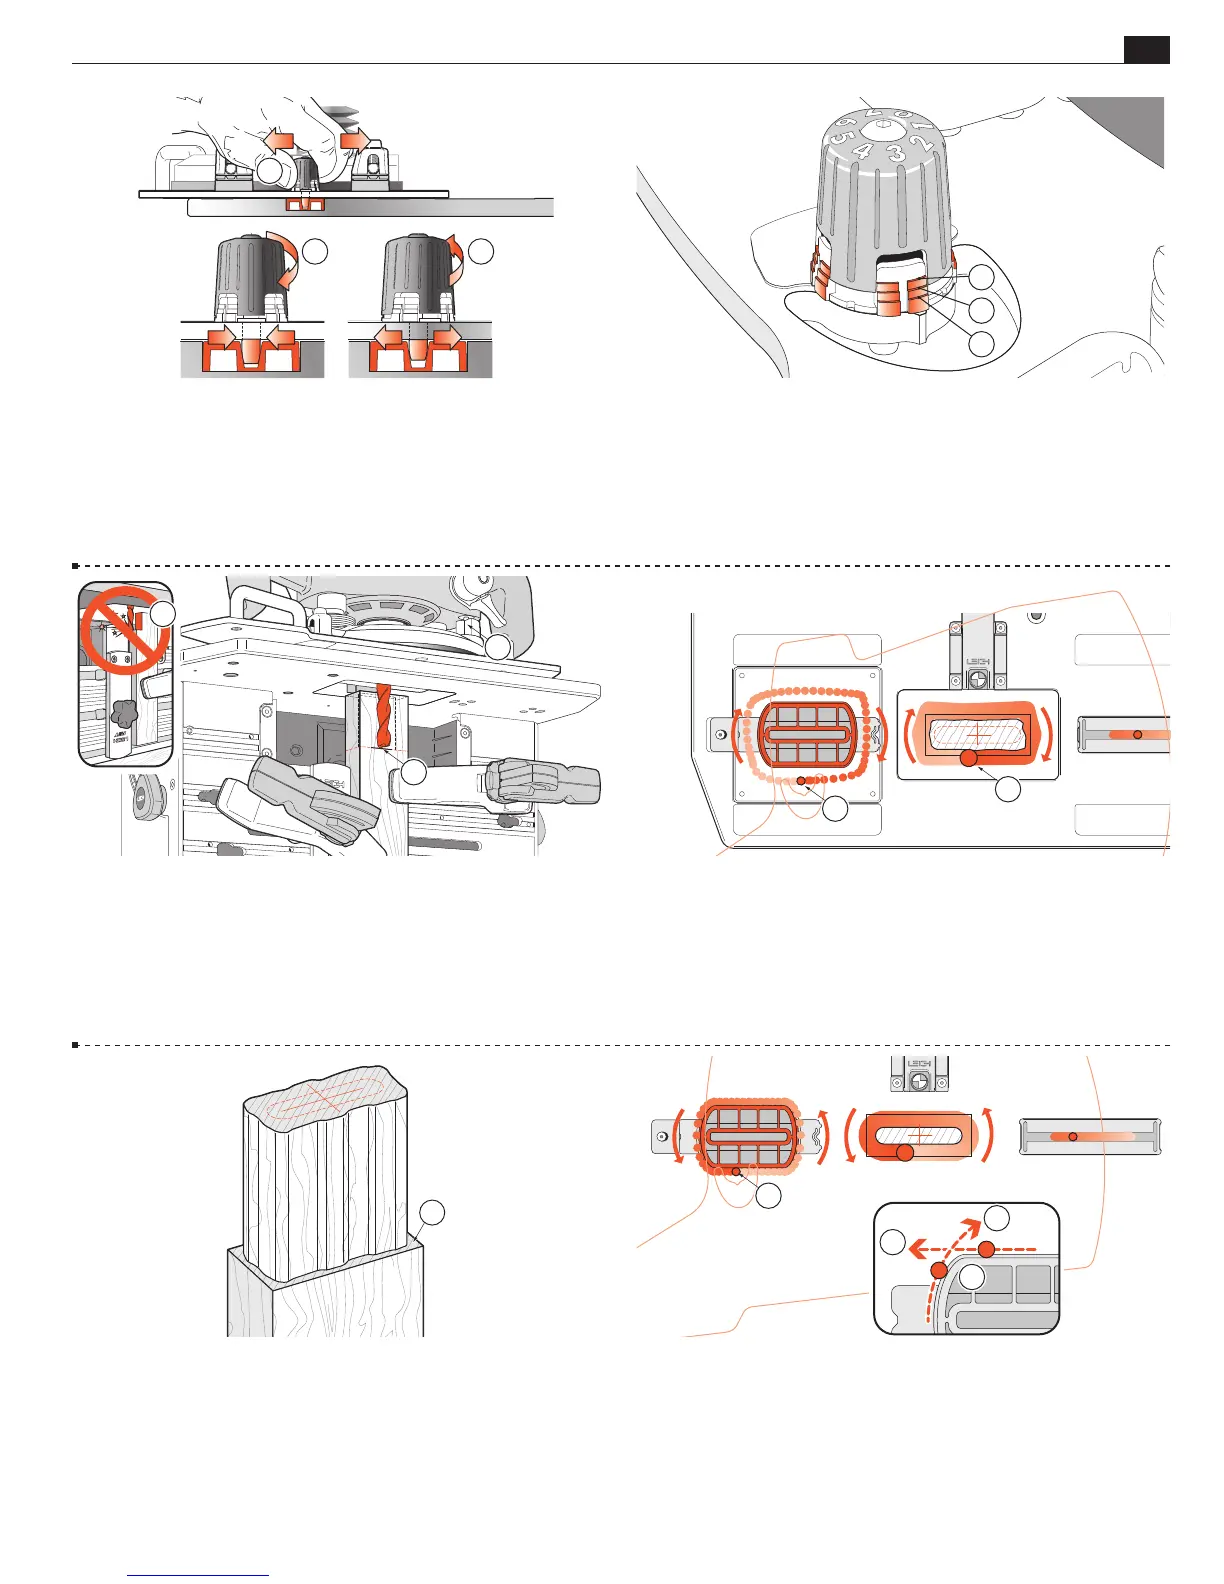
4-9 Adjust the right hand guide pin. Grip the right hand pin knob and
move the Sub-Base back and forth to feel the “free play” of the pin across the
slot width
➀
. Turn the knob down
1
⁄8 of a turn at a time, to feel the “play”
diminish
➁
. When the “play” stops, turn the knob up
1
⁄8 of a turn until the
slightest play can be felt
➂
. The router/Sub-Base should slide freely left to
right. If the right pin is a little “sticky”, turn it up a bit more.
1
2 3
4-10 Check that the left hand knob is two turns up. From this
setting the actual fit setting will be established by trial and error
and the result recorded for each guide/bit combination.
Note: The “steps” in the height “washer” indicate numbers of “turns
up”; one turn
➀
two turns
➁
three turns
➂
Never turn the knobs up more than 3
1
⁄2 turns in use.
1
2
3
4-11 Plunge the router so the tip of the bit is level with the pencil
mark of the tenon shoulder and lock the plunge
➀
. Set the plunge
depth stop rod to its stop
➁
. Generally, tenons are routed in one depth
setting, it is not necessary to make multiple passes at different depths of
cut.
m WARNING: Never rout tenons with the sidestop fence
in the inverted position
➂
.
1
2
3
4-12 Read all of the next three instructions before routing.
With the guide pin in the near side of the guide recess, switch on the
router power and with firm control, move it in until the bit lightly touches
the tenon workpiece. Very carefully, with the bit very lightly engaging the
wood surface, “climb rout” clockwise around the tenon piece
➀
. Maintain
very light bit contact. Do not run the guide pin on the guide yet
➁
.
1
2
4-13 Control the router firmly, the router is driven clockwise
by the bit rotation. This first shallow climb cut will leave a small
but clean shoulder
➀
.
1
4-14 Routing counter-clockwise, run the guide pin around the tenon
guide surface. Make sure the pin contacts the entire outer surface
➀
.
In these first test cuts, check the tenon for a completely smooth cut
before removing the piece from the jig. Until you are confident with
this procedure, we recommend as a final clean-up, you run the guide
pin “off ” of each guide “corner”
➁
in both directions
➂
.
3
2
3
1
MORTISE & TENON ROUTING PROCEDURES