Frame Mortise & Tenon Jig User Guide
52
Chapter 7
SPECIAL JOINTS
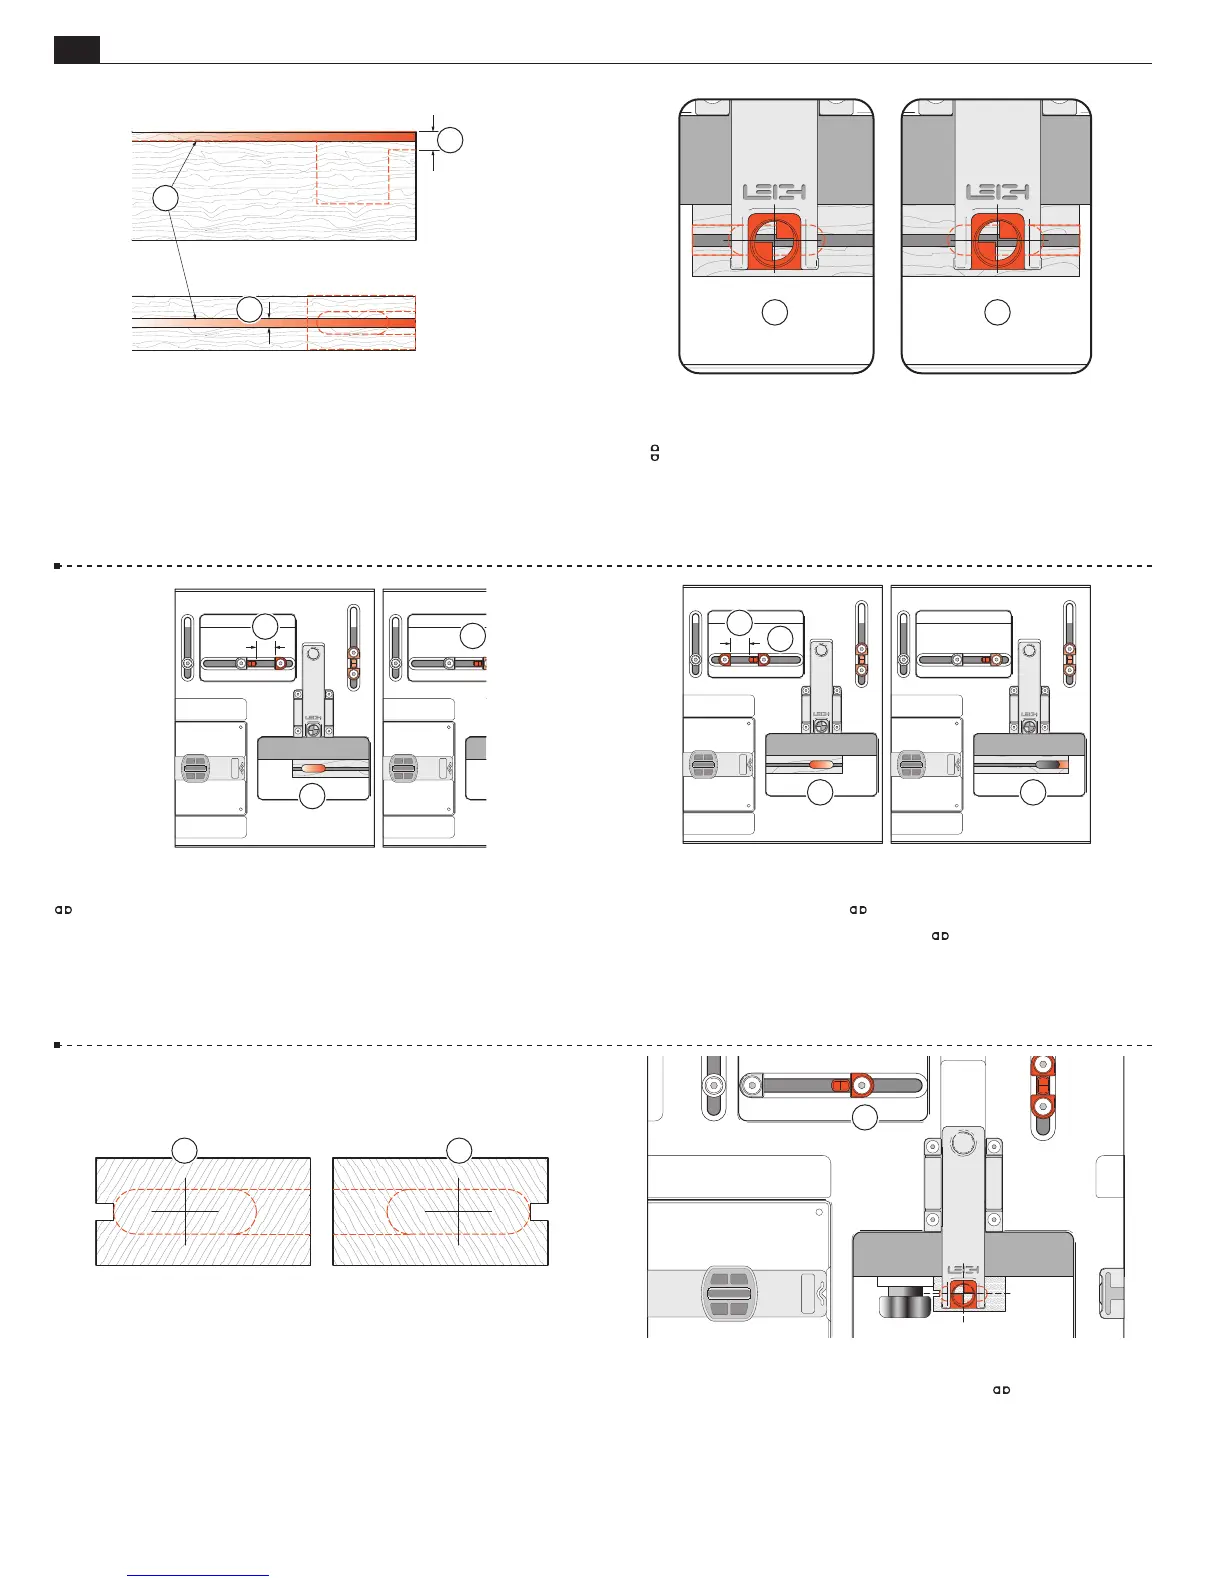
7-30 Routing the Tenons Mark the tenon centers “A” and
“B”. Remember, the tenons are “off center” and each end of the tenon
pieces are marked off center in opposite directions. Prepare and make
a couple of extra (scrap) tenon pieces to use in setting haunch bit
depth later.
BA
7-31 “A” tenons. With the workpiece centered on the jig,
sight the tenon center and set the right hand
limit stop to
the post
➀
.
1
7-26 First, groove all the workpieces
➀
.
The groove should be less than the mortise width
➁
and shallower
than the haunch recess
➂
.
1
2
3
7-27 Sight both the “A” and “B” mortises. Set stops or mark the
outrigger for repeatable successive workpieces. Position and lock
the
Limit Stops against the post.
BA
7-28 “A” Mortises and Haunch Recesses Set right-hand
Limit Stop from the post, say, 3 quarters guide length
➀
: e.g. 1"
guide, move
3
⁄4". Table still in “mortise center” position, rout mortise
full depth
➁
. Raise the plunge. Move table left to the stop
➂
. Lower the
bit to haunch depth; set router depth turret. The router is now set for
both depths of cut. Rout haunch recess
➃
. Repeat for all “A” mortises.
1
2
3
7-29 “B” Mortises and Haunch Recesses Move the table
left to touch the right-hand
Limit Stop against the post
➀
and lock the table. Move the left-hand
Limit Stop (by three
quarters of the guide length) to the left
➁
. Rout the “B” mortises
➂
and haunch recesses
➃
using the table movement and the same
router depth settings.
2
1
3 4