Frame Mortise & Tenon Jig User Guide
51
Chapter 7
SPECIAL JOINTS
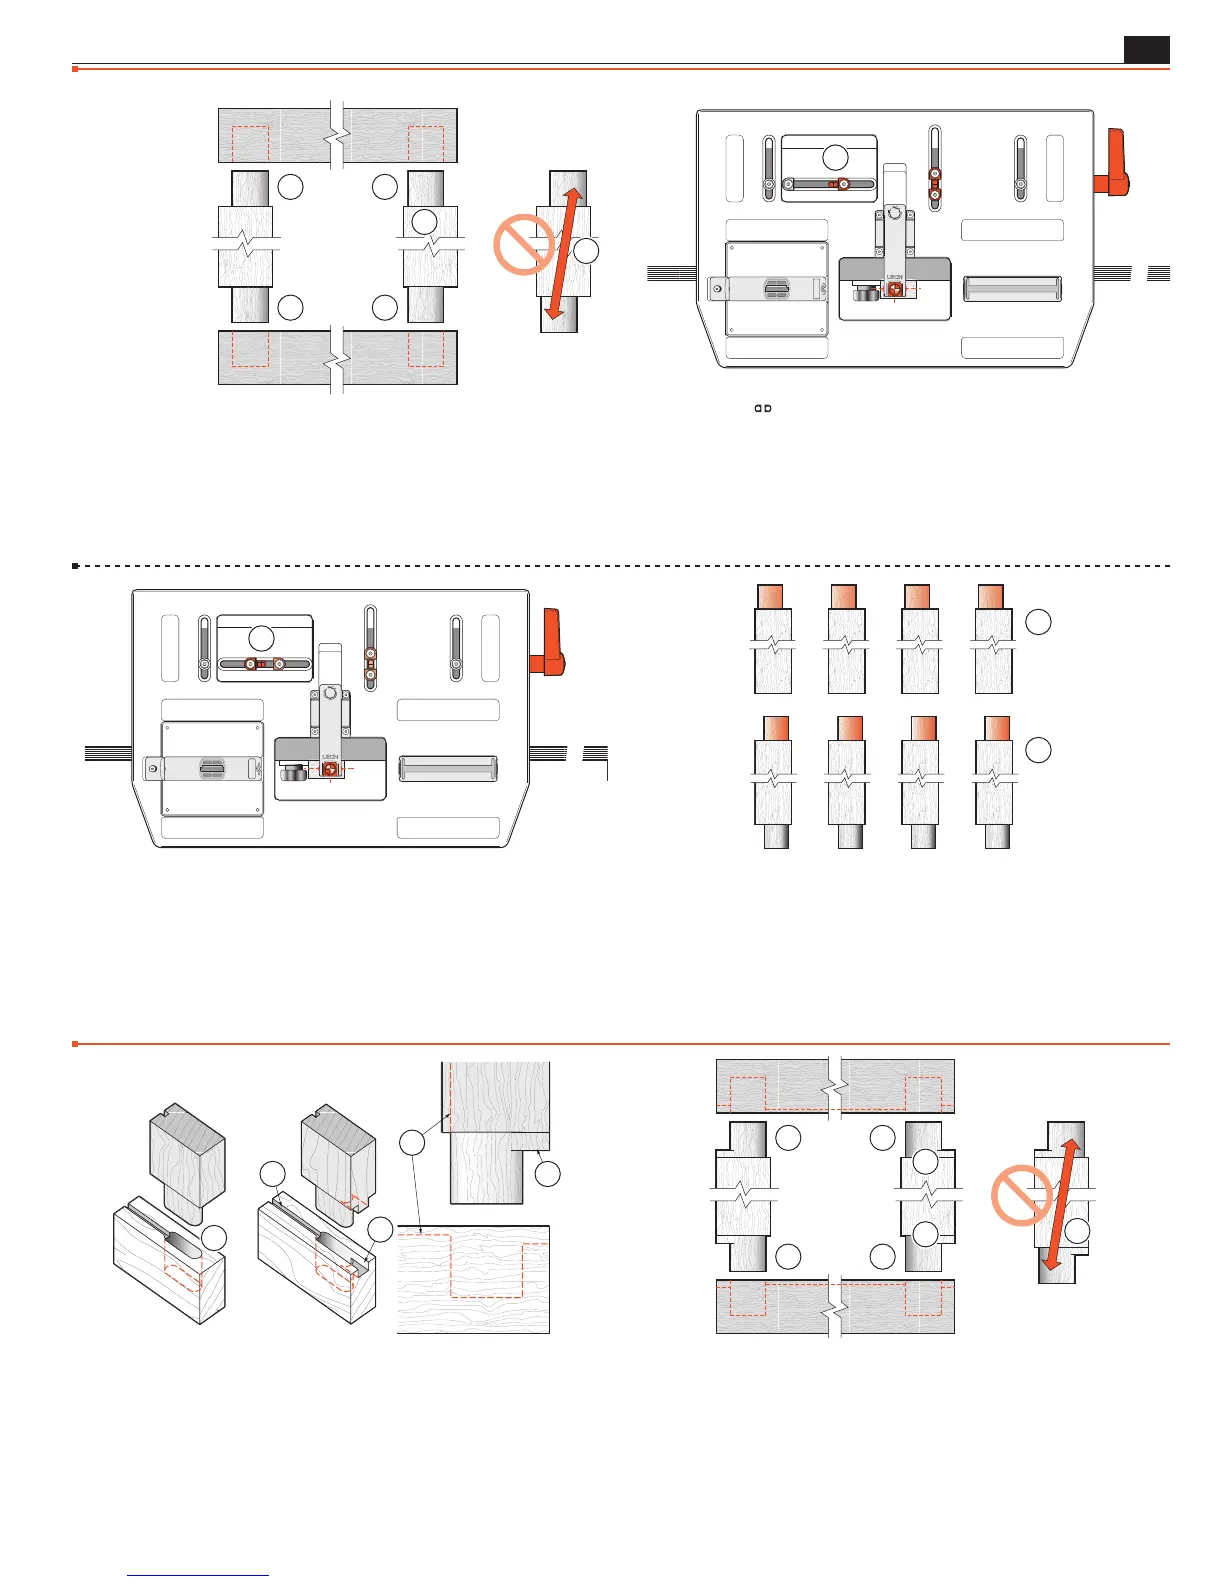
7-20 Asymmetric Tenons Not all tenons are centered on
the long axis of the workpiece end
➀
. This means that tenons “A”
are routed at one table sighting and tenons “B” at a second table
sighting. If you don’t, the two tenons will be diagonally opposed
to each other
➁
.
B
A
A
2
1
B
7-21 Use the
limit stops for rapid changeover from tenons
“A” to tenons “B”.
For example, with the workpiece centered on the jig, sight tenon
“A” and set the right-hand limit stop to the right of the post
➀
,
then…
1
7-22 …sight tenon “B” and set the left-hand limit stop to the left
of the post
➀
. Now alternately rout tenons “A” and “B”, moving
the table left and right each time.
1
7-23 Of course, if you don’t trust yourself to get the sequence
correct, you could rout all the “A” tenons first, then change the
table one time to rout all the “B” tenons. This latter procedure
would be the simplest way to rout haunched tenons (see next
section).
■
B
A
7-24 Haunched Joints Frame and panel door construction can
call for rails and stiles to be grooved for the panel
➀
, and the tenons
haunched
➁
, both for joint stability and to fill the end of the stile
groove which is sometimes run right through
➂
. This is not as com-
mon as it once was. Routers and router tables now make it simple to
have a stopped groove
➃
, avoiding the need for the haunch.
1
4
3
1
2
7-25 Haunched mortises and tenons are “handed”, and require
separate setups for each. e.g. if these two tenons
➀
were routed with
the same jig setup, the result would be offset tenons
➁
. So mark
out the two types of corners as “A” and “B” mortises and tenons.
B
A
A
1
1
2
B
Asymmetric Tenons
Haunched Joints