5
Chapter 2Frame Mortise & Tenon Jig User Guide
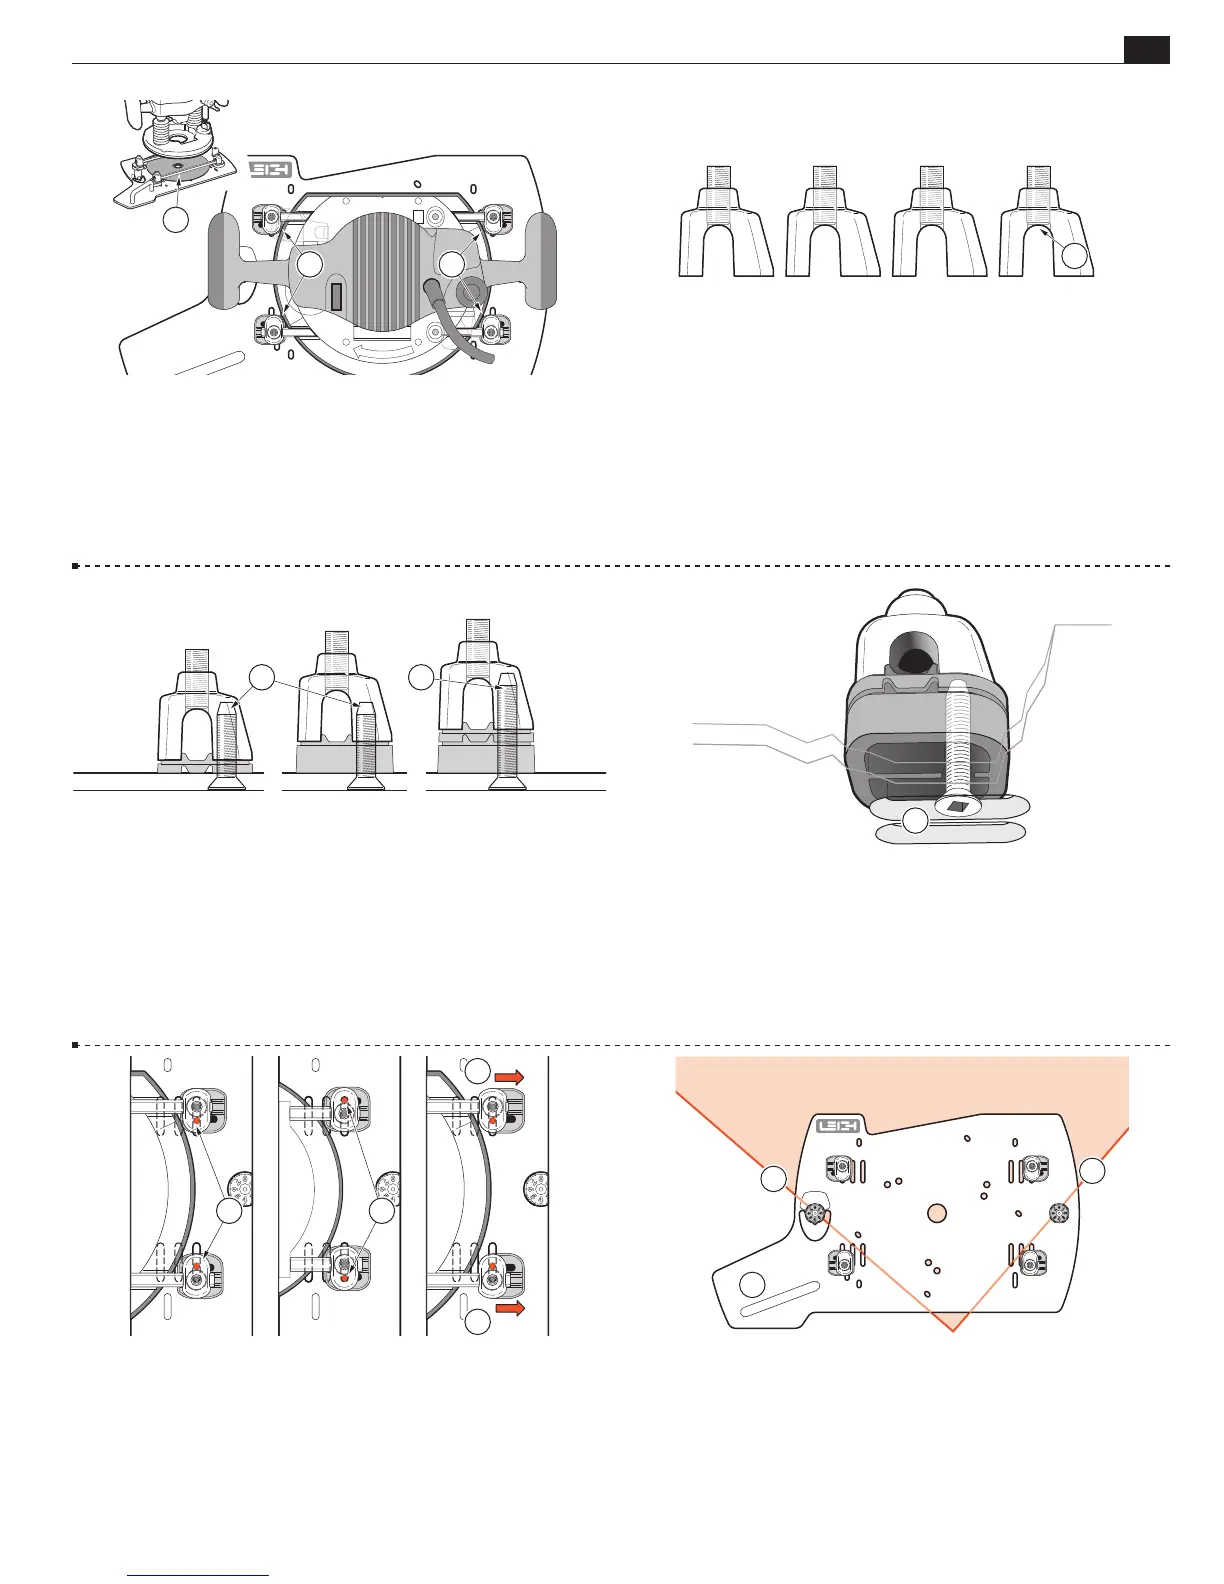
MOUNTING THE ROUTER
2-9 Note: Use of the shim stops is essential, not only to provide the
correct rod height but to also act as side-to-side stops for the router
➀
.
If the rod height of your router is less than
3
⁄16"[4,5mm] you must
provide a shop-made packing shim between the router and Sub-Base.
We suggest one or more sheets of sandpaper
➁
, rough side up. Don’t
forget the center hole.
11
2
2-10 Adjust the four U-Post set-screws with the set-screw end
flush inside the arch of the posts
➀
.
1
2-11 There are two lengths of U-Post screws;
3
⁄4"[19mm] and
1"[25mm]. The
3
⁄4"[19mm] are factory fitted as a quality control
measure. Use these for either the low or high shim spacers
➀
.
Change them for the 1"[25mm] screws if both shim spacers are
used
➁
.
1 2
2-12 Using the four selected screws, lightly attach the four U-Posts
and correct shim-stop combination through the previously marked
slots or holes in the Sub-Base. The screws must enter from below
➀
. Only very lightly tighten; you will need to move the U-Posts
and the shim-stops during setup.
1
2-13 In most cases, position the U-Post screw leg to the inside
of the rod
➀
or depending on the size and shape of the router
base, to the outside
➁
. Slide the shim-stops away from the router
position
➂
. These will be repositioned against the router later.
1 2
3
3
2-14 Place the Sub-Base flat down on the corner of a smooth
bench, the handle to your near left
➀
and the guide pins touch-
ing the adjacent edges of the bench
➁
.
1
2
2