6
Chapter 2 Frame Mortise & Tenon Jig User Guide
MOUNTING THE ROUTER
2-15 Unplug the router.
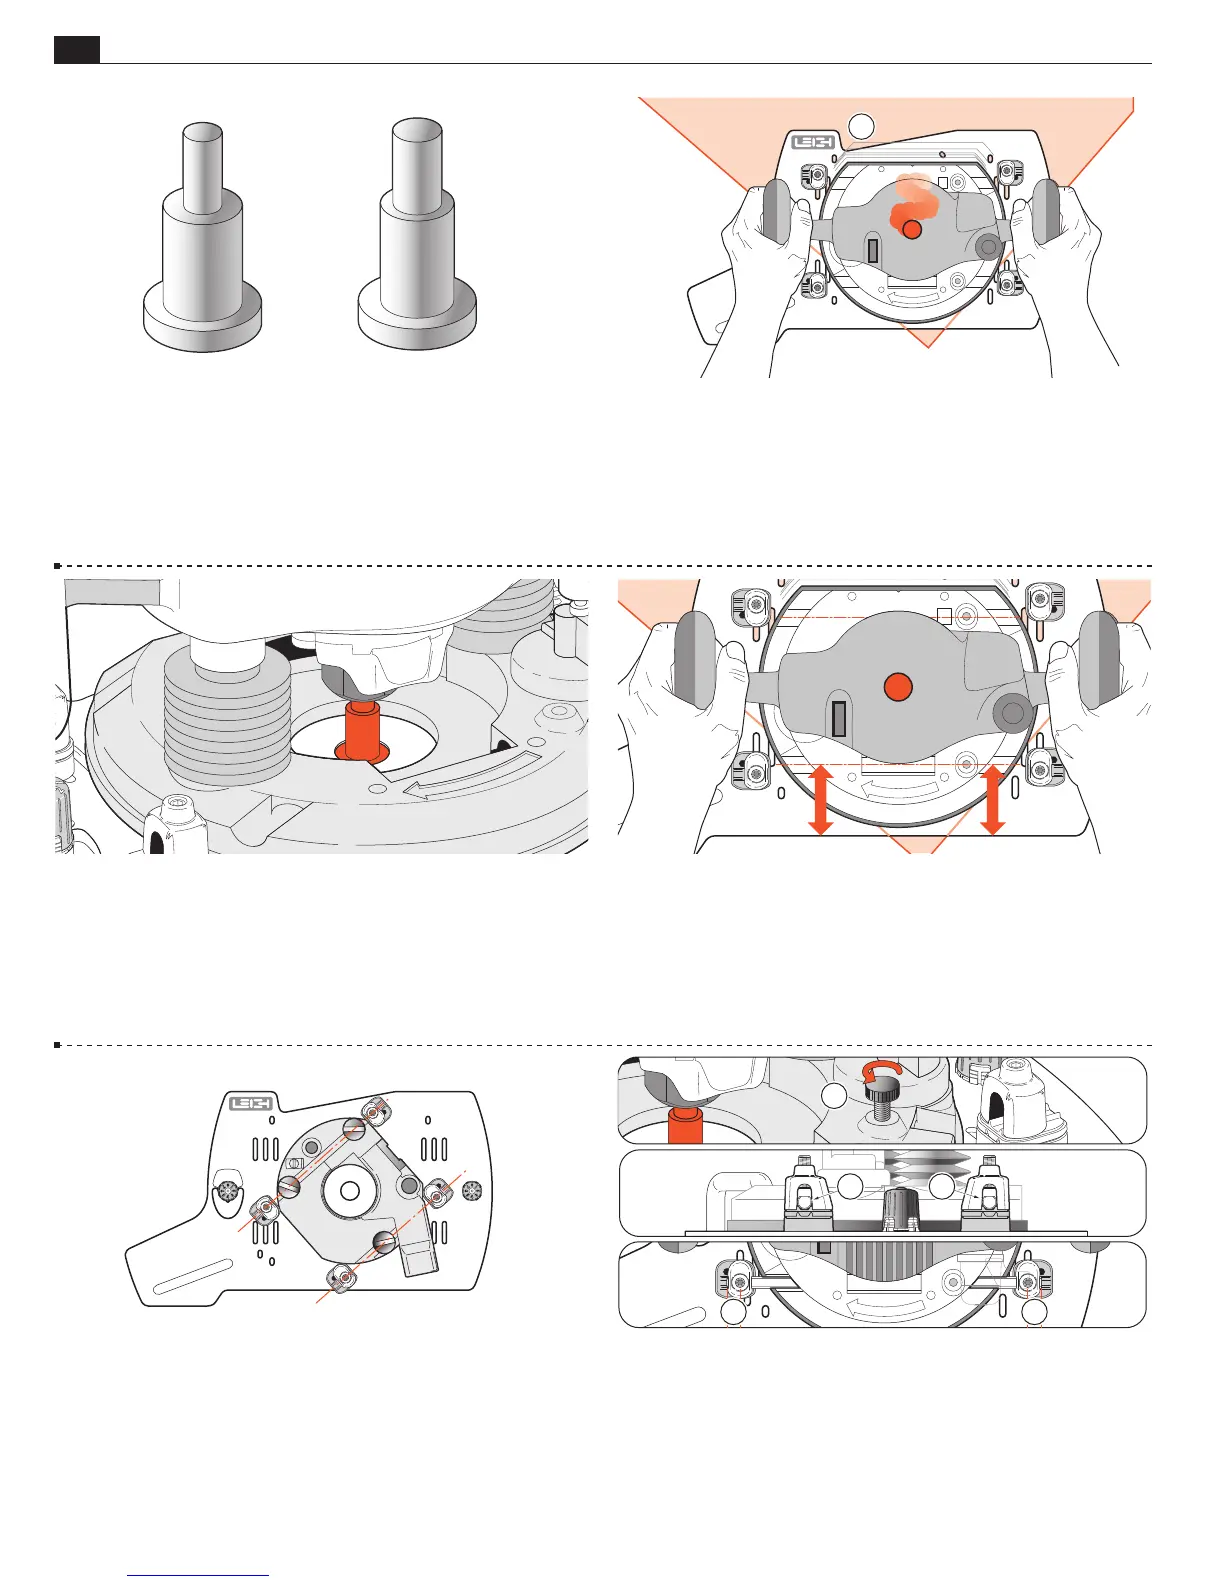
Note the collet size of the router. Choose the matching size center-
ing mandrel and fit it into the router collet.
1/4"
1/2"
8mm
12mm
2-16 Holding the router as you would in normal use, place it base
down onto the Sub-Base; the rear of the router toward the rear of
the Sub-Base and large notch
➀
. Plunge and move the router so
that the large diameter of the centering mandrel fits through the
Sub-Base center hole
…
1
2-17 …and touches flush to the bench. Lock the plunge.
m Concentricity of bit to Sub-Base bit hole is essential to FMT
Pro accuracy, so never mount the router without using the center-
ing mandrel.
2-18 Align the router so that the fence rod holes are parallel to the
front edge of the Sub-Base (except Festool 900 and 1000 Series,
see 2-19).
2-19 Festool 900 and 1000 Series:
Align the fence rod holes to the previously positioned U-Posts.
2-20 Loosen and raise any router fence rod knobs
➀
. Move the U-Posts
and adjust as necessary to slide the two hold-down rods through the
U-Posts and router fence rod holes, flat side of rods on top
➁
. Leave
an equal amount of rod projecting through each U-Post
➂
.
m Never use the router’s fence rod knobs
➀
to “help” secure the router.
This places uneven pressure and could damage the router base.
22
1
3 3