Do you have a question about the Leitner Frankie and is the answer not in the manual?
Use care and common sense, ride slowly, check path, avoid sudden movements and maintain balance.
Modifying the wheelchair will void the warranty. Contact support for approved alterations.
Ensure brakes are on, wheelchair is off, user is balanced, and folding clamp is closed before use.
Avoid wearing loose clothing that can get entangled in the wheels to prevent accidents.
Exercise caution when moving the wheelchair in reverse to prevent accidents.
Avoid obstacles as they can cause loss of balance. Use ramps where possible.
Keep body parts clear of moving parts when folding to prevent pinching injuries.
Carry a communication device for assistance in case of breakdown or emergencies.
Do not use mobile phones or other distracting devices while operating the wheelchair.
Avoid using the wheelchair in areas with high electromagnetic interference.
If controls malfunction, immediately push the power off button and contact support.
Keep wheelchair away from water, rain, puddles, ice, salt, snow, dirt, and high humidity.
Do not use on wet, slippery, sand, or rugged terrain. Use caution on moving objects.
Immediately stop the wheelchair if the wheels lose traction to prevent instability.
Verify local authority regulations regarding the legal use of wheelchairs.
The back-rest has a load capacity of 75kg. Do not push against it.
Do not overload the wheelchair beyond its maximum weight capacity of 135kg.
Do not tamper with electric components or the lithium battery; it can cause injury or explosion.
Riding is hazardous; use with care. Leitner assumes no liability for injury or damage.
Ensure the ground is even and free of obstacles; uneven surfaces can cause tipping.
Ride carefully, maximum incline is 12 degrees. Use under supervision initially.
Keep arms and feet within the footrest when navigating in limited spaces.
Never release brakes on inclines or declines; it can lead to uncontrolled rolling and injury.
Wheelchair best for indoor use. Outdoors, use only in dry, clean, safe conditions.
Do not use on stairs, escalators, or conveyor belts. Use elevators instead.
Always switch the wheelchair OFF when stationary to prevent accidental activation.
Perform a safety check before each ride, ensuring all parts are securely installed and tight.
Ensure the folding safety clamp is locked to prevent folding while in use.
Ensure brakes are engaged (ON) before operating the wheelchair with the joystick.
Check that brakes are effective and all nuts/bolts are tight. Wheelchair must not move with brakes on.
Verify front wheels spin freely and the axle rotates 360 degrees when lifted.
Test joystick to ensure it stops the wheelchair when released. Check controls before occupying.
Ensure armrests are locked with their safety clips on the outside.
Ensure cables do not touch the wheels during operation.
Ensure batteries are safely installed and adequately charged before use.
Confirm back-rest, seat cushion, and foot-rest are securely attached.
Charge the battery after every ride. Lithium batteries can be charged anytime.
Never store lithium batteries if fully discharged; this can cause damage.
Store batteries fully charged and recharge every two months to maintain capacity.
Lithium-ion batteries can leak, ignite, or burst. Handle with extreme care and keep away from fire.
Store batteries in a clean, dry place away from sunlight, between 10-30°C (50-86°F).
Do not store batteries with hazardous, corrosive, or flammable materials.
Never expose batteries to heat or fire. Store in a fire-proof environment.
The operating temperature range for discharge is 5°C (41°F) to 50°C (122°F).
Charging below 5°C (41°F) will reduce the battery's operational range.
Do not disassemble, deform, or modify the battery. Avoid short-circuiting terminals.
Protect batteries from water, salt water, and moisture to prevent damage.
Avoid dropping or subjecting batteries to strong shocks or impacts.
Inspect battery monthly for leakage, discoloration, cracks, damage, or corrosion.
In case of fluid leak, wash affected area with water and seek medical attention.
Store batteries out of reach of pets and children to prevent accidents.
Battery capacity declines naturally. Warranty covers at least 80% capacity within 1 year.
Always handle batteries carefully with two hands to ensure secure grip.
If errors occur, stop use, consult manual, or contact customer service.
Dispose of batteries responsibly according to local environmental guidelines.
Unpack the wheelchair carefully to avoid damaging any parts.
Check for transit damage upon arrival. Contact us immediately if any damage is found.
Report any missing parts immediately for prompt replacement.
Push the brake lever up to release the brake. Located at the back of each wheel.
Push the brake lever down to activate the brake. Located at the back of each wheel.
After releasing brakes, wheelchair can be pushed manually; occupant cannot operate it.
Before manual pushing, ensure the folding safety clamp is locked to prevent folding.
Ensure the back-rest grip is stable for manual pushing. Back-rest must be installed safely.
Release brakes only with occupant's consent, on flat and even surfaces.
Never release brakes on inclines or declines to prevent uncontrolled rolling.
Manual pushing may be harder due to motor drag. Use care.
Remove the seat cushion before folding the wheelchair as it may obstruct the process.
The folding safety lock must be locked when occupied to prevent accidental folding.
Unlock the safety lock by pulling the black lever towards you and upwards.
Once the clamp is released, the wheelchair can be folded. Do not occupy if released.
Fold the wheelchair by grabbing the backrest and front frame, folding as indicated by arrows.
Fold slowly, avoid over-stretching wires. Adjust tension if necessary.
Remove the joystick if needed to further reduce the folded size.
Insert the silver latch into the top bolt to lock the frame securely.
Push the black lever away until the safety clamp locks the frame into place.
Verify the frame is safely locked after engaging the clamp before occupying.
Ensure all four Velcro straps under the seat cushion are securely fastened.
Attach the lower part of the back-rest to the Velcro on the seat's back.
Attach the seat cushion with the zip facing backward, ensuring it is secure.
The seat cushion cover is removable and washable up to 80 degrees.
From the front, check the lower back-rest is attached to the seat's back.
Attach the front part of the backrest padding to the corresponding Velcro.
From the back, open straps (S) and attach back-rest to Velcro lines (V).
Re-attach the horizontal straps tightly to securely fix the backrest in place.
Ensure the backrest is installed safely before operating the wheelchair.
Align the joystick console with the armrest opening and insert into the tube.
Turn the knob (K) anti-clockwise to securely fasten the joystick console.
Carefully connect the joystick cable pin to the armrest groove without using force.
Avoid damaging joystick cable pins. If bent, carefully straighten them with forceps.
Damage to metal pins during installation is not covered by the manufacturer's warranty.
Move and turn the barrel to lock cables in place, preventing accidental disconnection.
Adjust wire slack so cables do not interfere with wheelchair operation.
Relocate joystick to the left armrest by removing the wire and installing the console.
Unscrew knob (K) from the right armrest and screw it into the left armrest socket.
Use a screwdriver to remove the screw holding the black cable latch (L) on the right armrest.
Manage the joystick cable by noting tie positions, removing old ties, and attaching new ones.
Carefully note cable tie positions, then remove them with a paper knife or scissors.
Attach the wire carefully to the left side using new cable ties.
Ensure the cable has slack for folding; avoid tightness to prevent damage.
Ensure the cable does not touch any wheels or the ground during operation.
Contact us or a mobility shop for assistance with cable management if needed.
Remove the black cover (C) from the left armrest and place it on the right armrest.
Remove the screw and washer from the left armrest to install the cable latch.
Insert joystick, secure with knob, and check both armrests are safely installed.
Fold carefully the first time to ensure the cable is not stretched too much.
Adjust cable tension if stretched to ensure the wheelchair can be folded safely.
Always switch the wheelchair power OFF before removing or installing batteries.
Push the release button with one hand and pull the battery with the other to remove.
Slide battery in fully until stable. Do not use force. Ensure it won't fall out.
Charge the battery after each use; this does not reduce battery life.
Charging takes about 6 hours from empty. Less time if partially charged.
Top speed may be lower when the battery charge is low.
It is recommended to switch the wheelchair OFF while charging the battery.
Disconnect the charger from the power supply and battery after charging is complete.
Charge batteries within the temperature range of 10°C (50°F) to 30°C (86°F).
Battery temperature may increase to approximately 50°C (122°F) during charging.
Stop charging immediately if battery becomes unusually hot and contact customer service.
Charge in a dry, well-ventilated area. Do not use containers that block ventilation.
Use only the original charger to prevent overheating, bursting, or ignition risks.
If battery doesn't charge fully within 8 hours, disconnect and contact customer service.
Keep the charger away from children and pets to prevent accidents.
Always switch the wheelchair power OFF before charging the batteries.
Connect the 3-prong connector to the joystick console and then to the power point.
Batteries can be charged individually using the small connector and then the power point.
Charger may get very hot. Keep away from flammable materials to prevent fire.
Charger stops automatically when full. Red light indicates charging, green indicates full.
Push the power button on top of the battery to check the charge level via LED lights.
Four green lights and one red light indicate a full battery charge.
Three green lights and one red light indicate the battery is 4/5 full.
Bars on the display indicate the current battery charge level.
Push the joystick in desired directions to control the wheelchair's movement.
Press the '+' button to increase top speed, maximum is about 5 km/h.
The display shows the top speed level; more bars mean a higher speed.
Press the '-' button to decrease top speed for better control in confined spaces.
The joystick controls movement forward, backward, and turning in various combinations.
Releasing the joystick stops the wheelchair and engages the brakes.
Control the wheelchair with care, avoiding sharp joystick movements.
Joystick control is proportional: slight movement for slow speed, full for max speed.
Begin using the joystick at low speed levels and push gently for control.
WARNING: Straps can be a choking hazard if used incorrectly. Seek professional guidance.
Use the latch to adjust strap length, approximately from 82cm to 144cm.
Push both strap ends together to close it securely.
To release the strap, push in the indicated direction and pull both ends apart.
Always switch the wheelchair power OFF before unlocking or adjusting armrests.
Only move the wheelchair when the armrests are securely locked.
To unlock, turn the lever anti-clockwise until it points upwards.
When flipping the armrest with the joystick, ensure the wires are not damaged.
Flip the armrest upwards by pushing it in the direction indicated by the red arrow.
To flip the armrest down, reverse the steps and ensure it is locked safely.
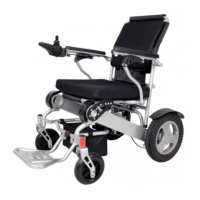
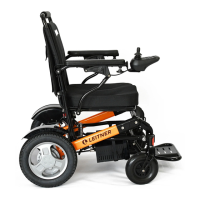
Specifications include weight (25/28kg), dimensions (101x58x93cm), and folded size.
Features include 5km/h top speed, 20km range, 250W motors, 12° climb, 85cm turn radius.
Includes two 6Ah lithium batteries (12Ah total), 7hr charge time, 135kg weight capacity.
Rear wheels are 12.5x2.25 inch, front wheels are 7x1.77 inch, both solid PU.
Under-seat storage bag: 27x18x15cm, with zip and Velcro latches.
Seat cushion 42x45cm, armrests 33x4.5cm. Seat-to-floor distance 46cm.
Flip-up footrest with 6cm clearance. Dimensions: 17cm deep, 18cm wide (back), 33cm wide (front).
1-year warranty for motor, batteries, controller. 2-year warranty for frame.
Recommendations for professional checks after assembly and for regular servicing.
| Brand | Leitner |
|---|---|
| Model | Frankie |
| Category | Wheelchair |
| Language | English |