7
Punching and binding with plastic combs
Preparations
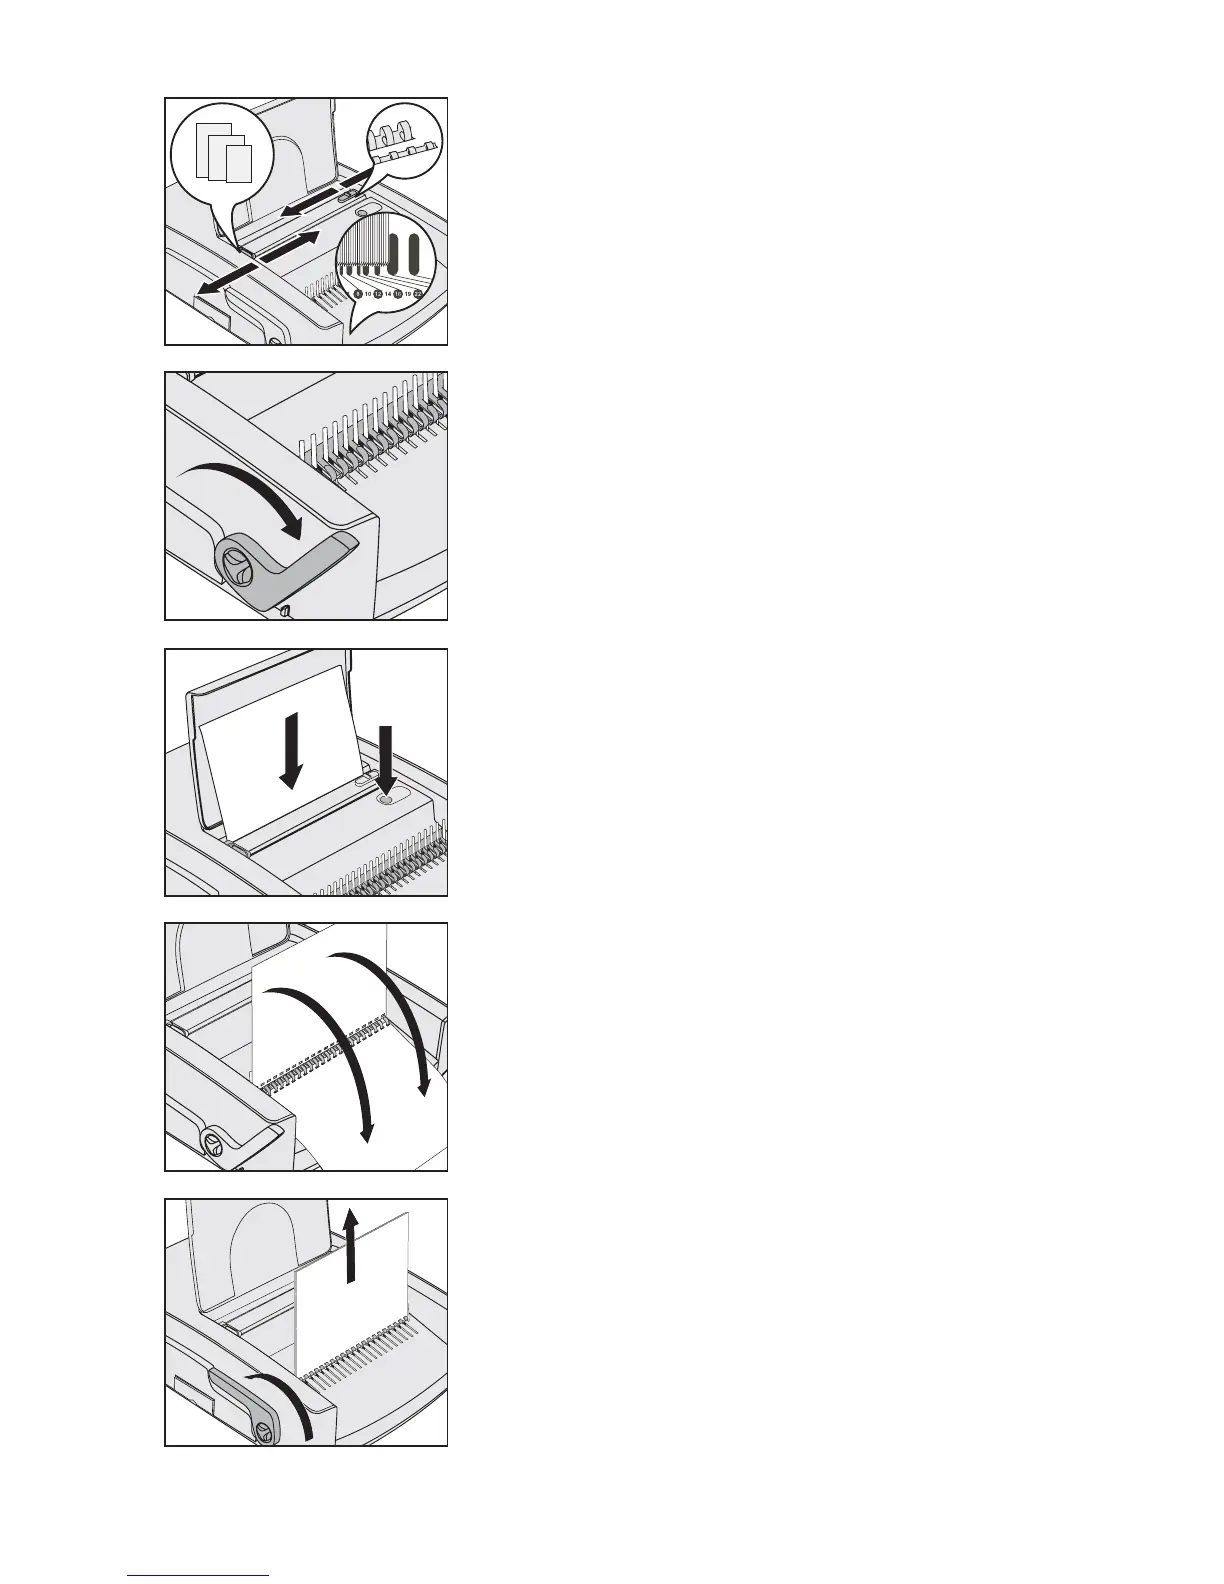
Set the paper stop to the paper format used.
Determine the comb size needed by holding the document
LQFOXGLQJIURQWDQGUHDUFRYHULQSRVLWLRQRQWKHFRPEVL]H
scale
.
You may also use the table on page 5 for this purpose.
Set the punching depth according to the comb size determined.
Inserting and opening the comb
Place the plastic comb with the side to be opened facing upwards
into the binding mechanism
.
Pull the binding lever
! so far until the comb is opened enough so
that the sheets can be easily inserted.
Punching the sheets
Tip: We recommend testing the punch setting using a blank sheet of paper
before punching the original document.
Caution! To prevent damage to the motor and punching
PHFKDQLVPUHPRYHDOOPHWDOSDUWVVWDSOHVHWFIURPWKH
document before punching. Do not punch more than 28 sheets of
JPðSDSHURUWZR¿OPVRIPPDWWKHVDPHWLPH(PSW\WKH
cuttings tray
" regularly.
Insert the sheets into the rear slot
.
Press the punching button
.
Remove the punched sheets.
Inserting the sheets
Insert the punched sheets into the opened comb.
It is now possible to punch all remaining sheets (step 3) and insert them into
the opened comb.
5HPRYLQJWKH¿QLVKHGGRFXPHQW
Push the binding lever ! backwards to close the comb.
5HPRYHWKH¿QLVKHGGRFXPHQW
•
•
•
2.
•
•
3.
•
•
•
4.
•
5.
•
•
DD
1
2
3
4
5
4
 Loading...