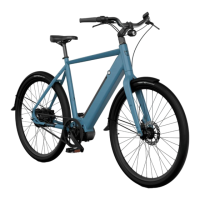
1716 Amsterdam+Assembly & Maintenance Guide
04. Battery
setup
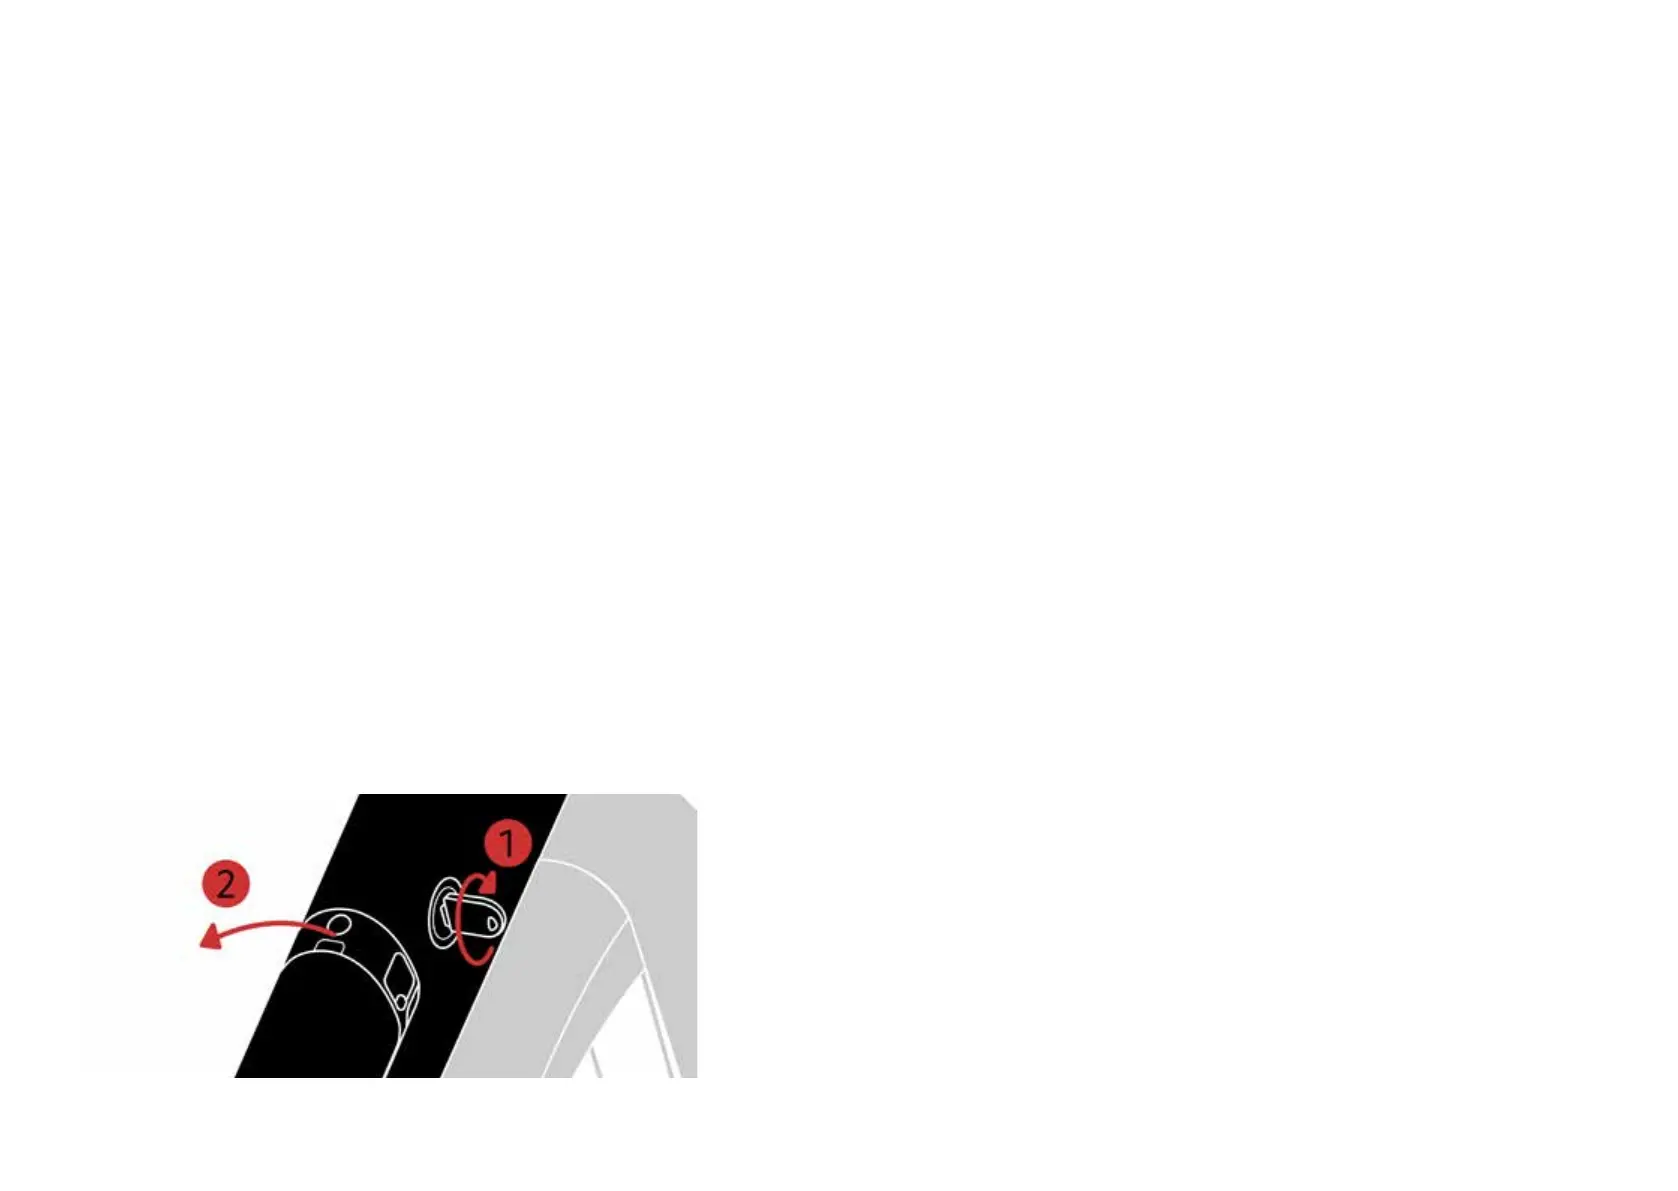
Make sure that the battery is properly inserted into
the frame. When you feel a click, you’ll know it’s been
locked into place. Your battery can be charged whilst
the battery is inside the frame, or you can simply take
it out and charge it separately.
Step 1: Insert the battery key into the keyhole in the
frame to unlock your battery. Make sure to insert it in
the keyhole, and not the charging port as this could
cause a short circuit.
Step 2: After turning the key, the battery will partially
pop out so you can easily remove the battery.
Remember to remove the key from the battery lock
whilst riding.
All batteries will come partially charged. However, to
get the most out of your battery, we strongly recom-
mend that you check out chapter 2 “Battery health”
of the Maintenance section of this manual.
Once you’ve nished inserting the battery, it’s time to
turn the bike on!
Note: All batteries and frames are water-resistant,
but if you are storing the bike outside overnight, or
for long periods of time, we recommend that the
battery is removed and kept inside and the bike is
covered and stored. Removing the battery overnight
will not only help to maximize its overall lifespan, but
also lower the risk of theft.