7
MAINTENANCE
Cleaning
1. Only use thinners which are compatible with the paint to clean the gun.
2. Empty excess paint from the gun container and pour in one cup of thinners. Shake the gun
back and forth to flush the container, then spray for 5 seconds to flush pump parts. Properly
discard used thinners. Repeat if necessary.
3. Disassemble pump and clean all parts individually. Be sure the vent hole is clean and free.
CAUTION:
The piston is made of tungsten carbide which is long wearing, but also brittle -
Do
Not drop it or force it in any way.
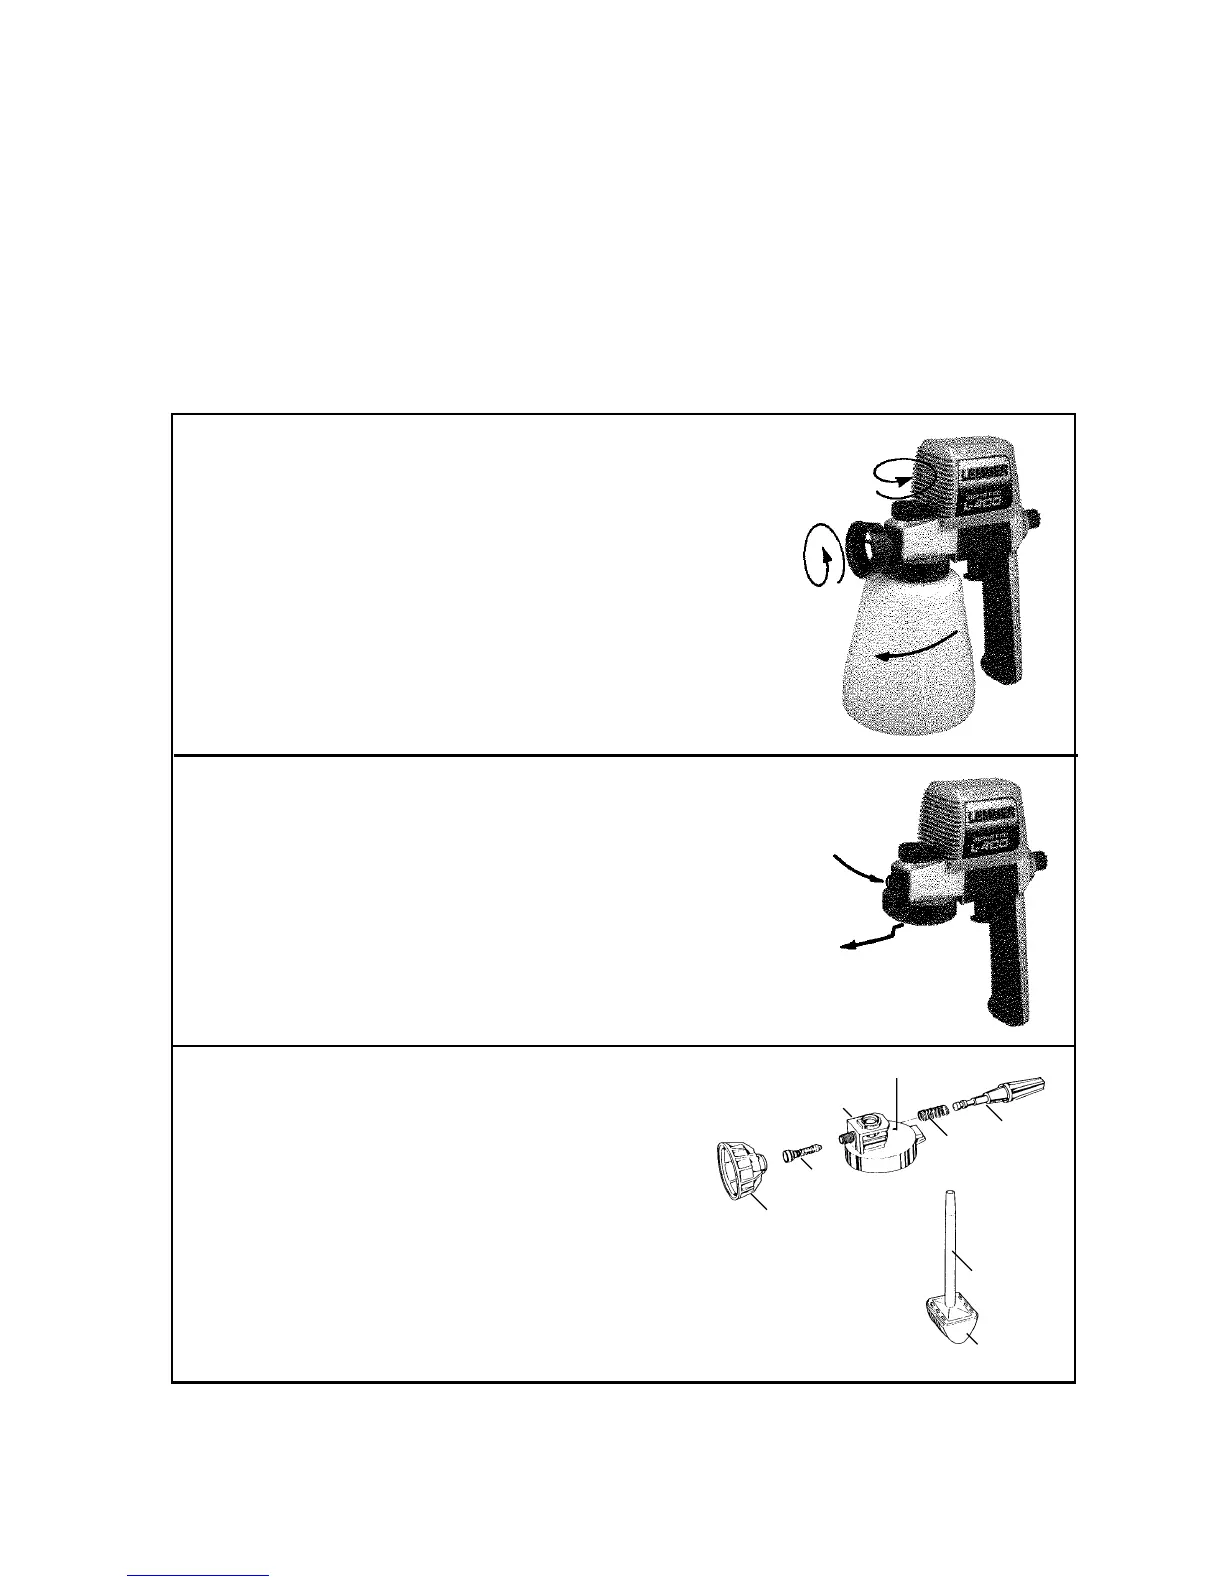
Disassembly Procedure
STEP 1
1. Disconnect Power Supply.
2. Remove Nozzle.
3. Remove Valve.
4. Remove Container.
5. Remove Suction Tube.
6. Remove locking screw.
STEP 2
1. Push Pump Housing in.
2. Push Pump Housing down (1/4") slightly.
CAUTION - Do not force in any manner, if stuck, clean
first or try penetrating oil.
3. Pull Pump Housing straight out.
STEP 3
1. Pull Piston out. If it is stuck, do not pry or
hammer. See “Freeing a seized piston” on
page 8.
2. Remove Piston Spring. If piston spring
remained on piston, remove it by butting the
steel end of piston on a soft object and then
push the spring off with your fingers.
Pump Cylinder
Spring
Nozzle
Vent Hole
Piston
Valve
Suction tube
Strainer
 Loading...