RetroFit Kit for Bennett Trim Tabs Installation Instructions
RetroFit Kit for Bennett Trim Tabs Installation Instructions
Pre-Installation Instructions
1)
Disconnect the Bennett hydraulic pump
unit (HPU) from the Bennett wiring
harness and drain as much of the
hydraulic fluid as possible into a container
for proper disposal later. Remember
that automatic transmission fluid (ATF)
is to be disposed of only at an approved
collection site in your area; do not discard
in the regular trash. Discard hydraulic
pump unit (HPU). Leave Bennett wiring
harness in place.
2) Remove and discard the Bennett trim
tab cylinders from the boat transom
and remove the hydraulic line at the
connection. It helps to have several rags
handy to soak up the oil. Remove and
discard old hydraulic lines.
3) Disconnect the Bennett cylinder from the
trim tab plane by tapping out the small
black pin at the base of the cylinder where
it attaches to the plane. You will first have to
remove one screw from the lower mounting
bracket as this holds the pin in place.
Do not remove the lower mounting
bracket, as you will need it later.
Installation Instructions
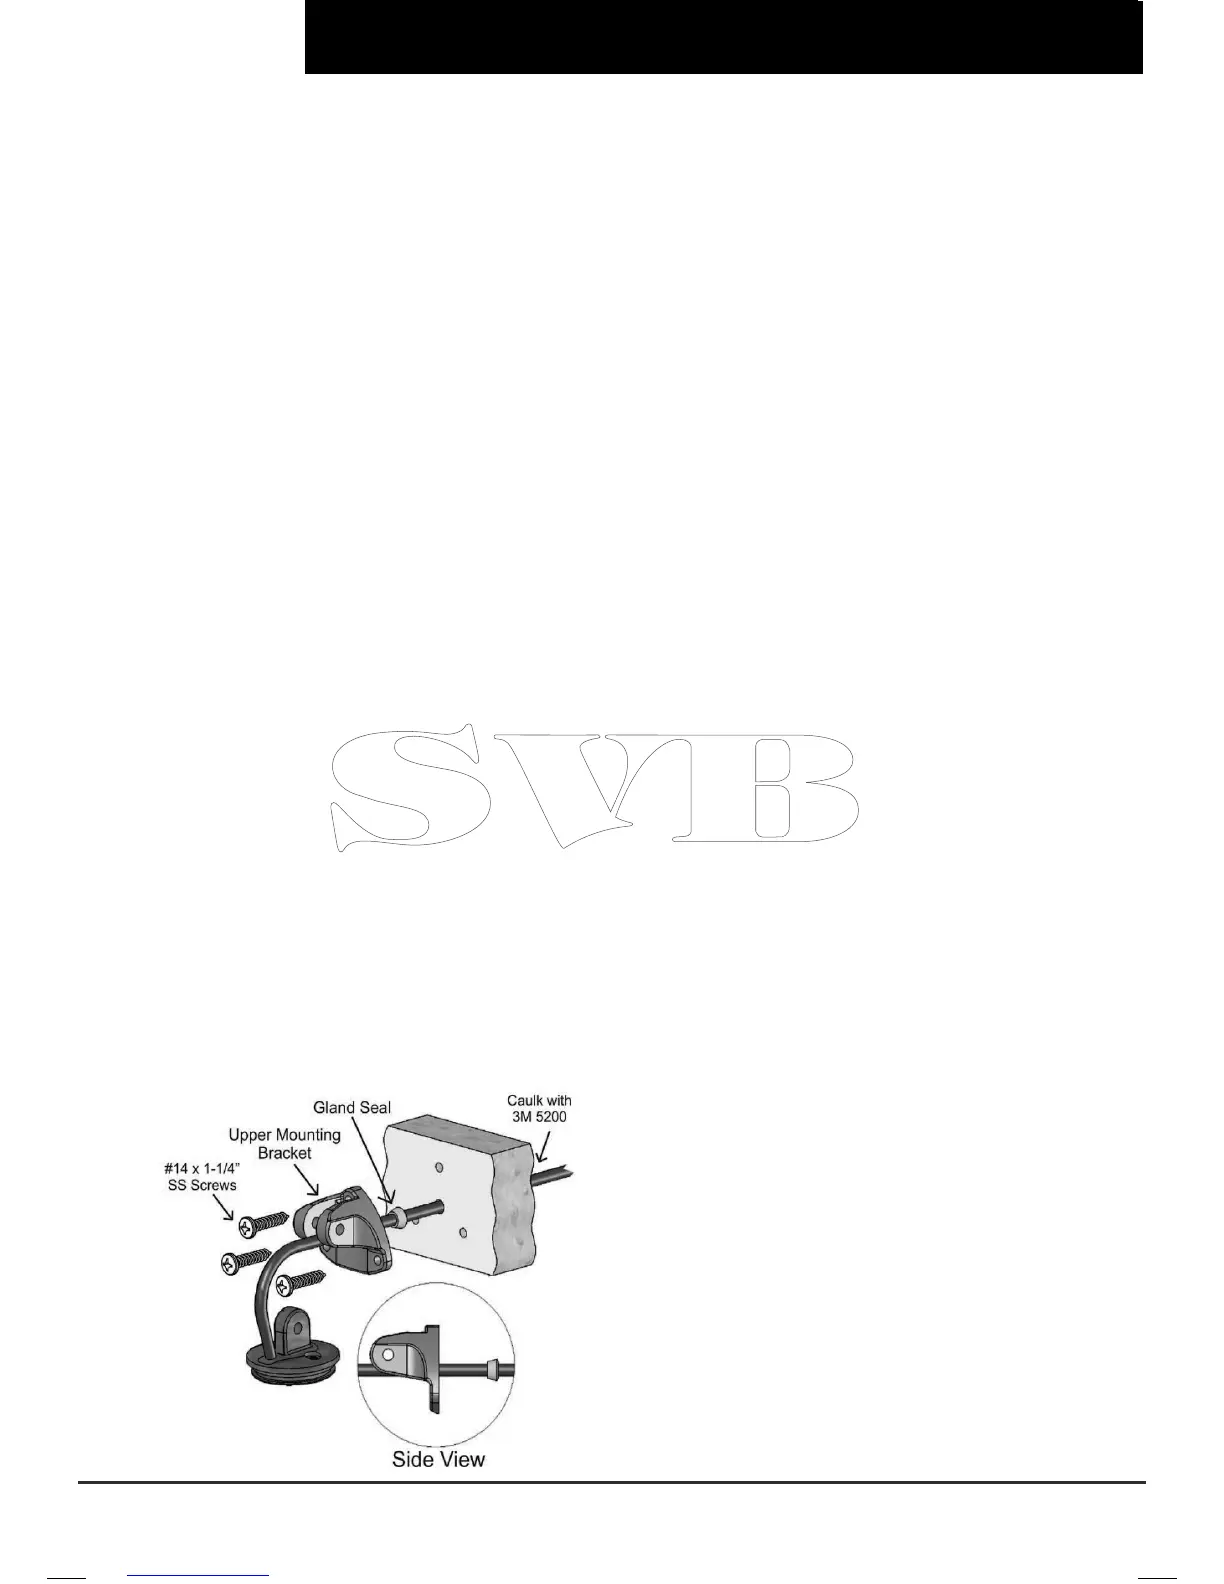
1) Insert the actuator cable through the
appropriate hole in the upper mounting
bracket (supplied with the kit) until it
reaches the actuator. Insert the actuator
cable through the gland seal until it
reaches the upper mounting bracket.
Note: For appropriate orientation
of upper mounting bracket and gland
seal, (see Fig 1).
You will need to clean the mounting
surfaces on the transom with a cleaning
solvent such as mineral spirits or alcohol
to remove all oils and dirt before final
mounting.
Insert the actuator cable through the
transom. With the actuator loosely
supported, bed the upper mounting
bracket and screws with 3M 5200
adhesive caulking. Start the provided
#14 x 1-1/4" (3.18 cm) stainless steel
sheet metal screws through the upper
mounting bracket and into the transom.
MAKE SURE TO LEAVE THE SCREWS
ONLY PARTIALLY INSTALLED.
Insert the actuator clevis (mounting
ear) into the upper mounting bracket
and hold in the approximate installed
location. Pass the actuator cable through
the transom removing slack on the cable
until it looks like the installation on
Fig 2.1 on page 6. Remove the actuator
from the upper mounting bracket and
finish installing the previously started
#14 x 1-1/4" (3.18 cm) stainless steel
sheet metal screws through the upper
mounting
bracket and into the transom.
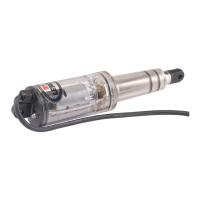
Lenco Marine’s RetroFit Kit is designed as a direct replacement for the Bennett hydraulic
power unit (HPU) on systems using Bennett's 4-ring standard trim tab actuators.
Note: Bennett Joystick Control can not be retrotted to the Lenco Actuators.
These instructions should be followed completely. See page 5 for complete Tools and
Materials List. If you experience any problems not covered, please call the Lenco Marine
Customer Service line at 772-288-2662.
Make sure the power is removed from the Bennett Trim Tab System before installation.
Fig. 1
(Continued on page 15)