Page 22
II-PLACEMENT AND INSTALLATION
All pipe, ttings, primer and solvent cement must conform
with American National Standard Institute and the Ameri-
can Society for Testing and Materials (ANSI/ASTM) stan-
dards. The solvent shall be free owing and contain no
lumps, undissolved particles or any foreign matter that
adversely aects the joint strength or chemical resistance
of the cement. The cement shall show no gelation, strati-
cation, or separation that cannot be removed by stirring.
Refer to the table 14 below for approved piping and tting
materials.
TABLE 14
PIPING AND FITTINGS SPECIFICATIONS
Schedule 40 PVC (Pipe) D1785
Schedule 40 PVC (Cellular Core Pipe) F891
Schedule 40 PVC (Fittings) D2466
Schedule 40 CPVC (Pipe) F441
Schedule 40 CPVC (Fittings) F438
SDR-21 PVC or SDR-26 PVC (Pipe) D2241
SDR-21 CPVC or SDR-26 CPVC (Pipe) F442
Schedule 40 ABS Cellular Core DWV
(Pipe)
F628
Schedule 40 ABS (Pipe) D1527
Schedule 40 ABS (Fittings) D2468
ABS-DWV (Drain Waste & Vent) (Pipe &
Fittings)
D2661
PVC-DWV (Drain Waste & Vent) Pipe &
Fittings)
D2665
PRIMER & SOLVENT CEMENT
ASTM
SPECIFICATION
PVC & CPVC Primer F656
PVC Solvent Cement D2564
CPVC Solvent Cement F493
ABS Solvent Cement D2235
PVC/CPVC/ABS All Purpose Cement
For Fittings & Pipe of the same material
D2564, D2235,
F493
ABS to PVC or CPVC Transition Solvent
Cement
D3188
CANADA PIPE & FITTING & SOLVENT
CEMENT
MARKING
PVC & CPVC Pipe and Fittings
ULCS636
PVC & CPVC Solvent Cement
ABS to PVC or CPVC Transition
Cement
POLYPROPYLENE VENTING SYSTEM
PolyPro® by Duravent
InnoFlue® by Centrotherm
IMPORTANT
Exhaust and intake connections are made of PVC.
Use PVC primer and solvent cement when using
PVC vent pipe. When using ABS vent pipe, use
transitional solvent cement to make connections to
the PVC ttings in the unit.
Use PVC primer and solvent cement or ABS solvent ce-
ment meeting ASTM specications, refer to TABLE 4.
As an alternate, use all purpose cement, to bond ABS,
PVC, or CPVC pipe when using ttings and pipe made of
the same materials. Use transition solvent cement when
bonding ABS to either PVC or CPVC.
Low temperature solvent cement is recommended during
cooler weather. Metal or plastic strapping may be used for
vent pipe hangers. Uniformly apply a liberal coat of PVC
primer for PVC or use a clean dry cloth for ABS to clean
inside socket surface of tting and male end of pipe to
depth of tting socket.
Canadian Applications Only - Pipe, ttings, primer and
solvent cement used to vent (exhaust) this appliance must
be certied to ULC S636 and supplied by a single manu-
facturer as part of an approved vent (exhaust) system. In
addition, the rst three feet of vent pipe from the furnace
ue collar must be accessible for inspection.
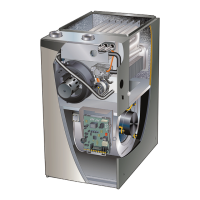
Venting Options
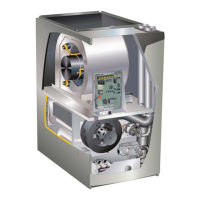
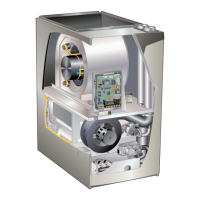
The EL296DFE is shipped with vent exhaust / air intake
connection at the top cap. See FIGURE 17. Using parts
provided, the furnace may be eld modied to have these
connections on the right side of the furnace cabinet. See
FIGURE 19 and follow the steps below. For left side vent-
ing order kit 87W73.
1 - Remove inner blower door.
2 - Loosen hose clamps which attach rubber ttings to
the white PVC pipes inside the vestibule area. See
FIGURE 17.
3 - Loosen the clamp which secures the pipes at the
blower deck. See gure 17.
4 - Remove white PVC pipes, slide up and out thru the
top cap.
5 - Remove the black plastic tting in top cap which
previously aligned the PVC pipes.
6 - Remove the remaining parts of the pipe clamp at
the blower deck.
7 - Remove the sheet metal patch plate on the side
of the cabinet which covers the openings for side
venting option. Save screws for reuse.
8 - Re-use the patch plate to cover the hole in the top
cap. See FIGURE 18. Remove the 2 screws which
secure the top cap to the furnace on the right side
and re-install securing the right edge of the patch
plate and the right side of the top cap to the furnace.
Use 2 self-drilling sheet metal screws (provided) to
nish securing the left edge of the patch plate on
the left side.
 Loading...