This document describes the Lennox Mini-Split Systems Wireless Indoor Unit Controller (M0STAT60Q-1), a wireless local controller designed for Lennox mini-split indoor units.
Function Description
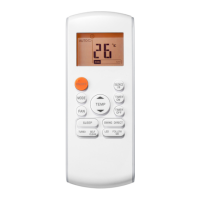
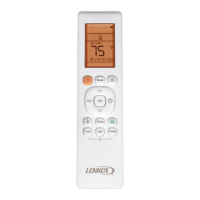
The M0STAT60Q-1 wireless controller allows users to operate and manage Lennox mini-split indoor units remotely. It provides control over various functions, including power on/off, operating mode selection (Auto, Cool, Dry, Heat, Fan), temperature setpoint adjustment, fan speed control (Auto, Low, Med, High), and specialized modes like Sleep, Turbo, Self Clean, Quiet, Timer ON/OFF, Frost Prevention, Louver Swing, and Follow Me. The controller features a display that shows current settings, operating status, and battery charge.
Important Technical Specifications
- Rated Voltage: 3.0 VDC (powered by 2 AAA batteries)
- Minimum Voltage for Sending Signal to CPU: 2.4 VDC
- Effective Transmitting Distance: 26 feet (8 meters)
- Operation Conditions: 23°F to 140°F (-5 to 60°C)
- Temperature Setpoint Range (Cool/Heat/Fan modes): 62°F – 86°F
Usage Features
General Operation:
- Pointing: The remote controller must be pointed directly at the indoor unit for proper function. Pointing it towards the ceiling will not control the unit (except for cassette units installed directly above the holder).
- Distance: Maintain a distance within 26 feet (8 meters) of the indoor unit.
- Line of Sight: Ensure no obstructions block the signal between the controller and the indoor unit.
- Environmental: Do not submerge the controller in liquid, expose it to direct sunlight, or drop/step on it.
- On/Off Button: Turns the indoor unit on or off.
- Up/Down Arrow Buttons: Increase or decrease the temperature setpoint, or scroll through settings options.
- Mode Button: Scrolls through operation modes: Auto → Cool → Dry → Heat → Fan.
- Fan Speed Button: Scrolls through fan speeds: Auto → Low → Med → High.
- Sleep Button: Activates "night-mode." This mode automatically adjusts the setpoint (increases for cooling, decreases for heating) by 2°F (1°C) per hour for the first two hours. The modified setpoint remains for five hours, after which the indoor unit shuts off. The system remains off until the "On" button is pressed.
- Turbo Button: (Not available on all indoor models) Activates turbo mode in cooling mode, ramping up the unit to reach the setpoint faster. After reaching the setpoint or 30 minutes, the unit resumes previous operating conditions.
- Self Clean Button: Activates self-cleaning mode in cooling or dry mode. The unit temporarily changes operation to evaporate condensate from the indoor coil, then returns to previous conditions.
- Silence Button: Activates quiet mode operation, making the indoor unit operate at the quietest sound possible. Pressing it again stops quiet mode. Note that quiet mode may reduce cooling or heating capacity.
- FP Button (Frost Prevention): Press and hold for two seconds to activate. In heating mode only, the unit operates at a 46°F setpoint, and the display shows "FP" (if available).
- Timer ON Button: Sets a delayed auto-start for the indoor unit. Each press increases the delay in half-hour increments up to 10 hours, then 1-hour increments.
- Timer OFF Button: Sets a delayed auto-stop for the indoor unit. Similar increment logic as Timer ON.
- Swing Button: Initiates left and right louver oscillation. Press again to stop oscillation. Not available on all models.
- Direct (Direction) Button: Moves louvers up and down in 6-degree increments. Louvers remain in place where stopped. Not available on all models.
- LED Button: Turns the indoor unit display on or off (for units with a display).
- Follow Me Button: Activates the remote's air temperature sensor, transferring the temperature sensing function from the indoor unit to the remote. The indoor unit then regulates room temperature based on the remote's sensor. The remote sends a signal every three minutes. If no signal is received for seven minutes, or if the button is pressed again, Follow Me terminates. The remote must remain pointed at the unit and within 26 feet (8 meters).
Display Indicators:
- Remote Controller On: Icon indicates the controller is on.
- Transmitting Signal Display: Icon blinks when a signal is sent.
- Operation Mode Icons: Show current mode (Auto, Cool, Dry, Heat, Fan).
- Setpoint or Room Temperature: Displays setpoint during normal operation, or room temperature in Follow Me mode. No display in Fan mode.
- Timer ON/OFF Icons: Light up to indicate a timed auto-start or auto-stop is set.
- Battery Charge Status: Icon displays battery charge level.
- Night Mode: Icon indicates night mode is active.
- Follow Me: Icon indicates the remote's sensor is being used.
- Fan Speed: Displays current fan speed.
Setting Operation Mode:
- Auto Mode: System operates in cooling or heating based on setpoint and room temperature. Not recommended for multi-zone units to avoid conflict errors.
- Cool Mode: System operates in cooling.
- Dry Mode: System removes humidity based on preset conditions (fan speed and setpoint not adjustable).
- Heat Mode: System operates in heating.
- Fan Mode: Fan only, no heating or cooling.
Setting Temperature:
- Use up/down arrows to adjust the setpoint.
Selecting Fahrenheit or Celsius:
- Press and hold the Up and Down buttons simultaneously for three seconds.
Maintenance Features
Batteries:
- Remove the battery cover from the back of the remote.
- Insert two AAA batteries into the compartment.
- Replace the cover.
- NOTE: ON/OFF Timer, setpoint, fan speed, and all other functions will need to be reset when batteries are completely discharged or replaced.
- WARNING: Do not mix old and new batteries or different types. Do not leave batteries in the remote if not used for an extended period. Dispose of used batteries according to local and state waste management standards.
Troubleshooting (Fault Codes - Indoor Unit):
The manual provides a list of fault codes for the indoor unit, indicating potential issues:
- E0: Indoor unit EEPROM error
- E1: Communication error between indoor and outdoor unit
- E3: Indoor fan speed error
- E4: Indoor return air temperature sensor error
- E5: Indoor coil temperature sensor error
- EC: Low refrigerant
- EE: High water level alarm
- F0: Outdoor current overload sensed
- F1: Outdoor ambient temperature sensor error
- F2: Outdoor coil temperature sensor error
- F3: Compressor discharge temperature sensor error
- F4: Outdoor unit EEPROM error
- F5: Outdoor unit fan speed error
- P0: Inverter module IPM error
- P1: High or low voltage protection
- P3: Outdoor unit low temperature lockout
- P4: Compressor drive error
- --: Mode conflict
- P6: Compressor high-pressure or low-pressure switch open
Important Notes:
- Frequent changes to operating mode may cause system malfunction. Allow at least one minute between mode changes for the system to stabilize.
- This device complies with Part 15 of the FCC Rules, meaning it will not cause harmful interference and must accept any interference received.