Page 9
C − Drier
A filter drier designed for all XC16 model units is factory
installed in the liquid line. The filter drier is designed to re-
move moisture and foreign matter, which can lead to com-
pressor failure.
Moisture and / or Acid Check
Because POE oils absorb moisture, the dryness of the
system must be verified any time the refrigerant system
is exposed to open air. A compressor oil sample must be
taken to determine if excessive moisture has been
introduced to the oil. Table 2 lists kits available from Lennox
to check POE oils.
If oil sample taken from a system that has been exposed to
open air does not test in the dry color range, the filter drier
MUST be replaced.
IMPORTANT
Replacement filter drier MUST be approved for
R−410A refrigerant and POE application.
Foreign Matter Check
It is recommended that a liquid line filter drier be replaced
when the pressure drop across the filter drier is greater than
4 psig.
TABLE 2
KIT CONTENTS TUBE SHELF LIFE
10N46 − Refrigerant Analysis Checkmate−RT700
10N45 − Acid Test Tubes Checkmate−RT750A (three pack)
2 − 3 years @ room temperature. 3+
years refrigerated
10N44 − Moisture Test Tubes
Checkmate − RT751 Tubes (three
pack)
6 − 12 months @ room temperature. 2
years refrigerated
74N40 − Easy Oil Test Tubes
Checkmate − RT752C Tubes (three
pack)
2 − 3 years @ room temperature. 3+
years refrigerated
74N39 − Acid Test Kit Sporlan One Shot − TA−1
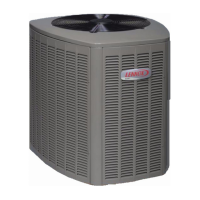
FIGURE 9
1− Shut off power to unit.
2− Remove high pressure switch from fitting next to filter drier.
(A schrader core is located under the high pressure switch).
3− Install high pressure gauge hose onto high pressure switch fitting.
4− Turn power on to unit and turn room thermostat to call for cooling.
5− Record pressure reading on gauge.
6− Remove hose from high pressure fitting and install on liquid line valve.
7− Read liquid line valve pressure.
8− High pressure fitting pressure − liquid line valve pressure = filter drier
pressure drop.
9− If pressure drop is greater than 4 psig replace filter drier. See figure 10.
10− Re−install high pressure switch.
MEASURING FILTER DRIER PRESSURE DROP
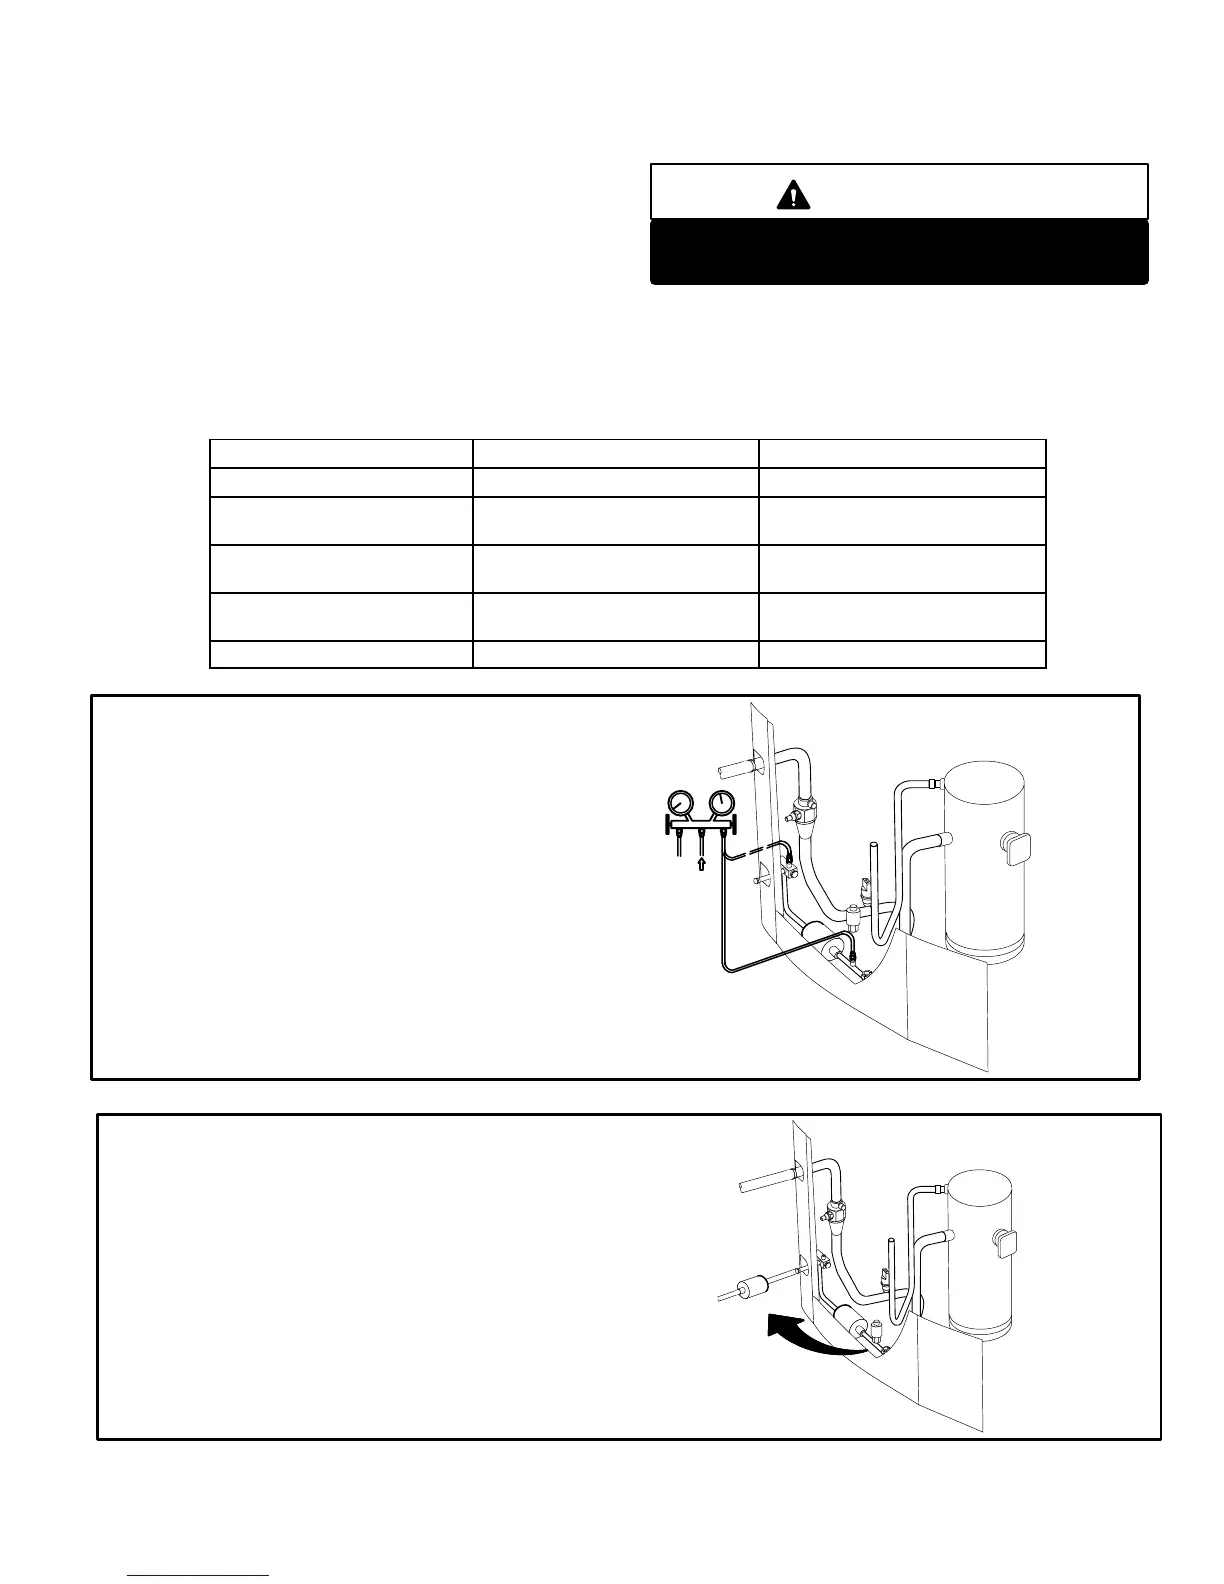
FIGURE 10
REPLACING FILTER DRIER
1− Recover all refrigerant from unit.
2− Remove original filter drier.
3− Install new filter drier in existing location or alternate location as
shown. Proper brazing procedures should be followed.
4− Evacuate system. See section IV − part B − .
5− Recharge system. See section IV − part C − .
 Loading...