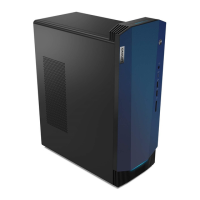
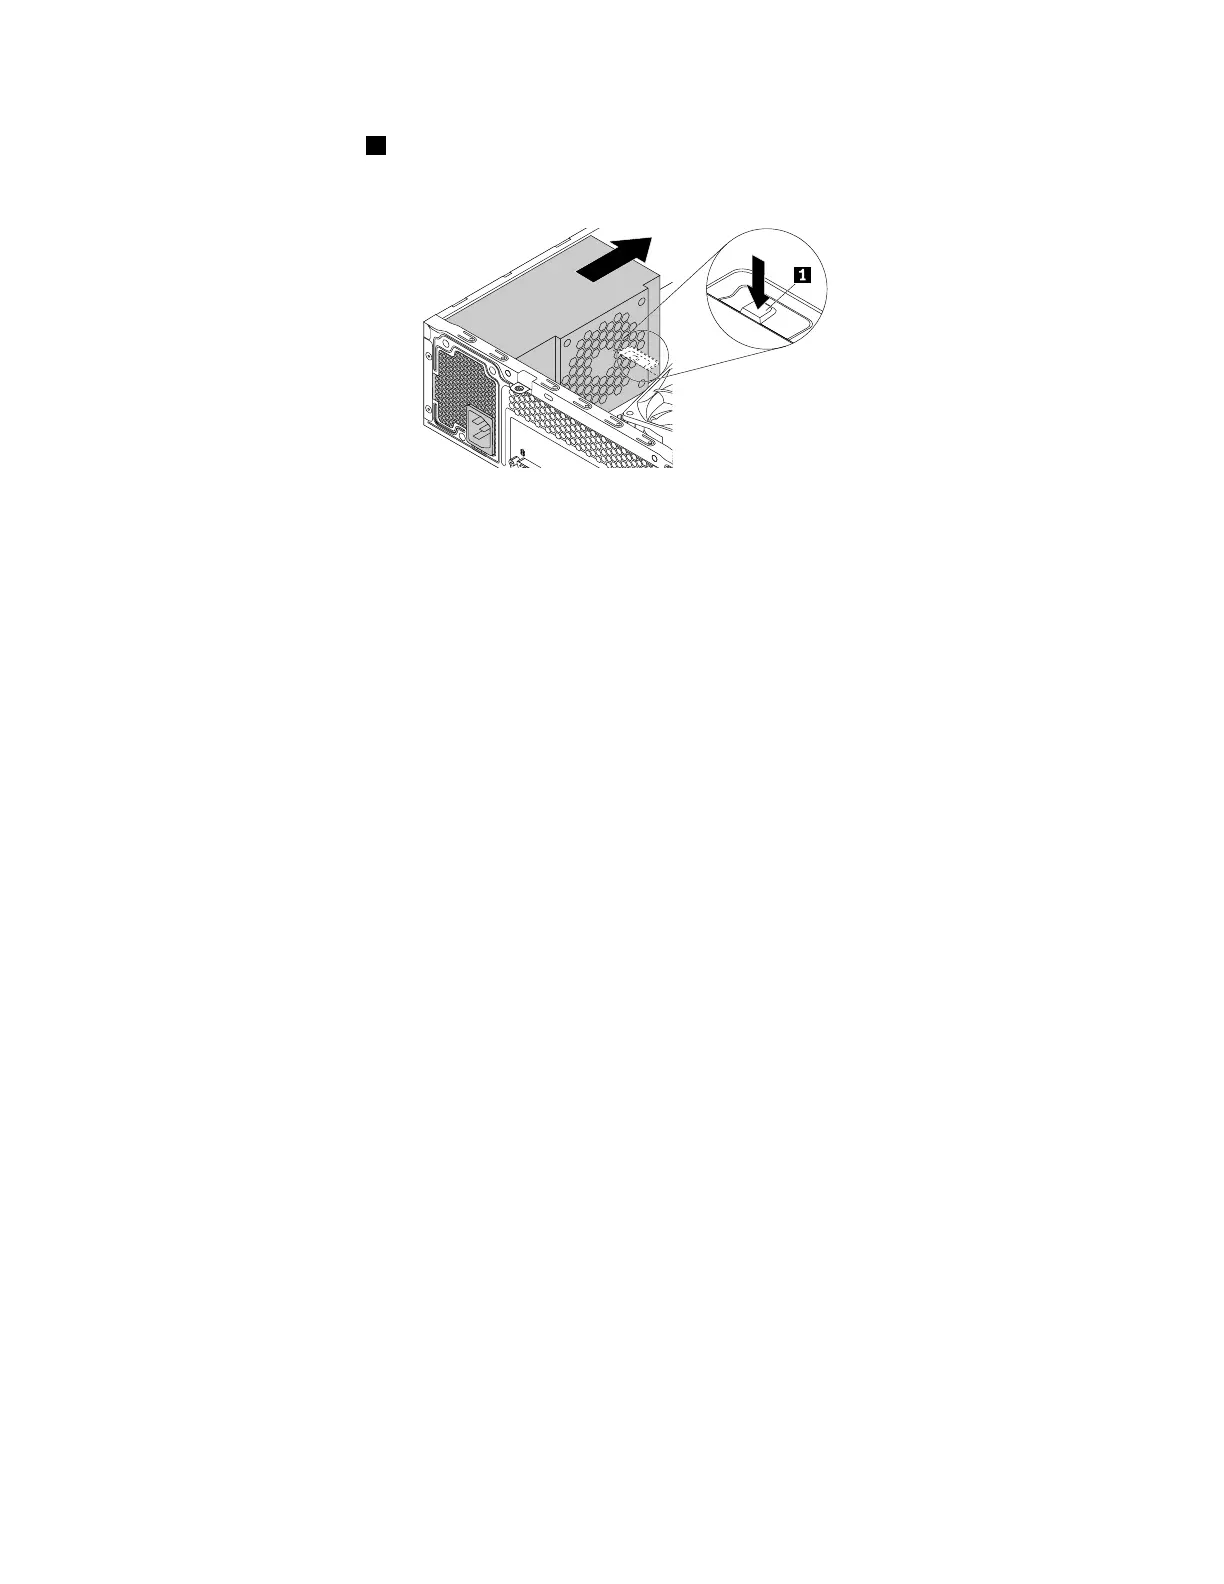
9.Presstheretainingclip1downwardandslidethepowersupplyassemblytothefrontofthecomputer.
Then,liftthepowersupplyassemblyoutofthechassis.
Figure21.Removingthepowersupplyassembly
10.Ensurethatthenewpowersupplyassemblyisthecorrectreplacement.
11.Installthenewpowersupplyassemblyintothechassissothatthescrewholesinthepowersupply
assemblyalignwiththoseinthechassis.
12.Installandtightenthethreescrewstosecurethepowersupplyassembly.
Note:UseonlyscrewsprovidedbyLenovo.
13.Reconnectthepowersupplyassemblycablestothesystemboard.See“Partsonthesystemboard”
onpage33
.
14.Reinstallthestoragedrive.See“Replacingthestoragedrive”onpage51.
15.Reinstalltheopticaldrive.See“Replacingtheopticaldrive”onpage49.
16.Reinstallthefrontbezel.See“Replacingthefrontbezel”onpage48.
Whattodonext:
•Toworkwithanotherpieceofhardware,gototheappropriatesection.
•Tocompletetheinstallationorreplacement,goto“Completingthepartsreplacement”onpage74
.
Replacingthecoin-cellbattery
Attention:DonotopenyourcomputerorattemptanyrepairbeforereadingandunderstandingtheChapter
1“Readthisfirst:Importantsafetyinformation”onpage1
.
Yourcomputerhasaspecialtypeofmemorythatmaintainsthedate,time,andsettingsforbuilt-infeatures,
suchasparallel-connectorassignments(configuration).Acoin-cellbatterykeepsthisinformationactive
whenyouturnoffthecomputer.
Thecoin-cellbatterynormallyrequiresnochargingormaintenancethroughoutitslife;however,nocoin-cell
batterylastsforever.Ifthecoin-cellbatteryfails,thedate,time,andconfigurationinformation(including
passwords)arelost.Anerrormessageisdisplayedwhenyouturnonthecomputer.
Refertothe“Lithiumcoin-cellbatterynotice”intheSafety,Warranty,andSetupGuideforinformationabout
replacinganddisposingofthecoin-cellbattery.
Toreplacethecoin-cellbattery,dothefollowing:
60ideacentre510SHardwareMaintenanceManual
 Loading...