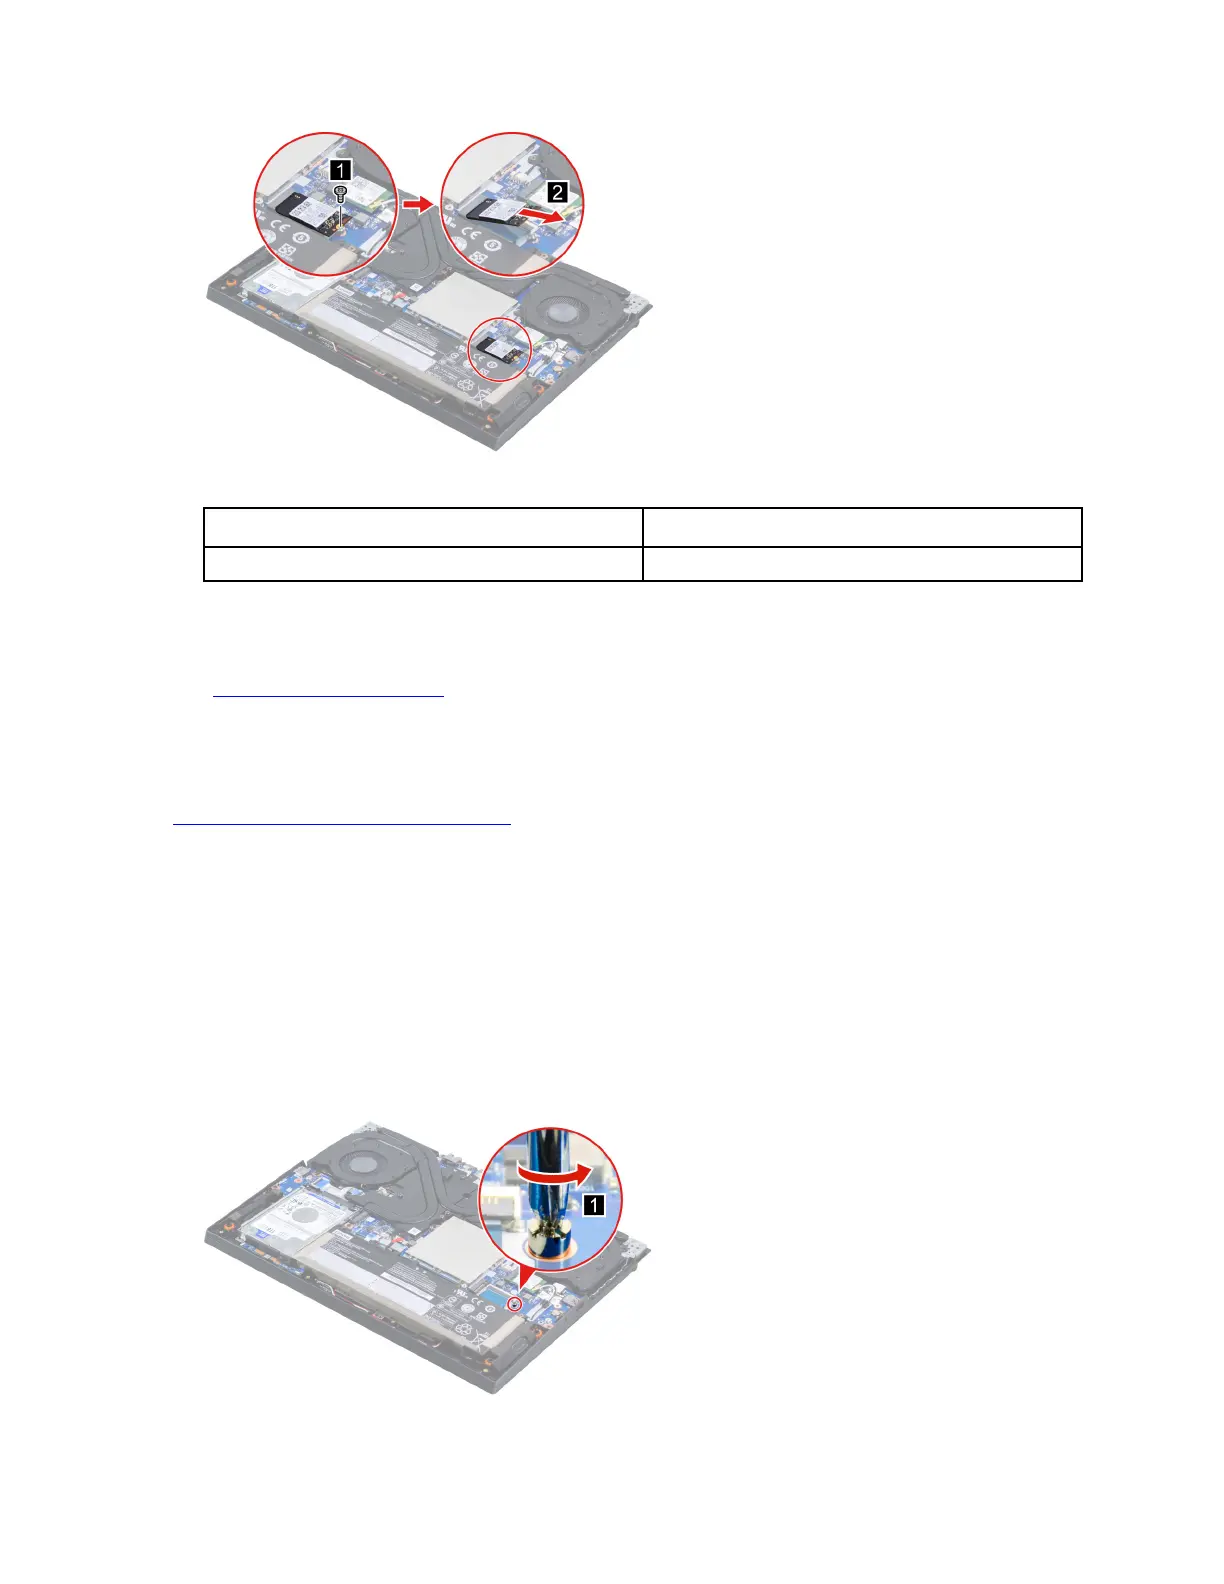
Figure 44. Remove the SSD
Screw specifications
Number of screws
M2 x L3 1
Note: For LCD panel with the factory color calibration feature, do the following to install new color profiles:
1. Connect your computer to the network and close the X-Rite Color Assistant program.
2. Go to
https://support.lenovo.com to download the installation software.
3. Double-click the EXE file. Follow the on-screen instructions to input the display serial number and click
Submit. You can find the display serial number and instructions on a sticker fixed to the front of the new
LCD part. When the new color profiles are installed successfully, a prompted window will be displayed.
Go to
https://support.lenovo.com/partslookup to look up the Lenovo part number of the following replacement
part:
SSD
Remove the solid-state drive (SSD) stand off
Make sure the following FRUs (or CRUs) have been removed.
“Remove the lower case” on page 50
“Remove the solid-state drive (SSD)” on page 51
Step 1. Remove the SSD stand off (for 2242 SSD only).
Figure 45. Remove the SSD stand off (for 2242 SSD only)
52 Hardware Maintenance Manual
 Loading...