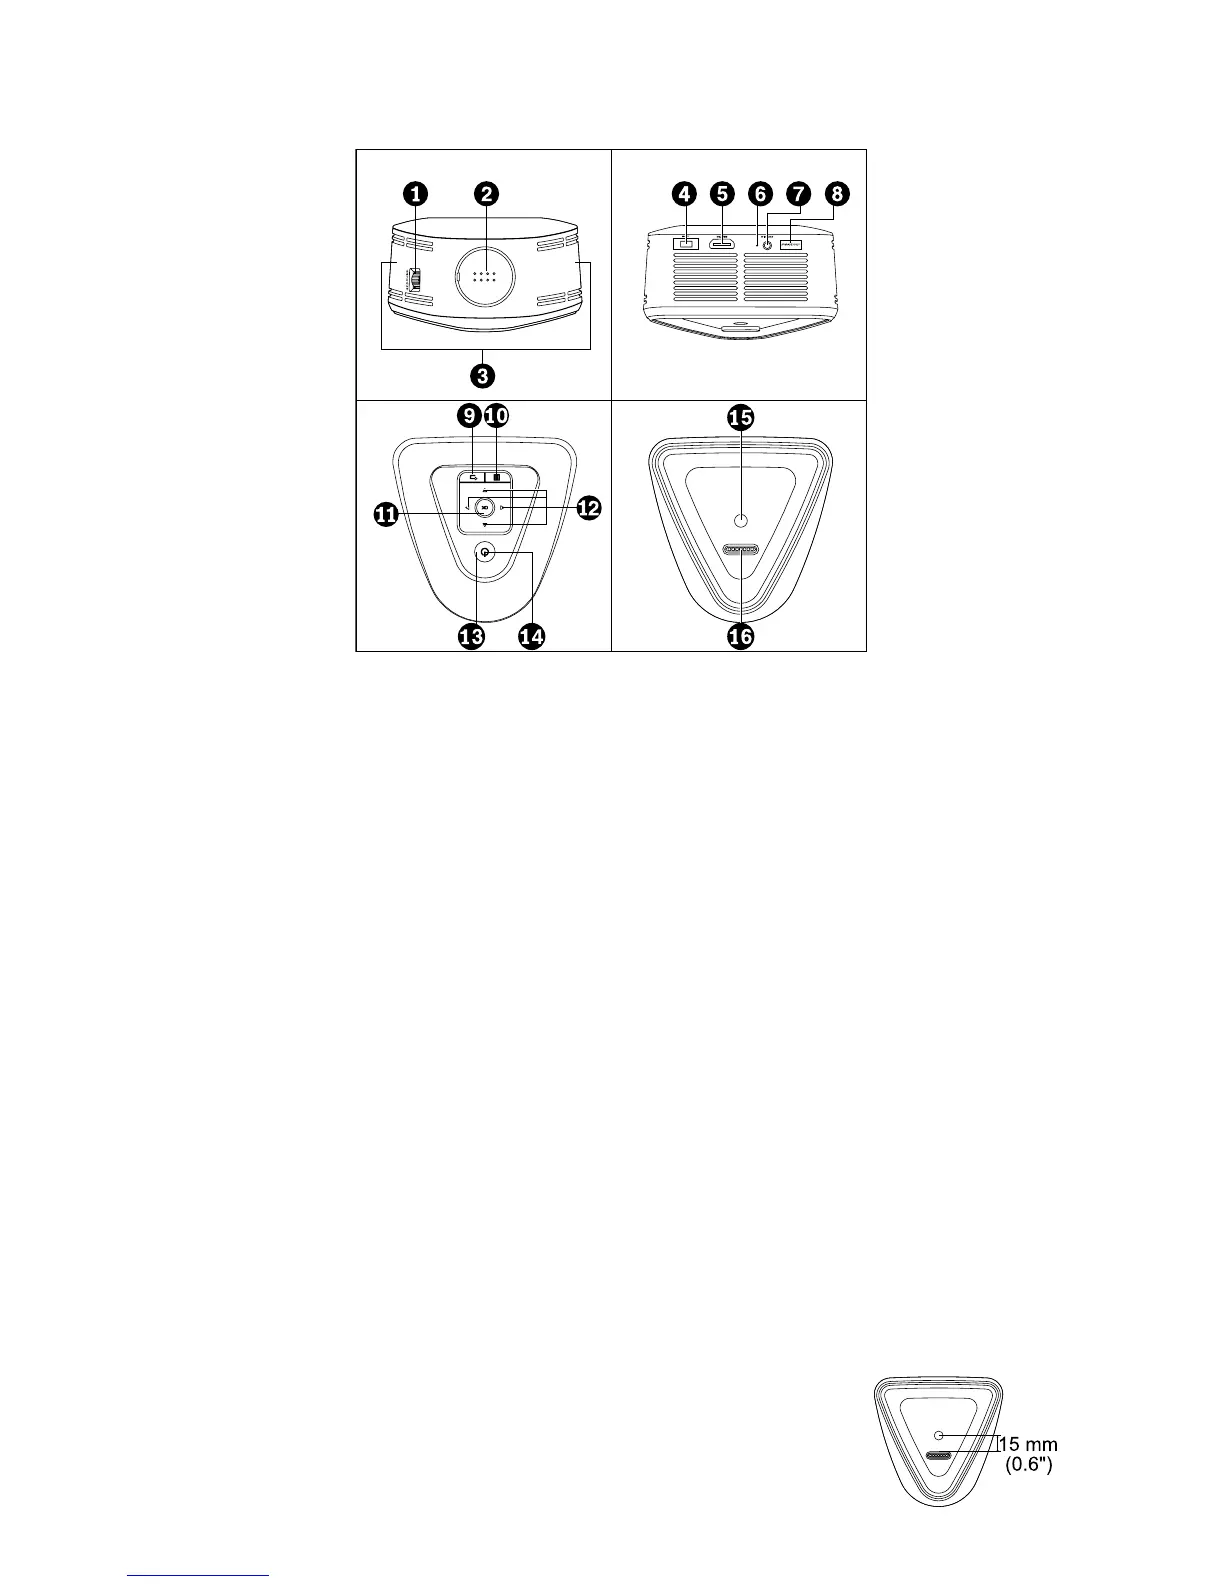
View of the projector
1. Focus ring
2. Lens cap
3. Internal speakers (2)
4. Power adapter connector
5. HDMI
1
-in connector
6. Wirelessactivityindicator
7. Wirelessresetbutton
8. USB
2
connector (for future firmware updates)
9. Back button (OSD
3
control)
10. Menu button (OSD control)
11. OK button (OSD control)
12. Arrow buttons (4) (OSD controls)
13. Power button
14. Power indicator
15. Screw hole (for installing a tripod)
16. Pogo pins (for connecting to the computer so that the computer powers the
projector)
1
HDMI: High-Definition Multimedia Interface
2
USB: Universal Serial Bus
3
OSD: On Screen Display
NOTE: If you want to use a tripod, ensure that the cradle head of
the tripod does not cover the pogo pins. The distance between
the center of the screw hole and the side of the pogo pins is
15 mm (0.6 inches) as shown.