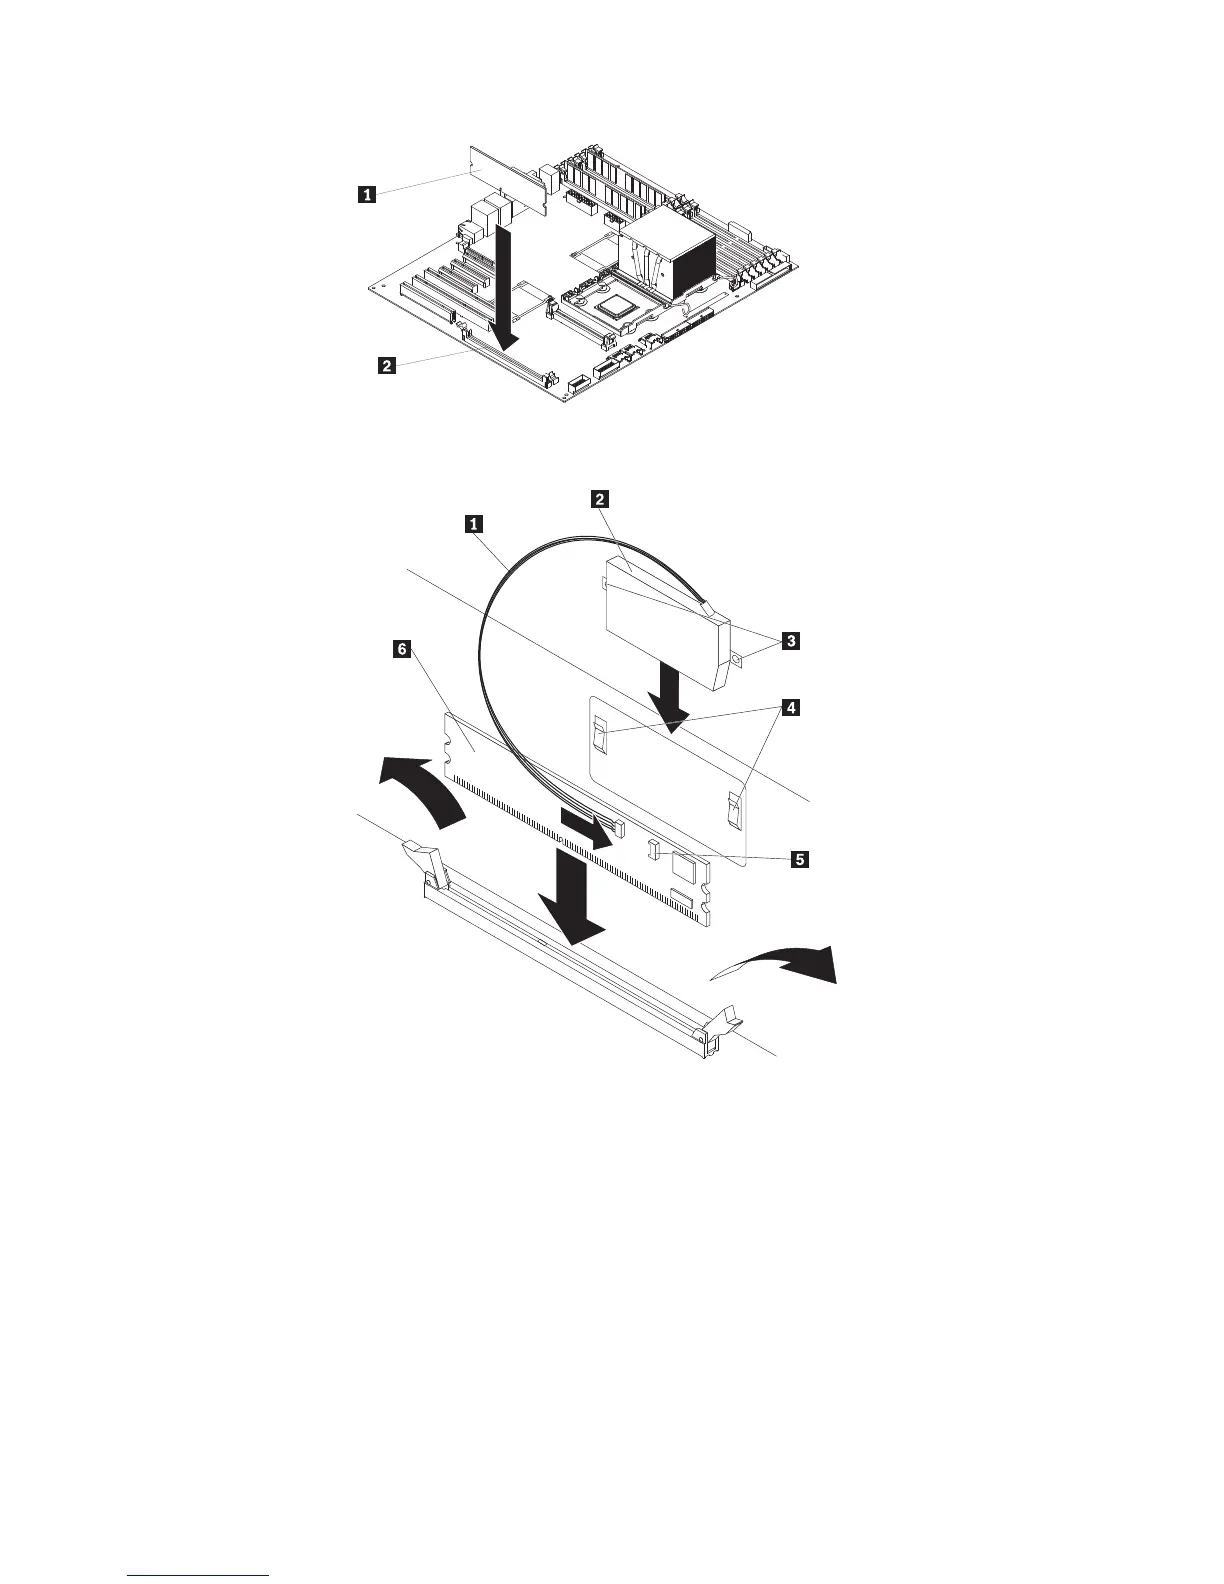
5. Press the ServeRAID-8k adapter firmly into the connector.
6. Mount the battery pack to the chassis, using the two mounting screws.
1 Battery cable 4 Battery mounting clips
2 Battery 5 Battery cable connector
3 Battery mounting tabs 6 RAID controller
7. Slide the battery pack mounting tabs into the battery pack mounting clips on the
chassis wall
8. Plug the battery pack cable into the connector on the adapter ServeRAID-8
adapter.
9. If you are installing the ServeRAID-8k adapter into a simple-swap SATA model,
make the following cabling changes to enable RAID level-5 support:
a. Disconnect the signal cable from the Simple-swap SATA backplate
connector on the system board and connector it to the Hot-swap SAS/SATA
1 connector on the system board. See “System-board internal connectors”
on page 10 for the location of these connectors on the system board.
118 ThinkServer TD100 and TD100x: Hardware Maintenance Manual
 Loading...