Replacing FRUs 52
Replacing the microprocessor
Attention
Do not open your computer or attempt any repairs before reading the Important
Product Information Guide.
1
Remove the computer stand. For details, see Replacing the monitor stand or Replacing the UltraFlex II
Stand.
2
Remove the computer cover. For details, see Removing the computer cover.
3
Remove the optical drive. For details, see Replacing the optical drive.
4
Remove the VESA mount bracket. For details, see Replacing the VESA mount bracket.
5
Remove the middle frame. For details, see Replacing the middle frame.
6
Remove the system board shield. For details, see Replacing the system board shield.
7
Remove the heat sink. For details, see Replacing the heat sink.
8
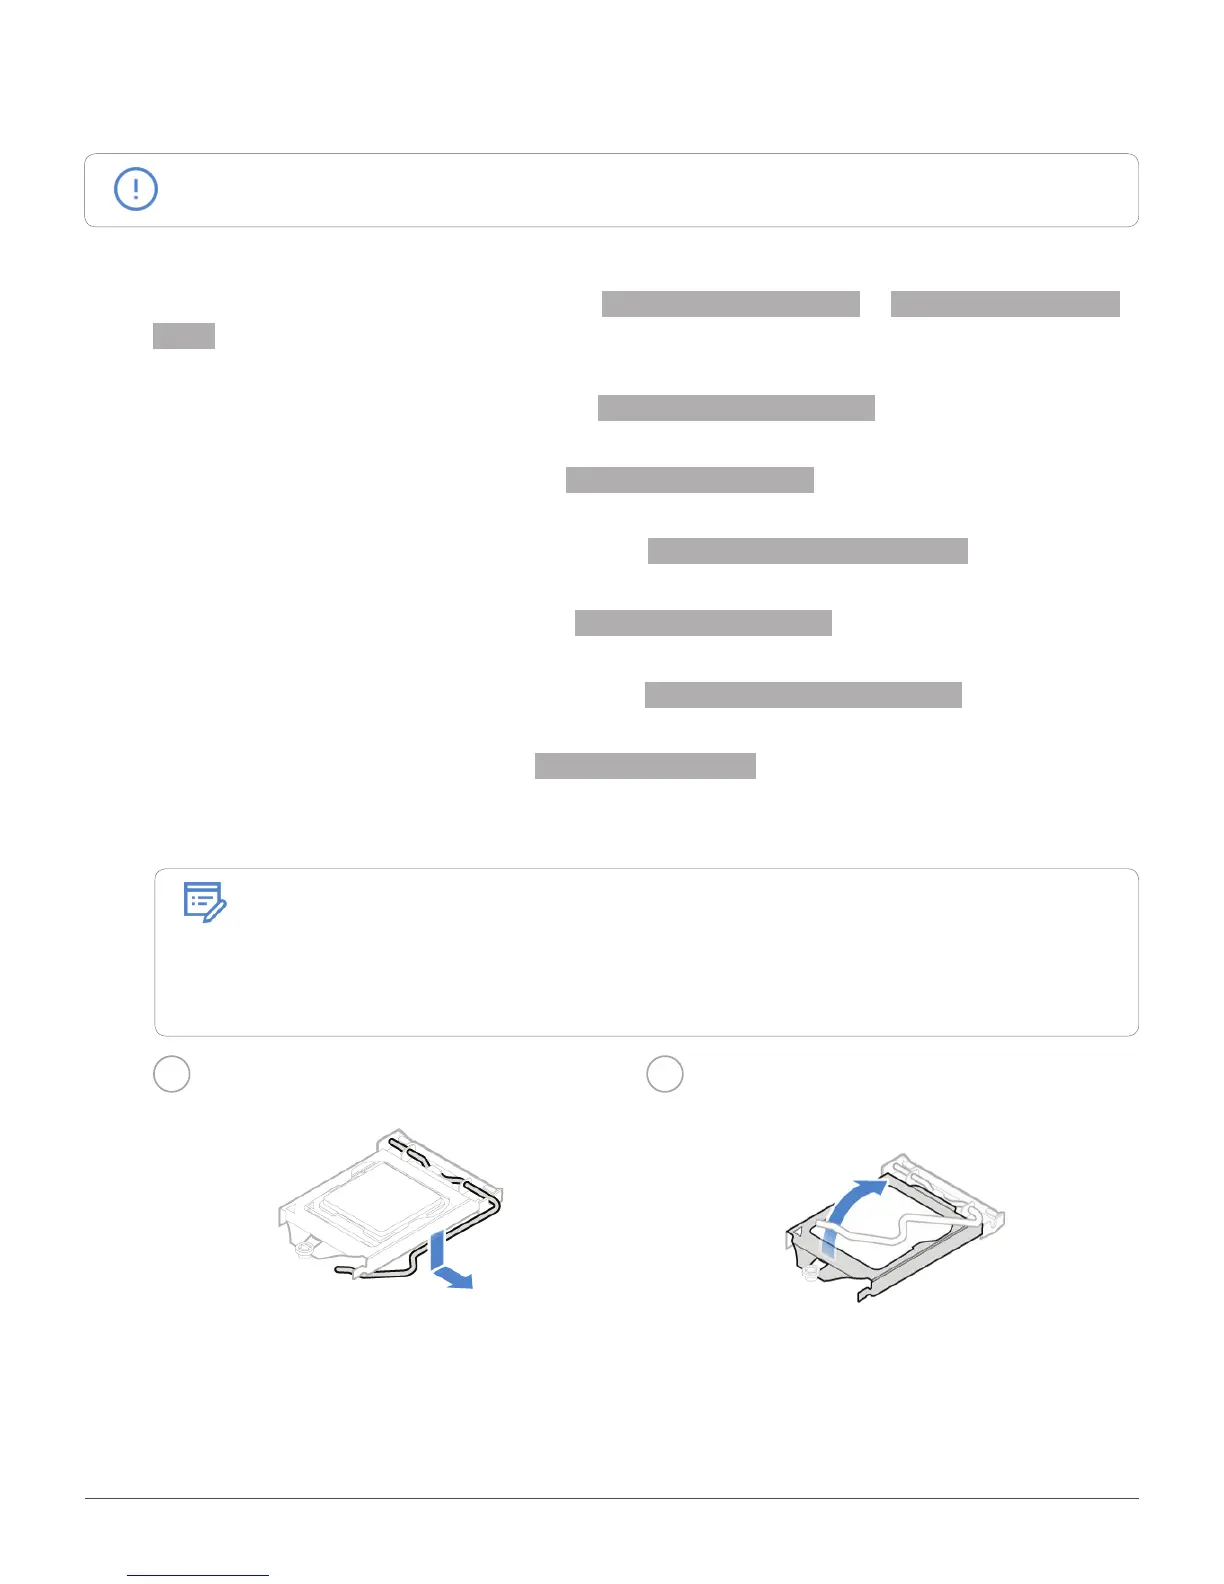
Replace the microprocessor.
Note
• Your microprocessor and socket might look different from the one illustrated.
• Touch only the edges of the microprocessor. Do not touch the gold contacts on
the bottom.
• Do not drop anything onto the microprocessor socket while it is exposed. The
socket pins must be kept as clean as possible.
1 2
 Loading...