© HAAG-STREIT AG, 3098 Koeniz, Switzerland – HS-Doc. no. 1500.7220055.04100 – 10. Edition / 2015 – 06
4.3 Optional T-Cone
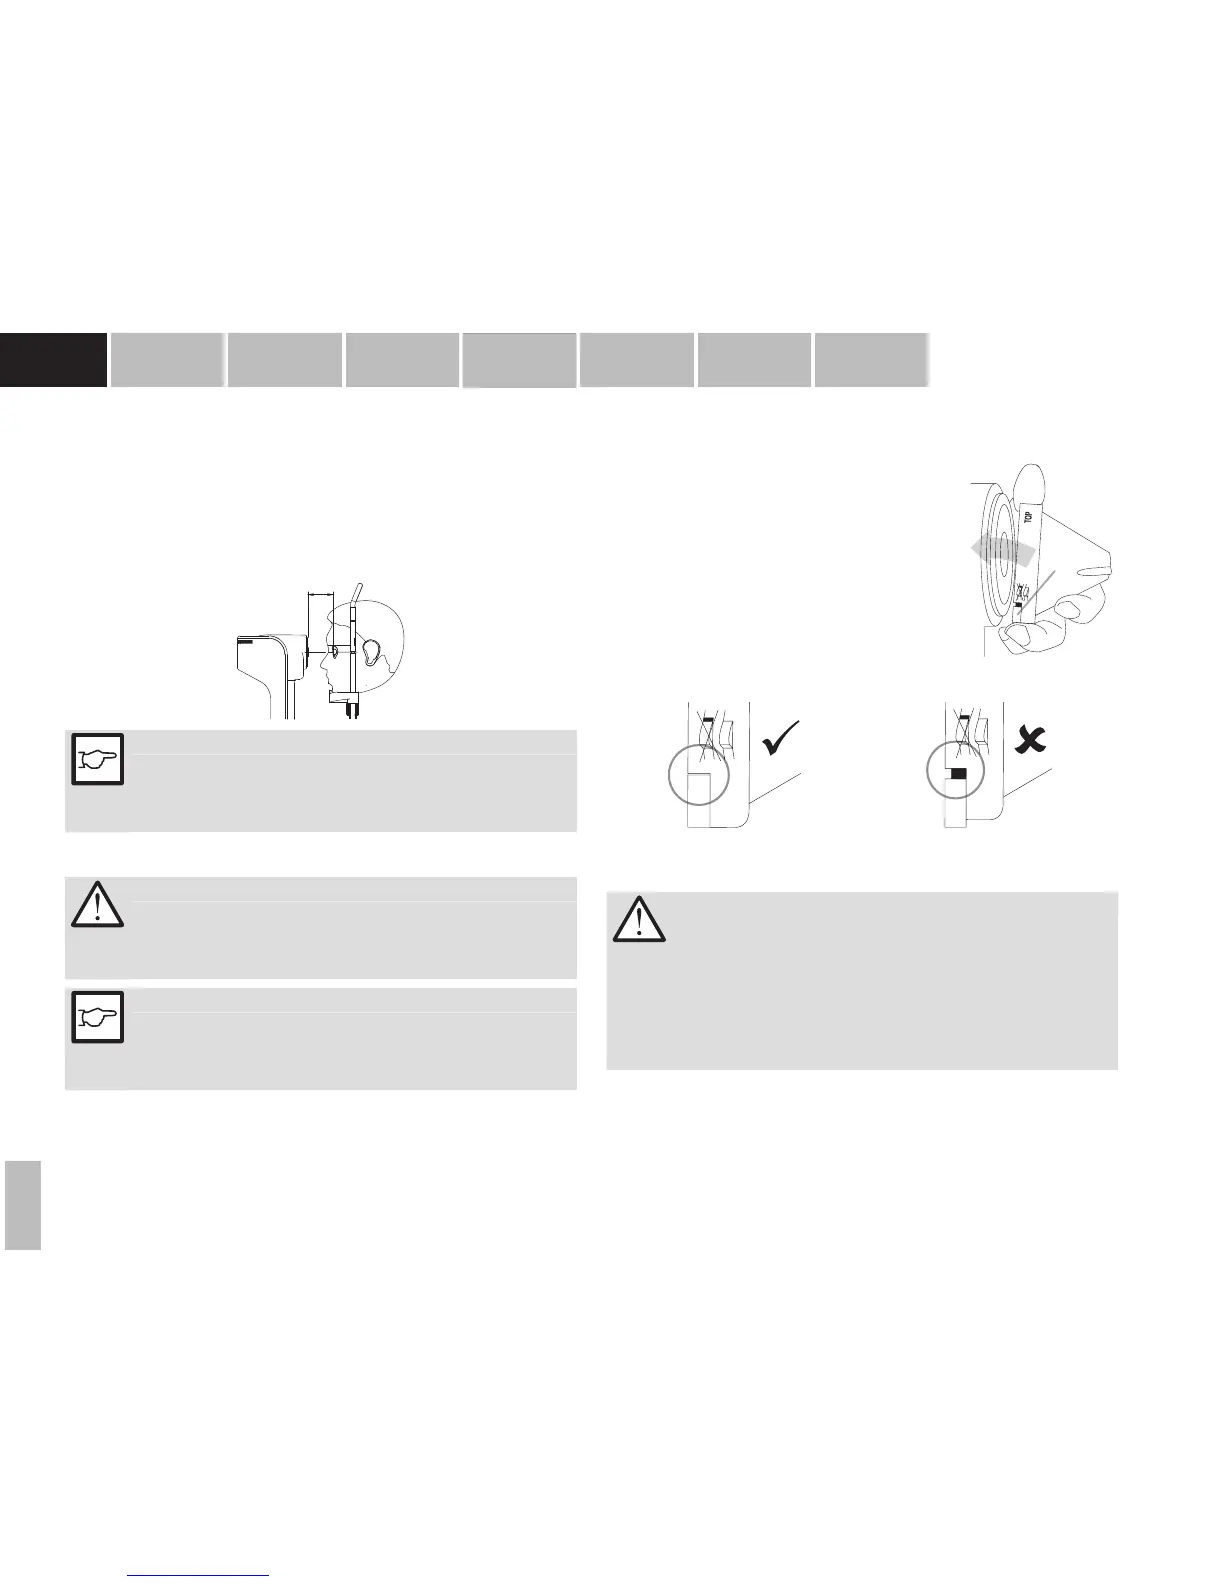
4.3.1 Fitting the optional T-Cone
• Remove the dust cover from the storage packaging.
• Hold the T‑Cone with the locking clip (17) pressed down
next to the metal ring and t it on the front ring of the Len-
star as shown on the illustration.
• Keep the locking clip depressed so that the T‑Cone lies
ush with the front ring. Make sure that "TOP" on the metal
ring of the T‑Cone is at the top. The T‑Cone is held in place
on the front ring of the Lenstar LS 900 biometer by strong
magnets.
TO
P
17
• Ensure that the red safety mark is no longer visible on the locking clip. If the red safety
mark is still visible, remove the T-Cone and t it again.
The T-Cone is tted correctly. The red
safety mark is not visible.
The T-Cone is not tted correctly. The red
safety mark is visible. Please remove the
T-Cone and t it again.
WARNING!
• The T‑Cone can only be used with the Lenstar with which it was calibrat‑
ed. To use the T‑Cone on another Lenstar or to use another T‑Cone on a
Lenstar with an already saved T‑Cone calibration, the calibration must be
performed again.
• The measuring distance from the T‑Cone to the eye (apex) is approx. 6
mm. Depending on the anatomy of the patient, the tip of the T‑Cone may
touch the eyelid or bridge of the nose. To avoid injuries, care must always
be taken when moving the Lenstar with tted T-Cone towards the patient.
4. Operation
4.1 Position of patient during measurement
Positioning of the device is done manually by the user. The patient must be posi‑
tioned in such a way that the distance from the measuring head to the eye is ap‑
prox. 68 mm. A steady head position is promoted by resting the patient’s head in
good contact with the chin rest and forehead band, and by the patient holding on to
the handles supplied. This can positively in uence adjustment time and measuring
accuracy. The patient should sit up as straight as possible.
68 m m
NOTE!
In order to get the best possible results, the patient should be request‑
ed to keep the eye as wide open as possible during the measurement
and to focus on the measuring beam. Blinking is permitted, but should
be kept to a minimum.
4.2 Measuring with LENSTAR APS (optional)
WARNING!
The LENSTAR APS (Automated Positioning System) device moves
autonomously during the automated measurement process. To avoid
trapping ngers, do not touch any moving parts during the measure-
ment.
NOTE!
• Make sure that the LENSTAR APS is free to move in any direction for op‑
timum performance of the automated measurement process.
• Before using the LENSTAR APS, ensure that the cross slide xation
screw is unlocked.
01-IFU_LS900-7220055-04100_eng.indd 10 17.06.2015 10:56:02