Do you have a question about the Leviton ODS15-GDW and is the answer not in the manual?
Covers requirements like wall box compatibility, multi-gang support, and load control.
Provides guidance on sensor placement to avoid false triggers from temperature sources.
Step-by-step guide for wiring the sensor, including neutral wire considerations and mounting.
Details how to pair and configure the sensor using the Leviton Smart Sensor App.
Explains how to configure the sensor using simple push-button commands without an app.
Details the Auto ON/Auto OFF and Manual ON/Auto OFF modes and their behavior.
Provides solutions for common problems like sensor not triggering or lights staying on.
Explains the meaning of LED indicator lights on the sensor during operation and setup.
States compliance with FCC rules and Canadian ICES standards for radio frequency emissions.
Outlines the warranty terms, exclusions, and limitations for the product.
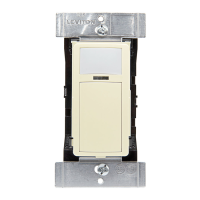
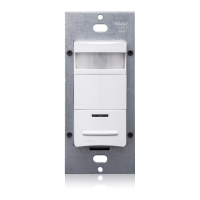
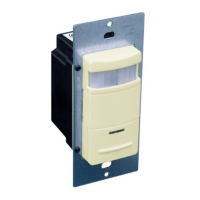
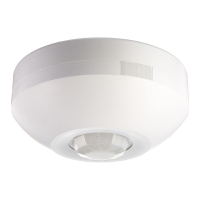
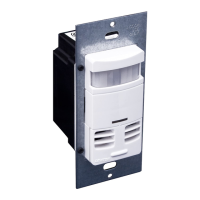
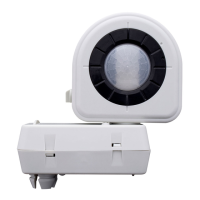
The Leviton® Cat. No. ODS15-GD, Wall Switch Occupancy Sensor, is a sophisticated device designed to automate lighting control based on occupancy. It leverages Passive Infrared (PIR) detection technology to monitor a room for human presence through a segmented lens. This specialized lens divides the sensor's field-of-view into distinct zones. When a person moves into or out of one of these zones, the sensor detects the motion and subsequently switches the lights ON. The lights will remain illuminated as long as an occupant continues to move within the sensor's detection zones.
The ODS15-GD offers a versatile 180° field-of-view, covering a maximum area of approximately 1100 square feet. Its sensing capabilities extend up to 30-40 feet directly in front of the sensor and 15-20 feet on either side. The sensor distinguishes between "minor motion" and "major motion." Minor motion, which involves small body movements, is detected in a specific zone, ensuring the lights stay ON even with subtle activity. The broader "major motion" zone requires larger movements for detection, exhibiting a slightly lesser degree of sensitivity.
One of the key features of the ODS15-GD is its configurability. Users can adjust settings using the Leviton Smart Sensor App, available for smartphones and other Bluetooth™ enabled Android™ or iOS devices. This app allows for comprehensive customization of the sensor's behavior. For simpler adjustments, the device also supports push-button programming, offering several popular pre-configured options.
The sensor is equipped with a photocell, enabling daylighting hold-off. This feature, programmable via the Leviton Smart Sensor App, prevents lights from turning on if there is sufficient natural light in the room, contributing to energy savings. The ODS15-GD is designed for flexible installation, capable of operating with or without a Neutral wire, making it suitable for a wide range of electrical setups.
For optimal performance, careful consideration should be given to the installation location. The sensor's PIR technology is sensitive to heat emitted by the human body and is most effective at sensing motion across its field-of-view, rather than directly towards or away from it. It's crucial to avoid mounting the device near climate control sources such as radiators, air exchanges, or air conditioners, as hot or cold drafts can mimic body motion and trigger the sensor. A recommended distance of at least 6 feet from such sources is advised. Similarly, mounting the sensor directly under large wattage light sources (over 100W incandescent) should be avoided, as the heat they generate and temperature changes during switching can interfere with detection. If closer mounting is necessary, using lower wattage bulbs overhead is recommended.
The ODS15-GD is designed to be fully functional right out of the box with default settings. However, users can easily customize its operation. Through the Leviton Smart Sensor App, users can set the operating mode to either Auto ON / Auto OFF (the default) or Manual ON / Auto OFF. In Auto ON / Auto OFF mode, lights automatically turn ON upon occupancy detection and OFF after a set timeout when no occupancy is detected. In Manual ON / Auto OFF mode, lights only turn ON when the push-button switch is pressed, and then turn OFF automatically after a timeout if no motion is detected. This mode is particularly useful for presentations or film screenings where manual control is preferred.
The app also allows for adjustment of the sensor's sensitivity, which dictates the field-of-view coverage area. This can be increased or decreased to suit the room size, with 100% sensitivity recommended for larger spaces up to 1100 sq ft. Timeout durations, which determine how long lights remain ON after the last detected occupancy, can also be customized.
Beyond basic occupancy detection, the ODS15-GD includes advanced features. Users can activate and configure a night light, choosing a custom color for its illumination. Daylighting settings, including target light levels, can be precisely adjusted to optimize energy efficiency. For enhanced security, a security code can be set to lock the configuration, preventing unauthorized changes. The Leviton Smart Sensor App provides access to these and many other programming options.
For installers without a Bluetooth-enabled device, popular preset product configurations can be applied using simple push-button commands directly on the sensor. This involves removing the front cover, pressing specific buttons for a set duration, and observing LED blinks to navigate and select desired settings. The locator light, which is ON when the switch power is OFF, also serves as a visual indicator during programming.
Maintenance features include a Bluetooth Reset option, which resets any security settings while preserving lighting and mode settings. This is initiated by pressing and holding the switch button for a specific duration until the PIR lens flashes RED, indicating the reset is complete and any password has been cleared.
The device also provides clear indicator light descriptions, with different LED colors and blinking patterns signifying various states such as PIR detection, Bluetooth pairing mode, installation/test mode, manual configuration mode, identify mode, and daylighting hold-off calibration. These visual cues assist in setup, troubleshooting, and understanding the sensor's current operational status.
In summary, the Leviton ODS15-GD Wall Switch Occupancy Sensor is a versatile and intelligent lighting control solution, offering advanced PIR detection, extensive configurability via a smartphone app or push-button programming, energy-saving features like daylighting hold-off, and flexible installation options, all designed to enhance comfort and efficiency in various indoor environments.
| Type | Occupancy Sensor |
|---|---|
| Voltage | 120 VAC |
| Sensor Technology | Passive Infrared (PIR) |
| Color | White |
| Coverage | 180 degrees |
| Material | Plastic |
| Mounting Type | Wall Mount |
| Brand | Leviton |
| Coverage Area | 900 sq. ft. |
| Mounting | Wall |
| Product Dimensions | 4.5 x 2.5 inches |