Do you have a question about the Leviton ODS15-ID and is the answer not in the manual?
Overview of the Leviton ODS15-ID Wall Switch Occupancy Sensor's features, detection technology, and modes.
Guidelines for installation, including wall box compatibility, multi-gang support, and faceplate options.
Step-by-step wiring and mounting instructions for the occupancy sensor.
Visual representation of the sensor's horizontal and vertical detection coverage areas.
Recommendations for sensor placement to ensure optimal detection and avoid false triggers from heat sources.
Explanation of Auto ON/Auto OFF and Manual ON/Auto OFF modes using the push-button switch.
Guide to configuring settings via the Leviton Smart Sensor App or push-button commands.
Steps for pairing the device with the Leviton Smart Sensor App and initial setup.
Instructions for configuring the sensor using button presses without the app.
Detailed electrical and operational specifications for the ODS15-ID sensor.
Explanation of the LED indicator lights and their meanings during operation and setup.
Common issues and solutions for sensor performance and operation.
Information on the 5-year limited warranty and technical assistance contact details.
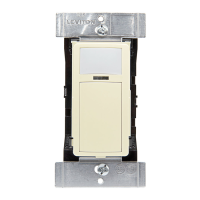
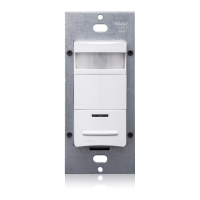
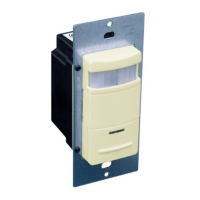
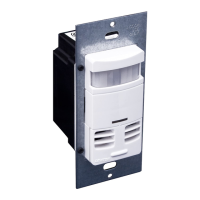
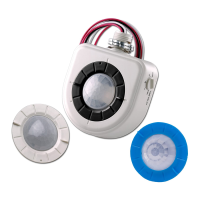
The Leviton Cat. No. ODS15-ID Wall Switch Occupancy Sensor utilizes Passive Infrared (PIR) detection technology to monitor a room for occupancy through a segmented lens. This specialized lens divides the field of view into sensor zones. When a person passes into or out of a sensor zone, the sensor detects motion and switches the lights ON. The lights will remain ON as long as there is an occupant moving through the sensor zones. The ODS15-ID can also be programmed to vacancy mode (Manual ON/Auto OFF) for installations where manual ON switching is required for Title 24 applications.
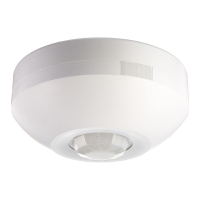
The ODS15-ID provides a 180° field of view with a maximum coverage area of approximately 1100 square feet. The maximum sensing distance in front of the sensor is 30-40 feet, and 15-20 feet on either side. A "minor motion" zone detects small body movements and allows the lights to stay ON even though a person may not be moving or walking around the room. The remainder of the field of view, the "major motion" zone, exhibits a lesser degree of sensitivity and requires larger movements. Simple configuration can also be applied using push-button setup for several popular preconfigured options. The ODS15-ID is also equipped with a photocell for daylighting which is programmable using the Leviton Smart Sensor App.
For optimal performance, the ODS15-ID sensor lens establishes dozens of zones of detection. The sensor is sensitive to the heat emitted by the human body. In order to trigger the sensor, the source of heat must move from one zone of detection to another. The device is most effective in sensing motion across its field of view, and less effective sensing motion towards or away from its field of view. Keep this in mind when selecting the installation location. Occupancy sensors respond to rapid changes in temperature, so care should be taken NOT to mount the device near a climate control source (i.e., radiators, air exchanges, and air conditioners). Hot or cold drafts will look like body motion to the device and will trigger it if the unit is mounted too close. It is recommended to mount the occupancy sensor at least 6 ft away from a climate control source. In addition, it is also recommended NOT to mount the occupancy sensor directly under a large light source. Large wattage bulbs (greater than 100W incandescent) give off a lot of heat and switching the bulb causes a temperature change that can be detected by the device. Mount the occupancy sensor at least 6 ft away from large bulbs. If it is necessary to mount the device closer, lower the wattage of the bulb directly overhead.
The ODS15-ID installs into standard single gang wall boxes and supports multi-gang installations. Ivory, light almond, black, red, and gray faceplates are available with a color change kit (sold separately). A Decora® wallplate is not included. The device controls lighting loads and plug load control up to 15A.
The ODS15-ID has a push button switch that will toggle the lights ON or OFF. When mode is set to Auto ON / Auto OFF, the lights will automatically turn ON when occupancy is detected and will turn OFF automatically after occupancy is no longer detected and the timeout has expired. If mode is set to Manual ON / Auto OFF, the lights will only turn ON when the push button switch is pressed; the lights will turn OFF automatically after occupancy is no longer detected and the timeout has expired. If the lights are ON, the lights can be turned OFF when the button is pressed. The lights will stay OFF (regardless of motion detected) until the timeout expires. After the timeout expires, the lights will turn ON when the next motion is detected. This is useful for slide or film presentations. The Motion Indicator light will blink RED for 1 second each time motion is detected. In Manual ON mode, the button must be pressed to turn the lights ON. In the absence of motion, the unit will time out and turn the lights OFF.
The ODS15-ID Sensor is designed to work out of the box in default settings. Changes to these settings and additional product configuration can be performed using the Leviton Smart Sensor App, downloadable from Google Play™ or the Apple App Store®, using any Bluetooth™ enabled Android™ or iOS Device. To pair to the device using the Leviton Smart Sensor App, press and hold the ON/OFF button for 2-5 seconds; when the light behind the PIR lens blinks BLUE, release the button. Open the Leviton Smart Sensor App and connect to the device. The device can also be found by scanning for nearby devices; devices can be identified in the app to confirm you are connected to the right sensor.
The Leviton Smart Sensor App can be used to:
If the installer does not have access to a Bluetooth enabled Android or iOS Device, popular preset product configuration can also be made using simple push button commands. If the wall plate is attached, remove it first. With the wallplate removed, pinch sides of sensor near bottom tabs to release front cover of sensor. With the front faceplate of the sensor removed, push both buttons on front of sensor simultaneously for 10-15 seconds (note: after 5 seconds, a light will blink BLUE and then alternate between BLUE and RED) and release when the Locator Light is blinking GREEN. Push the bottom button to move to the next automatic setting using the table below as a guide. When at the desired setting, press and hold the bottom button again for 5 seconds (until the GREEN LOCATOR light turns ON), when the button is released, the light will flash the number of times as the setting selected; the sensor is now saved in that configuration. The front cover can now be reattached. Insert the top tabs and push in bottom tabs to attach.
The ODS15-ID is equipped with a photocell for daylighting and also has a built in night light that can be turned ON and configured using the Leviton Smart Sensor App.
To perform a Bluetooth Reset, which resets any security settings but preserves lighting and mode settings, push the button on the switch for approximately 20-25 seconds until the light behind the PIR lens is flashing RED. NOTE: after 5 seconds, the light behind the PIR lens will blink BLUE and then alternate between BLUE and RED; at 10-15 seconds it will then blink GREEN. When the light flashes RED, release the button. The device will reset and turn off when complete. When the device turns back on it will have no password set.
Troubleshooting tips include:
| Type | Occupancy Sensor |
|---|---|
| Voltage | 120 VAC |
| Sensor Type | Passive Infrared (PIR) |
| Mounting Type | Wall Mount |
| Color | White |
| Technology | Passive Infrared |
| Product Type | Occupancy Sensor |
| Material | Plastic |
| Weather Rating | Indoor Use Only |
| UL Listed | Yes |
| Coverage | 180 degrees |
| Compatibility | Incandescent, LED |
| Application | Commercial, Residential |
| Coverage Area | 1000 sq ft |