Touch To
3 Held Jobs Display all current held jobs.
4 USB View, select, or print photos and documents
from a flash drive.
Note: This icon appears only when you
return to the home screen while a
memory card or flash drive is connected to
the printer.
5 Menus Access printer menus.
Note: These menus are available only
when the printer is in Ready state.
6 Status message
bar
• Show the current printer status such as
Ready or Busy.
• Show the status of printer supplies.
• Show intervention messages and the
instructions on how to clear them.
7 Status/Supplies
• Show a printer warning or error
message whenever the printer requires
intervention to continue processing.
• View more information on the printer
warning or message, and on how to
clear it.
8 Tips View a context‑sensitive help information.
These may also appear on the home screen:
Touch To
Search Held Jobs Search current held jobs.
Jobs by user Access print jobs saved by user.
Profiles and Apps Access profiles and applications.
Features
Feature Description
Attendance message
alert
If an attendance message affects a function,
then this icon appears and the red indicator light
blinks.
Feature Description
Warning
If an error condition occurs, then this icon
appears.
Printer IP address
Example:
123.123.123.12
3
The IP address of your printer is located at the
top left corner of the home screen. You can use
the IP address when accessing the Embedded
Web Server to view and remotely configure
printer settings.
Using the touch-screen buttons
Note: Your home screen may vary, depending on your home screen
customization settings, administrative setup, and active embedded
solutions.
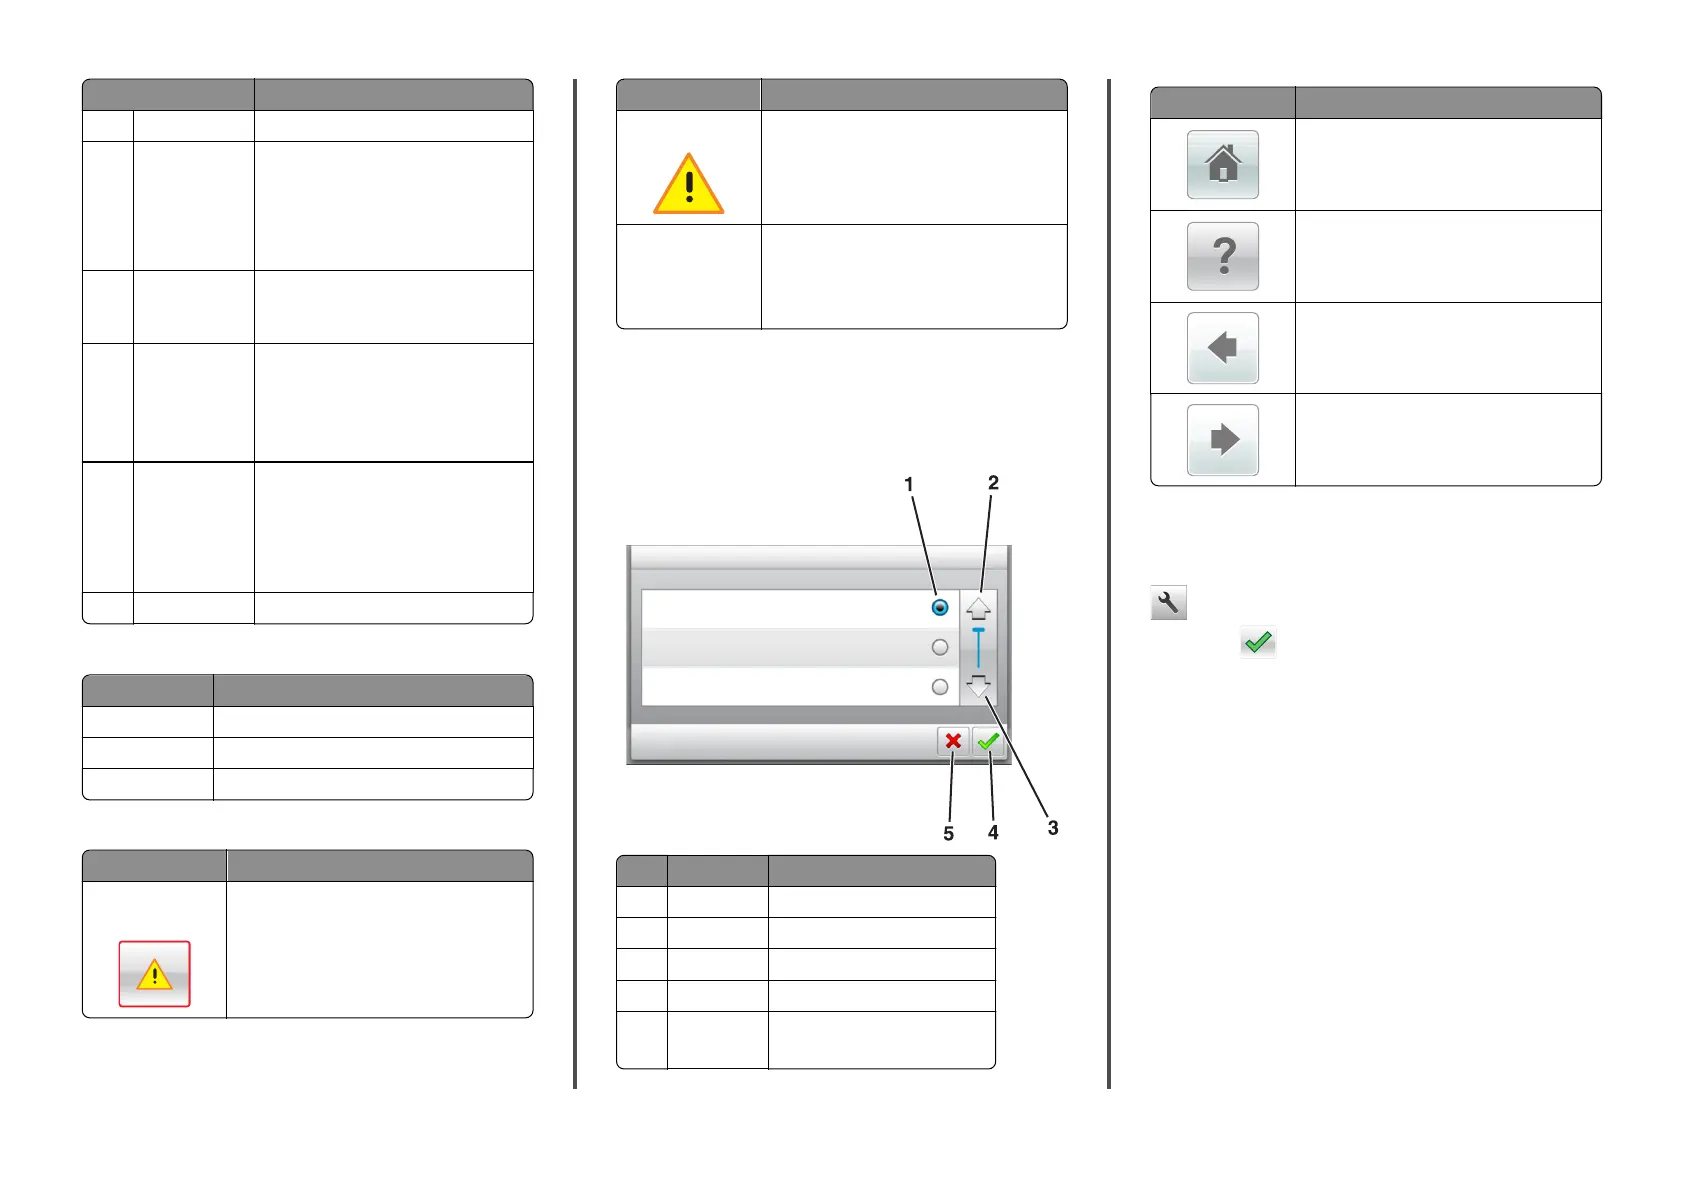
Touch the To
1 Radio button Select or clear an item.
2 Up arrow Scroll up.
3 Down arrow Scroll down.
4 Accept button Save a setting.
5 Cancel button
• Cancel an action or a selection.
• Return to the previous screen.
Touch To
Return to the home screen.
Open a context-sensitive Help dialog on the
printer control panel.
Scroll to the left.
Scroll to the right.
Setting the paper size and type
From the home screen navigate to:
> Paper Menu > Paper Size/Type > select a tray > select the paper
size or type >
Configuring Universal paper settings
The Universal paper size is a user‑defined setting that lets you print on
paper sizes that are not preset in the printer menus.
Notes:
• The smallest supported Universal size is
70 x 127 mm (2.76 x 5 inches) for one‑sided printing and
105 x 148 mm (4.13 x 5.83 inches) for two‑sided (duplex)
printing.
• The largest supported Universal size is 216 x
356 mm (8.5 x 14 inches) for one‑sided and two‑sided printing.
• When printing on paper less than 210 mm (8.3 inches) wide, the
printer may print at a reduced speed after a period of time to
ensure the best print performance.
1 From the home screen, navigate to:
4