Note: Make sure all paper fragments are removed.
6 Insert the standard tray.
7 Do either of the following to clear the message and continue
printing:
• For touch‑screen printer models, touch or Done.
• For non‑touch‑screen printer models, select Next > >
Clear the jam, press OK >
.
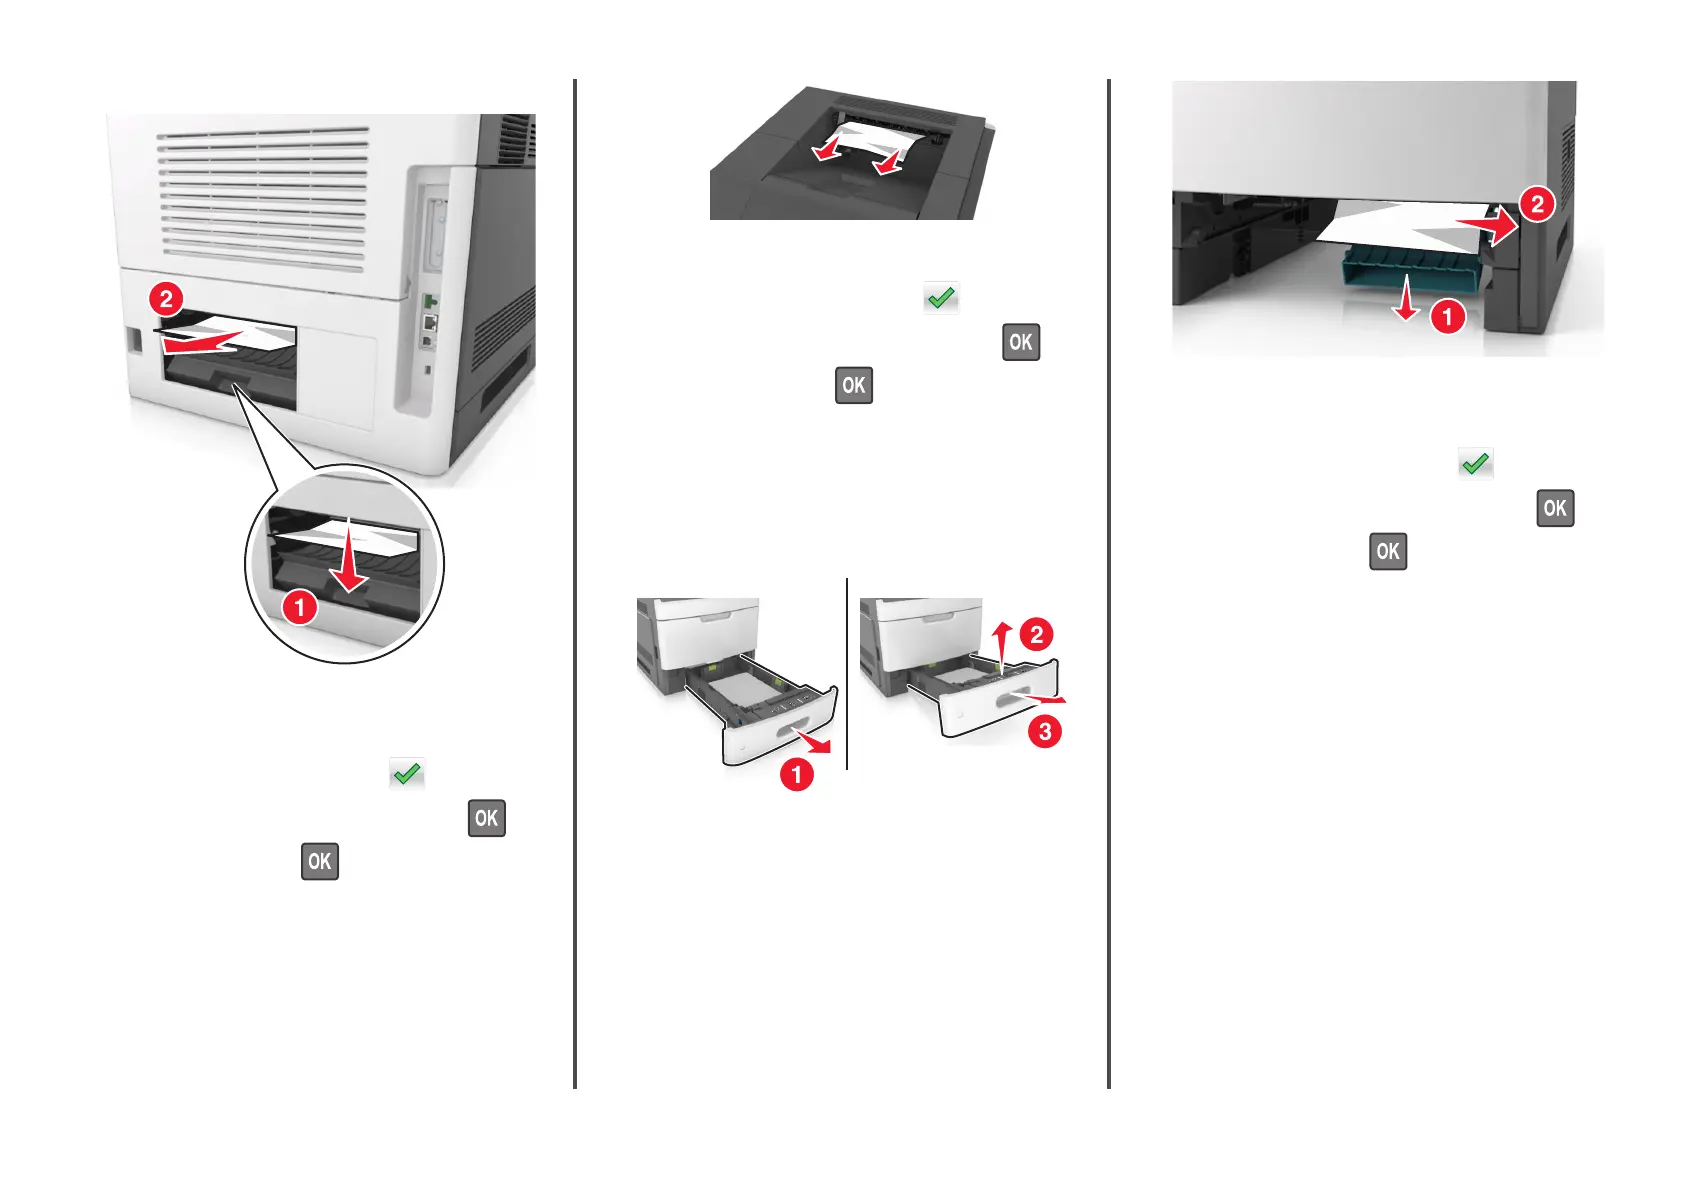
[x]‑page jam, remove standard bin
jam. [203]
1 Firmly grasp the jammed paper on each side, and then gently pull
it out.
Note: Make sure all paper fragments are removed.
2 Do either of the following to clear the message and continue
printing:
• For touch‑screen printer models, touch or Done.
• For non‑touch‑screen printer models, select Next > >
Clear the jam, press OK >
.
[x]‑page jam, remove tray 1 to clear
duplex. [235–239]
1 Pull out the tray completely.
Note: Lift the tray slightly and pull it out.
2 Push down the front duplex flap, then firmly grasp the jammed
paper, and then gently pull the paper to the right and out of the
printer.
Note: Make sure all paper fragments are removed.
3 Insert the tray.
4 Do either of the following to clear the message and continue
printing:
• For touch‑screen printer models, touch or Done.
• For non‑touch‑screen printer models, select Next > >
Clear the jam, press OK >
.
23