Sensor (toner density) removal
1 Remove the left cover. See “Left cover removal (MX71x)” on page 416.
2 Remove the controller board access shield. See “Controller board access shield removal” on page 424.
3 Remove the media tray. See “Media tray removal” on page 538.
4 Remove the front door. See “Front door removal” on page 453.
5 Remove the toner cartridge.
6 Remove the imaging unit.
7 Remove the MPF feeder lift plate. See “MPF feeder lift plate removal” on page 465.
8 Remove the media turn guide. See “Media turn guide removal” on page 462.
9 Remove the media vertical guide. See “Media vertical guide removal” on page 463.
10 Remove the duplex exit diverter. See “Duplex exit diverter removal” on page 451.
11 Remove the inner guide deflector. See “Inner guide deflector removal” on page 455.
12 Remove the media aligner roller. See “Media aligner roller removal” on page 460.
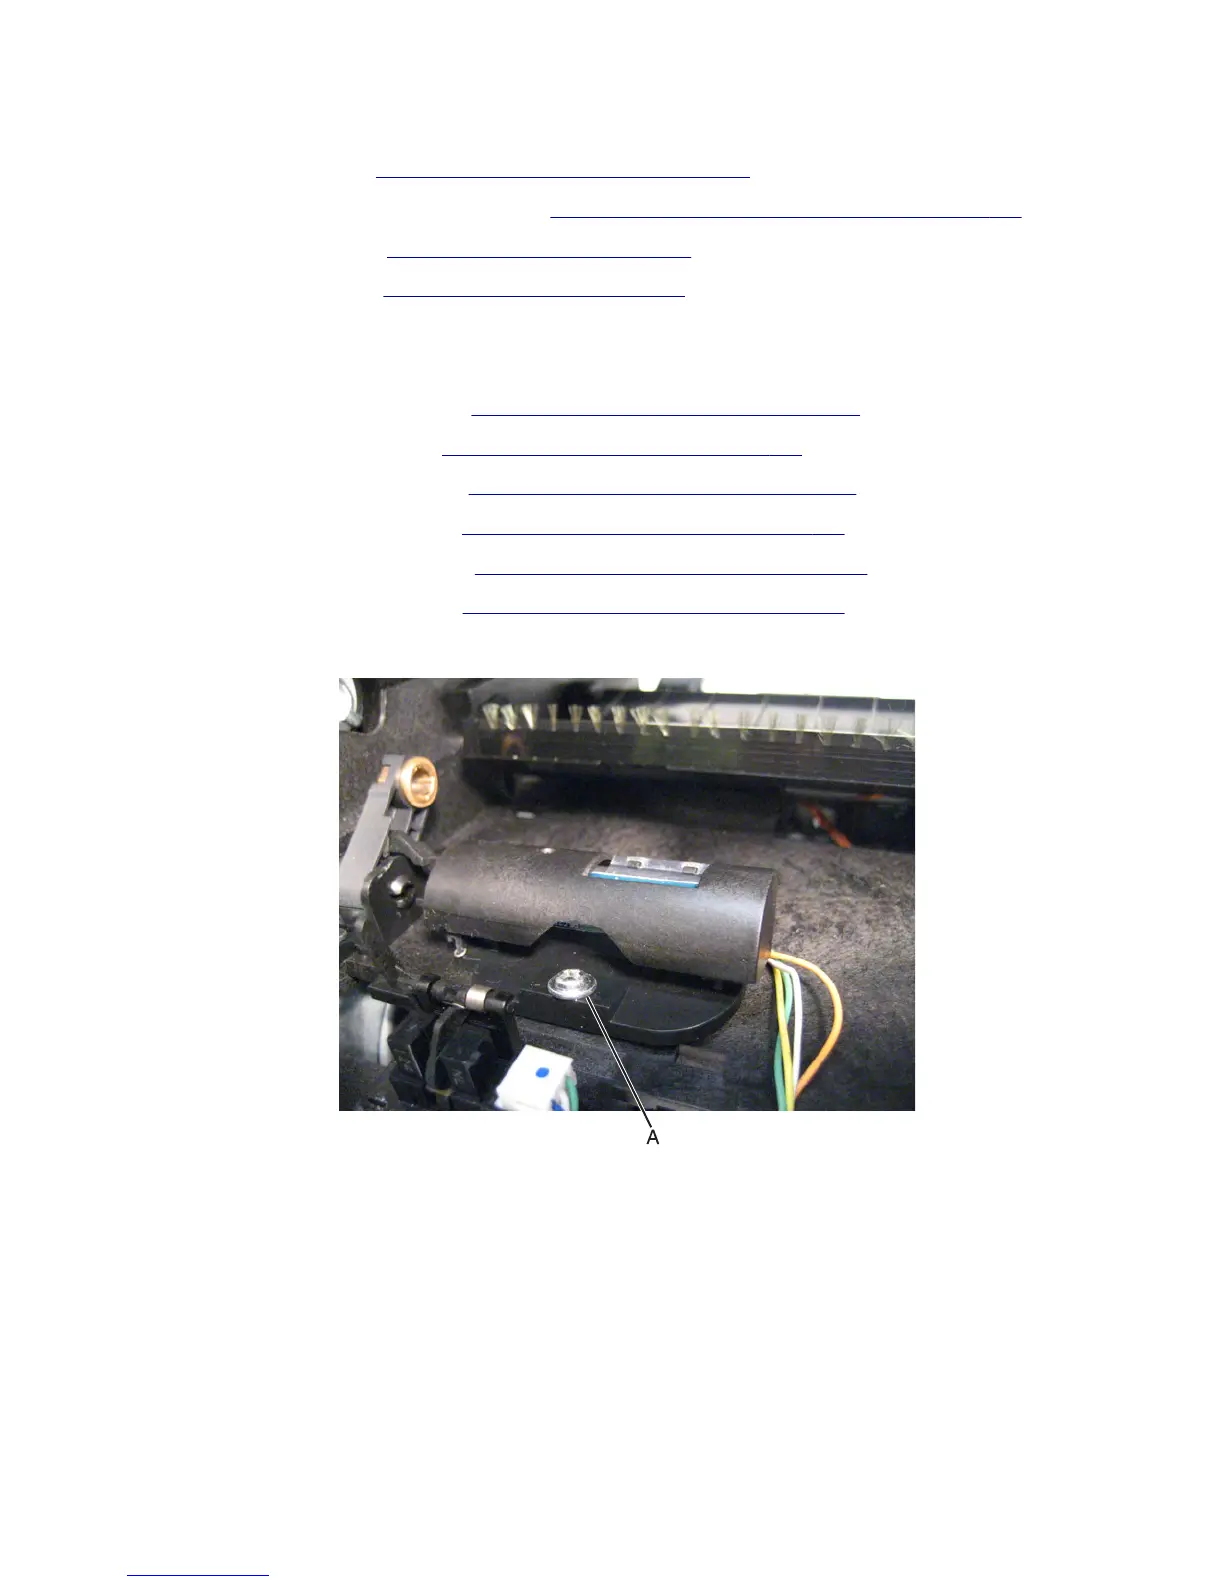
13 Remove the screw (A) securing the sensor (toner density) to the machine.
14 Gently lift and remove the sensor (toner density).
7463
Repair information
475
 Loading...