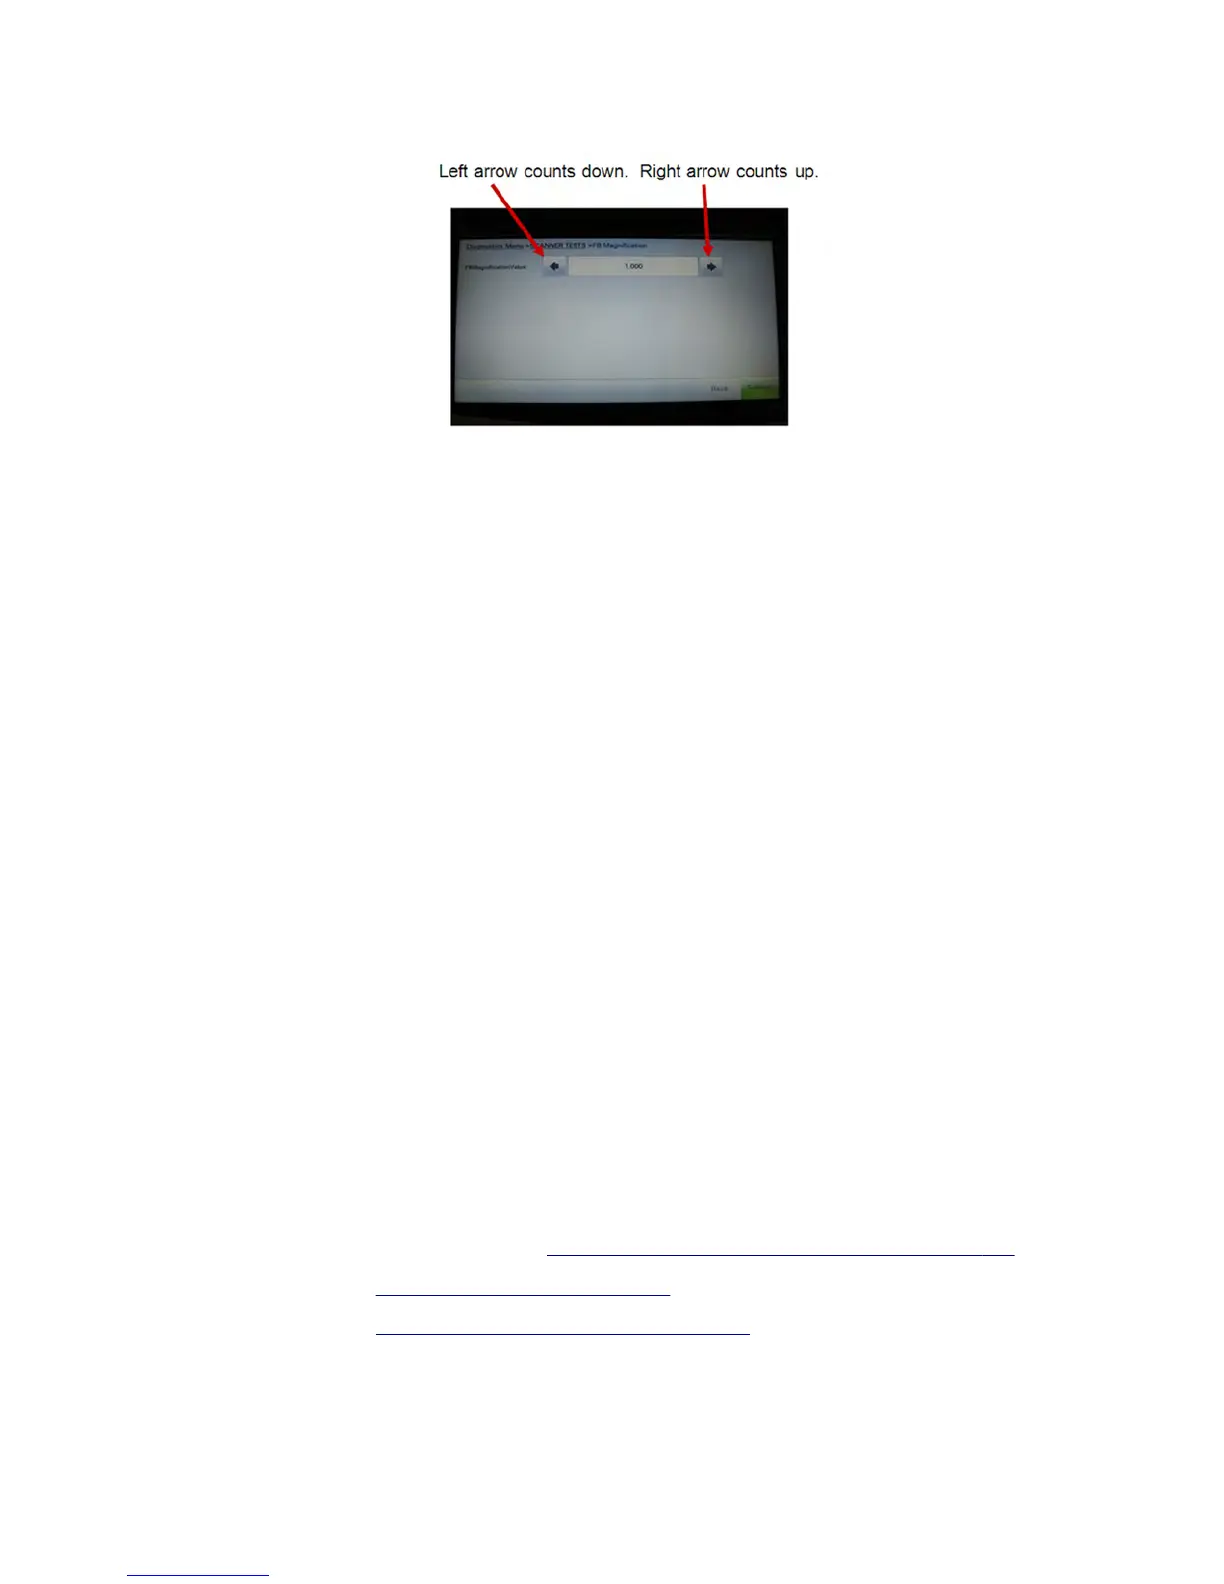
The range of adjustment is from 1.020 to 0.980 in increments of 0.005.
3 Make the needed adjustment and then select Submit to save the settings.
4 Select Back, and then select Scanner Calibration > Copy Quick Test to check the adjustments.
5 Put the test target page in the ADF tray face up, and then select Copy Quick Test to check the flatbed scan
magnification.
6 Check the scan results and see if further adjustment is needed. If they need further adjustment, then go back and
repeat the adjustment process until the correct magnification value is chosen.
7 When done, select Back, and then select Exit Diags to reboot the printer.
Removal procedures
Keep the following tips in mind as you replace parts:
• Some removal procedures require removing cable ties. You must replace cable ties during reassembly to avoid
pinching wires, obstructing the paper path, or restricting mechanical movement.
• Remove the toner cartridges, imaging unit, and media tray before removing other printer parts. The imaging unit
should be carefully set on a clean, smooth, and flat surface. It should also be protected from light while out of the
device.
• Disconnect all external cables from the printer to prevent possible damage during service.
• Unless otherwise stated, reinstall the parts in reverse order of removal.
• When reinstalling a part held with several screws, start all screws before the final tightening.
Left side removals
Column left front cover removal (MX81x)
1 Remove the controller board access cover. See “Controller board access cover removal” on page 423.
2 Remove the rear door. See “Rear door removal” on page 549.
3 Remove the left cover. See “Left cover removal (MX81x)” on page 418.
4 Open the front door.
5 Open the cartridge door.
7463
Repair information
414