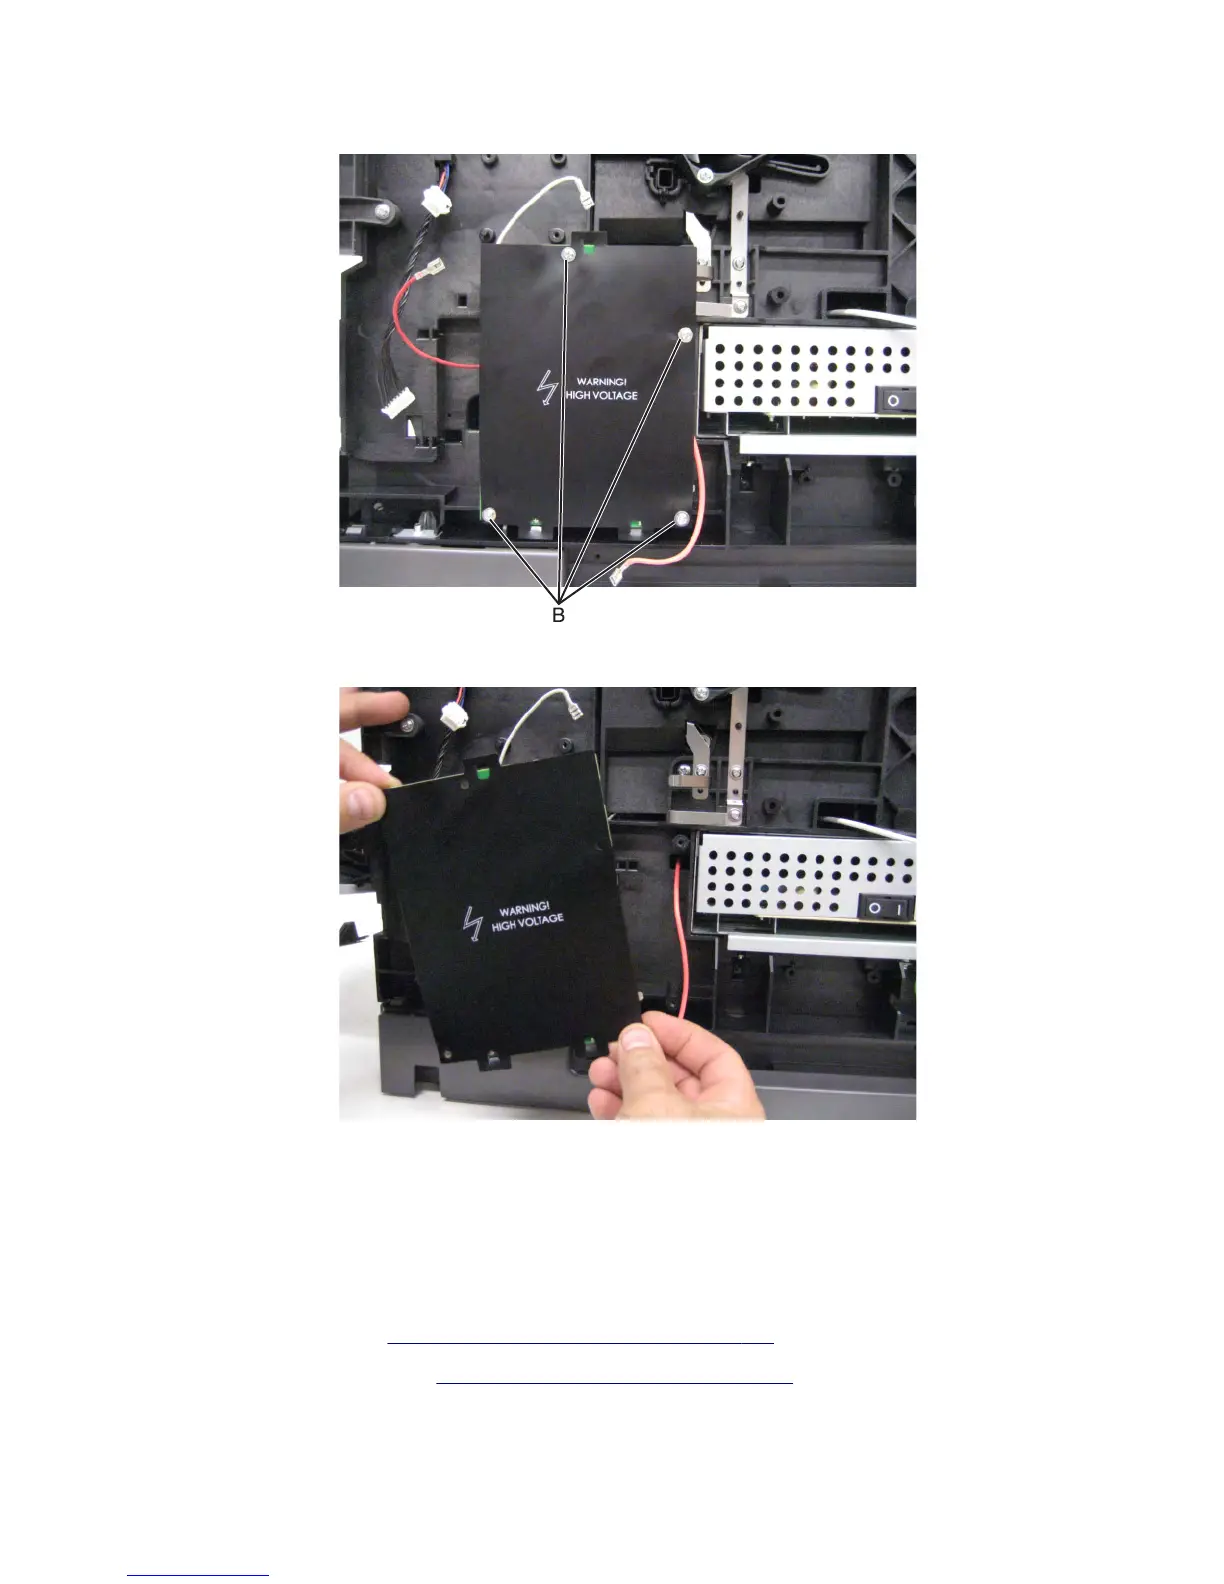
3 Remove the four screws (B) securing the HVPS to the machine.
4 Remove the HVPS.
Installation notes:
• When replacing the HVPS, make sure the plastic insulating shield is properly reattached.
• When replacing the HVPS, make sure the cables are properly reattached.
LVPS removal
1 Remove the right cover. See “Right cover removal (MX71x)” on page 438.
2 Remove the rear lower cover. See “Rear lower cover removal” on page 551.
7463
Repair information
445