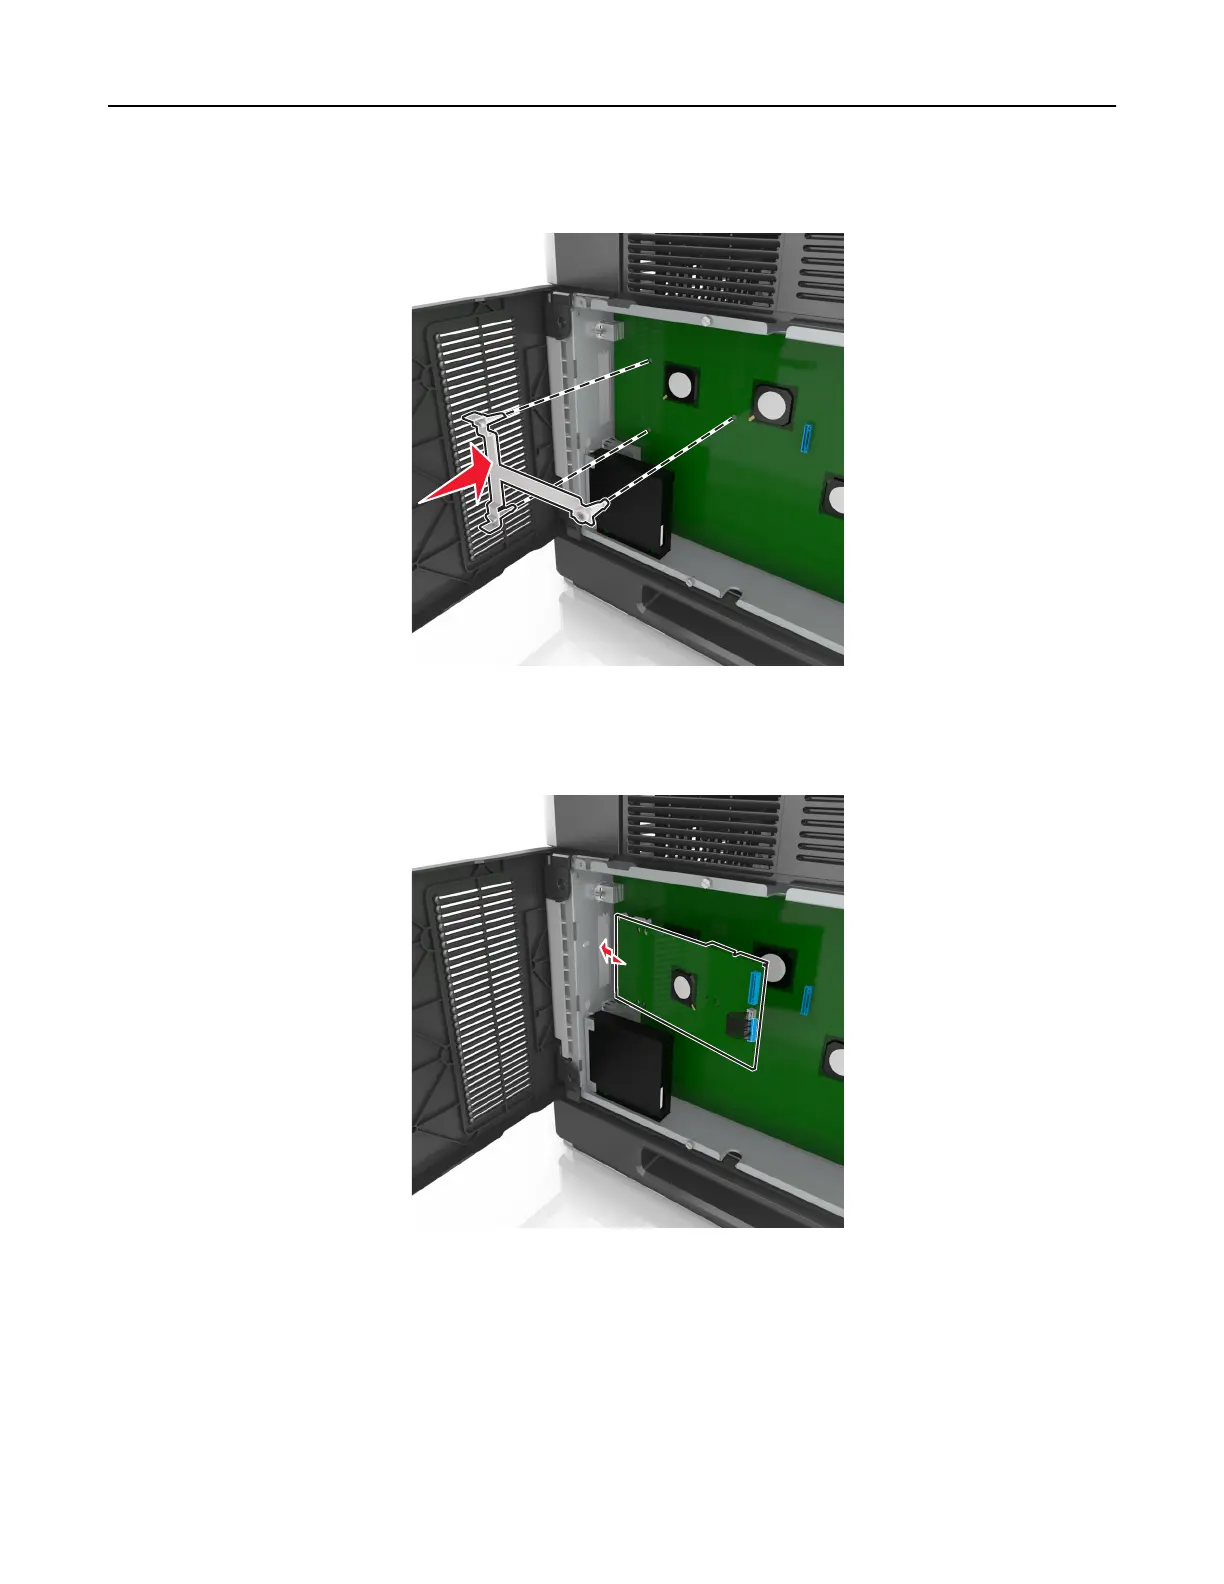
5 Align the posts of the plastic bracket to the holes on the controller board cage, and then press the plastic
bracket on the controller board cage until it clicks into place.
Note: Make sure that the plastic bracket has latched completely, and that the plastic bracket is seated
firmly
on the cage.
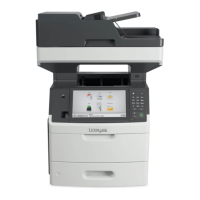
6 Install the ISP on the plastic bracket.
Note: Hold the ISP at an angle over the plastic bracket so that any overhanging connectors will pass
through the ISP opening in the cage.
Additional printer setup 37