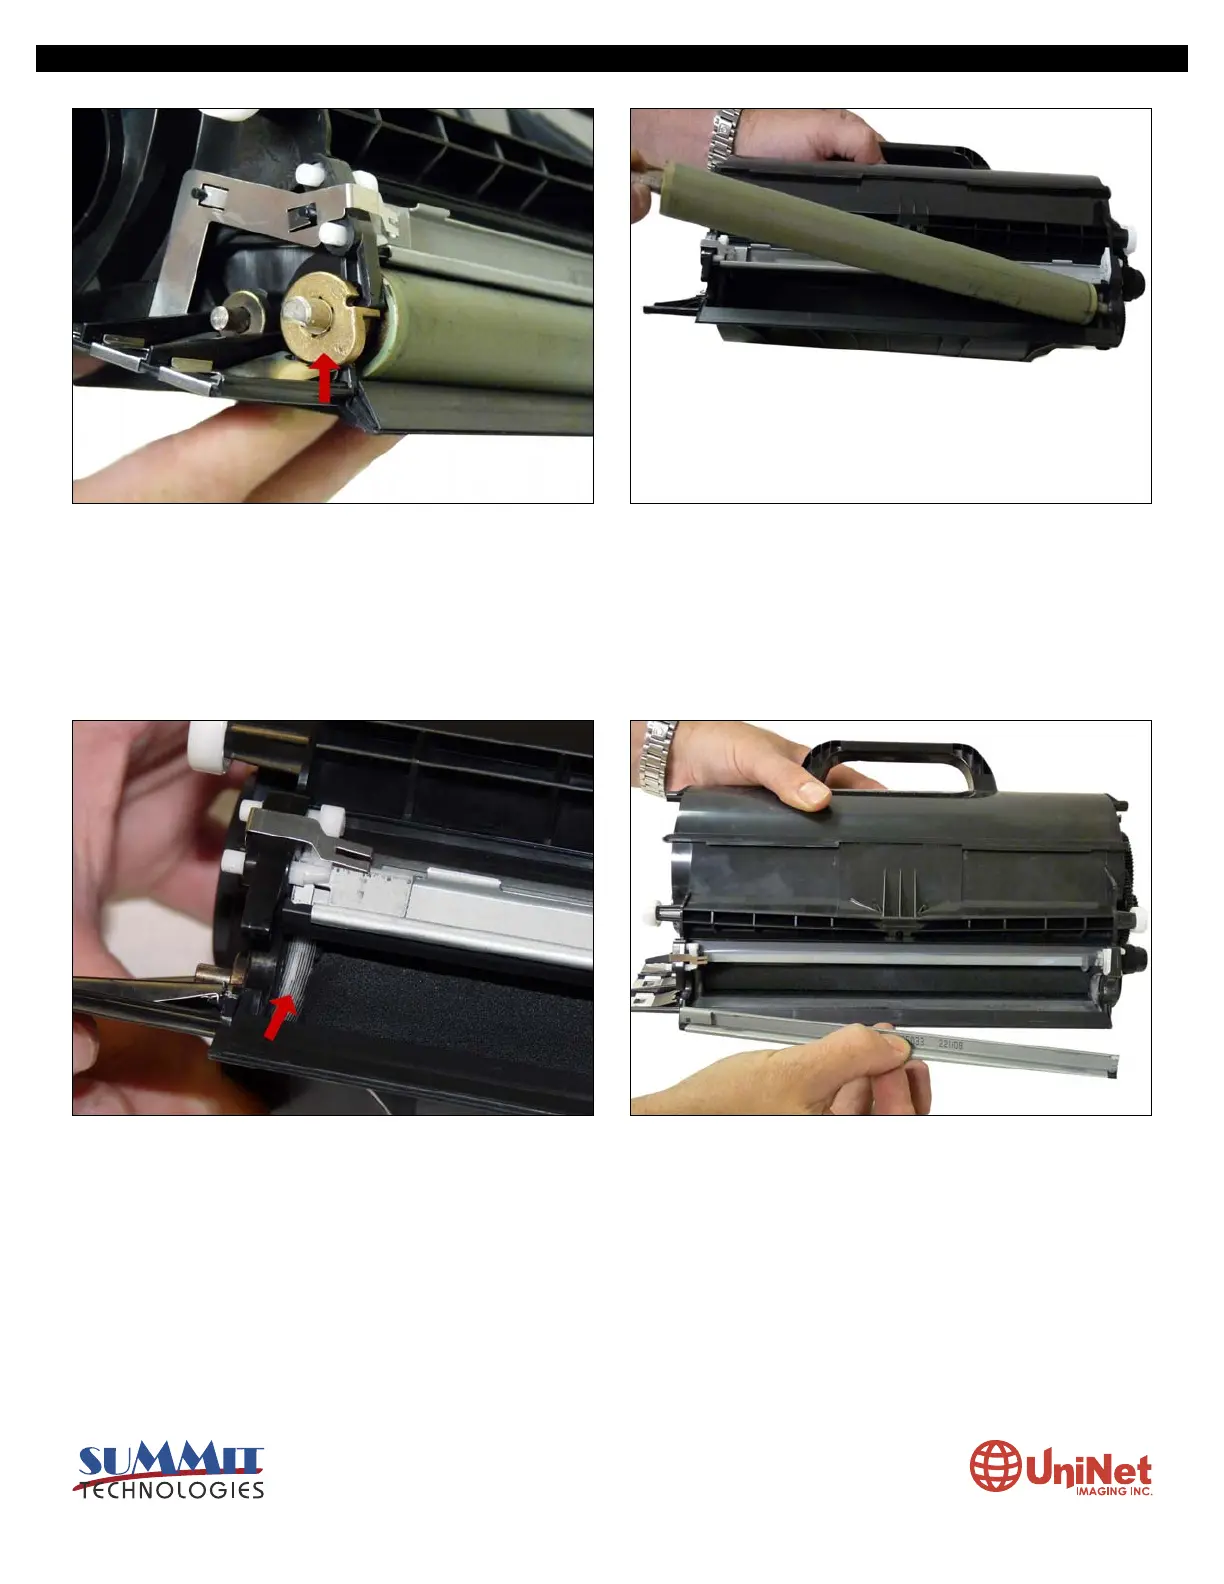
18. On the left (fill plug) side of the static roller there is a small
metal bushing. Press down on the metal spring, take a small
screwdriver, and pry the bushing up so that the tab on the
bushing is facing up. This will release the bushing and devel-
oper roller.
19. Remove the developer roller. Note that there are no spac-
ers on these cartridges. NOTE: Always remove the doctor blade
spring before removing the developer roller. Failure to do this
will cause the doctor blade to slide down from its original posi-
tion and possibly ruin the alignment. Vacuum/blow the toner
hopper clean.
20. With a cotton swab dipped in alcohol, clean the developer
roller seals located on either end of the static roller section.
These seals are made of a white plastic. Also clean the electri-
cal contact that touches the developer roller shaft. Carefully
vacuum or blow off the developer roller. Be careful not to touch
the roller with your hands, or to damage the roller in any way.
21. Remove the doctor blade by sliding the blade down out of
the track.
LEXMARK T650 SERIES • TONER CARTRIDGE REMANUFACTURING INSTRUCTIONS
3232 West El Segundo Blvd., Hawthorne, California 90250 USA • Ph +1 424 675 3300 • Fx +1 424 675 3400 • techsupport@uninetimaging.com • www.uninetimaging.com
© 2009 UniNet Imaging Inc. All trademark names and artwork are property of their respective owners. Product brand names mentioned are intended to show compatibility only. UniNet Imaging does not warrant downloaded information.

 Loading...


