17
16 BACKLIGHT
• When operating with the power cable, there are 3 levels of brightness for
adjustment.
• Press 【 Light/Snooze】to adjust backlight.
• When operating on batteries only, the backlight will come on shortly (about
10 seconds) when 【 Light/Snooze】is pressed.
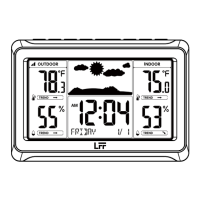
17 LOW BATTERY INDICATION
• Low battery icon by outdoor humidity, replace batteries in the sensors.
• Low battery icon by indoor humidity, replace batteries in the weather station.
19 IMPORTANT PLACEMENT GUIDELINES
• Mounting under an eave or deck rail works well.
• Mount the remote sensor on the North side where to prevent sun from causing
incorrect readings
• Be sure the outdoor sensor is mounted vertically to drain moisture.
• Mount at least 6 feet in the air for a strong RF (radio frequency) signal.
• To prevent wireless interference, place units at least 3 ft (0.9 m) away from
electronic devices (TV, computer, microwave, radio, etc.).
• To maximize atomic signal reception, place the weather station away from large
Note: When there is low battery icon indication, it means the used battery level is
low, it may affect normal functions. Please replace new alkaline batteries soon in
order to keep normal function.
1
1
18 FACTORY RESTART
If there is malfunction, the Factory Restart is a great way to return your station to
"out of the box" condition.
18.1 FACTORY RESTART
1.) Remove all power (batteries and AC-AC adaptor) from outdoor sensors and
weather station.
2.) Leave both units without power for 10 minutes. (very important).
3.) Follow the operation “4 FIRST TIME TO USE” to start the pair the sensor.