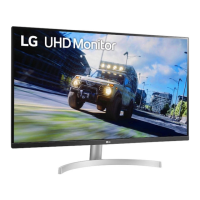
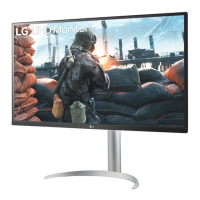
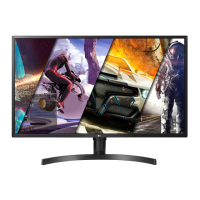
This document is an owner's manual for an LG IPS LED Monitor, specifically models 32UD59 and 32MU59. It provides comprehensive instructions for assembling, preparing, using, and troubleshooting the monitor, along with details on its features and settings.
The LG IPS LED Monitor functions as a display device, utilizing LED backlighting for its LCD panel. It is designed to connect to various external devices, including PCs and AV devices, to display video and audio signals. The monitor supports both HDMI and DisplayPort connections, offering flexibility for different setups.
Assembly and Preparation:
Before using the monitor, users are instructed to verify all components are present. The package typically includes the monitor body, stand body, stand base, cable holder, power cord, AC-DC adapter, and a CD containing the owner's manual and drivers. Depending on the region, HDMI and DisplayPort cables may also be included.
Assembling the monitor involves attaching the stand base to the stand body, and then securing the assembled stand to the monitor body. Users are cautioned to handle the monitor carefully during assembly to prevent scratches or damage, especially to the screen. It is recommended to place the monitor on a soft cloth during this process. The manual emphasizes using genuine components and supplied cables to ensure safety and optimal performance, warning that using counterfeit or uncertified cables may lead to display issues or image noise.
Installation:
The monitor can be installed on a table or mounted on a wall. For table installation, it should be placed in an upright position, ensuring at least 100 mm / 4 inches of space from the wall on all sides for proper ventilation. After placement, the power adapter is connected to the monitor, and the power cord is plugged into a wall outlet. The joystick button on the bottom of the monitor is then used to turn it on. A caution is given to unplug the power cord before moving or installing the monitor to avoid electric shock.
For wall mounting, the screen should be placed face down on a soft cloth to protect it. The four screws on the back of the monitor are removed, and a VESA-compatible wall mount plate is aligned and tightened with screws. Users are advised to refer to the wall mount plate's installation guide and to use screws of the correct length (under 8 mm / 0.31 inches from the outer surface of the back cover) to prevent damage to the monitor screen. The manual also warns against installing the monitor on a ceiling or slanted wall without proper support, as this could lead to injury.
Adjusting the Monitor:
The monitor offers adjustable height and angle for a comfortable viewing experience. The stand height can be adjusted by up to 4.72 inches, and the screen angle can be tilted forwards or backwards (20° to -5°). Users are advised to handle the monitor with both hands when adjusting the height and to avoid placing fingers or hands between the screen and the base. When adjusting the angle, care should be taken not to touch or press the screen area. The monitor head can also be slightly rotated up or down (up to 3°) to adjust the horizontal level.
Connecting Devices:
The monitor supports various connections:
- Connecting to a PC: Digital video and audio signals can be transmitted from a PC via HDMI or DisplayPort cables. The monitor supports Plug and Play, meaning it can be added to a computer without requiring manual driver installation or reconfiguration.
- Connecting to AV Devices: Similar to PCs, AV devices can be connected via HDMI to transmit digital video and audio signals.
- Connecting Headphones: Peripheral devices like headphones can be connected to the monitor's headphones port. It is recommended to use straight earphones, as angled ones might interfere with other external devices.
The joystick button, located at the bottom of the monitor, serves as the primary control for various functions.
- Power On/Off: Pressing the joystick button once turns the monitor on. Pressing and holding it turns the monitor off.
- Volume Control: Moving the joystick button left or right adjusts the monitor's volume.
- Main Menu Activation: Pressing the joystick button once activates the main menu.
- Navigation: Moving the joystick up/down or left/right navigates through menu options.
- Selection/Exit: Pressing the joystick button again selects an option or exits the main menu.
The On Screen Display (OSD) menu allows users to configure various monitor settings.
- Quick Settings: Includes Brightness, Contrast, and Volume adjustments.
- Input: Allows selection of the input mode (HDMI, DisplayPort) and adjustment of the Aspect Ratio (Full Wide, Original, 1:1).
- Picture: Offers various Picture Modes (Custom, Reader, Photo, Cinema, Dark Room 1, Dark Room 2, Color Weakness) and allows adjustments for Brightness, Contrast, Sharpness, SUPER RESOLUTION+, Black Level, HDMI ULTRA HD Deep Color, and DFC (Dynamic Fine Contrast).
- Game: Provides settings for Response Time (Fast, Normal, Slow, Off), FreeSync (Extended, Basic, Off), Black Stabilizer, and Gamma (Mode 1, Mode 2, Mode 3, Mode 4).
- Color Adjust: Allows customization of Color Temp (Custom, Warm, Medium, Cool) and Six Color adjustments (Red, Green, Blue, Cyan, Magenta, Yellow) for Hue and Saturation.
- Picture Reset: Resets all picture settings to default.
- General: Includes Language selection, SMART ENERGY SAVING (High, Low, Off), Power LED (On, Off), Automatic Standby (Off, 4H, 6H, 8H), DisplayPort 1.2 (Enable, Disable), Buzzer (On, Off), OSD Lock (On, Off), and OSD Size (Large, Small).
Maintenance and Troubleshooting:
The manual provides a troubleshooting guide for common issues:
- No Display: Check power cord, power LED status, and ensure the correct input is enabled.
- OUT OF RANGE/No Signal: Verify PC graphics card signal frequency and cable connections.
- OSD Lock: Unlock the OSD from the General menu.
- Image Sticking: Use a screensaver to prolong monitor lifetime and prevent image retention.
- Unstable/Shaky Display: Ensure the appropriate resolution is selected, especially avoiding interlaced resolutions like HDMI 1080i 60/50 Hz.
- Abnormal Color: Set color depth to 24 bit or higher, check signal cable connections, and note that pixilated spots are normal for LCD screens.
- "Unrecognized monitor" message: Install the display driver from the provided CD or LG website.
- No Sound: Increase monitor volume and set the monitor as the default audio device on the PC.
- External Device Compatibility: For UHD resolution devices, check compatibility and adjust the HDMI ULTRA HD Deep Color setting if issues arise.
Kensington Lock:
The monitor includes a Kensington security system connector at the back, allowing users to secure the monitor to a table using a Kensington lock cable. This is an optional accessory.
Energy Saving:
The monitor features SMART ENERGY SAVING options (High, Low, Off) to reduce power consumption. It also has an Automatic Standby feature that turns off the monitor after a period of no movement on the screen. The manual notes that the monitor is ENERGY STAR® certified, indicating its energy efficiency.
The manual emphasizes that illustrations are typical and may differ slightly from the actual product. All information and specifications are subject to change without prior notice to improve product performance.