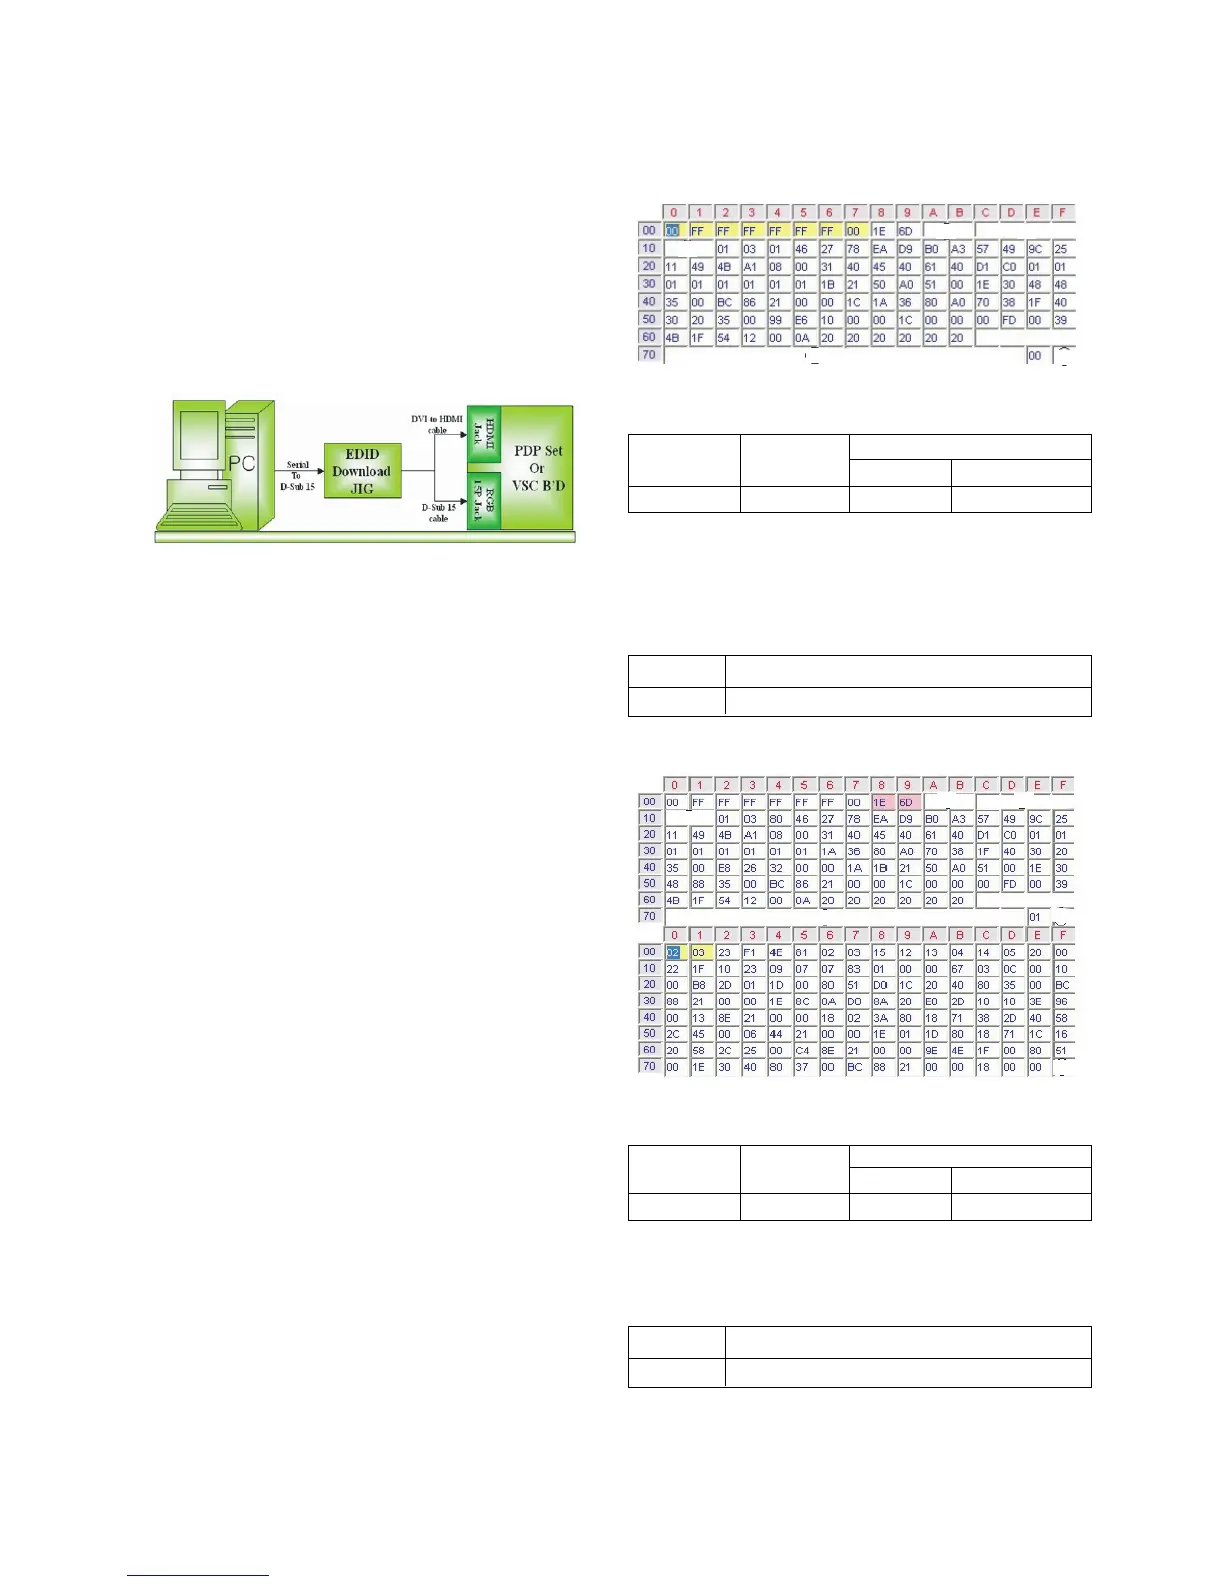
8. EDID(The Extended Display Identification Data )
/DDC(Display Data Channel) download
8-1. Required Test Equipment
(1) Adjusting PC with S/W for writing EDID Data.
(S/W : EDID TESTER Ver.2.5)
(2) A Jig for EDID Download.
(3) Cable : Serial(9Pin or USB) to D-sub 15Pin cable, D-sub
15Pin cable, DVI to HDMI cable.
8-2. Required Test Equipment
8-3. Preparation for Adjustment
(1) Connect the Set, EDID Download Jig, PC & Cable.
(2) Turn on the PC & EDID Download Jig. Set up the S/W
option.
(3) Power on the Set.
8-4. Sequence of Adjustment
(1) EDID Download
1) Init the data.
2) Load the EDID data.(Open File).
[ Analog file ] (for RGB)
]
[ Digital
file ] (for HDMI)
3) Set the S/W as below.
4)
Push the “Write Data & Verify”button. And confirm “Yes”.
5) If the writing is finished, you will see the “OK” message.
6) If TV has three HDMI INPUT, you must download three
times for each HDMI.
8-5. EDID DATA
1) Analog-RGB.
=> Detail EDID Options are below([1],[2],[3],[4],[5])
1.[1]-Product ID
2. [2]-Serial No : Controlled on production line.
3. [3]-Month, Year : Controlled on production line.
ex) Monthly: '03' => '03'
Year : '2006' => '10'
4. [4]-Model Name : model name.
5. [5]-Checksum -> Changeable by total EDID data.
2)
HDMI_1.
=> Detail EDID Options are below([1],[2],[3],[4],[5])
1.[1]-Product ID
2. [2]-Serial No : Controlled on production line.
3. [3]-Month, Year : Controlled on production line.
ex) Monthly: '03' => '03'
Year : '2006' => '10'
4. [4]-Model Name : model name.
5. [5]-Checksum -> Changeable by total EDID data
- 8 -
LGE Internal Use OnlyCopyright©2008 LG Electronics. Inc. All right reserved.
Only for training and service purposes
(Fig.5) Connection Diagram of DDC download

 Loading...