41
Installation Manual
Due to our policy of continuous product innovation, some specifications may change without notification.
©LG Electronics U.S.A., Inc., Englewood Cliffs, NJ. All rights reserved. “LG” is a registered trademark of LG Corp.
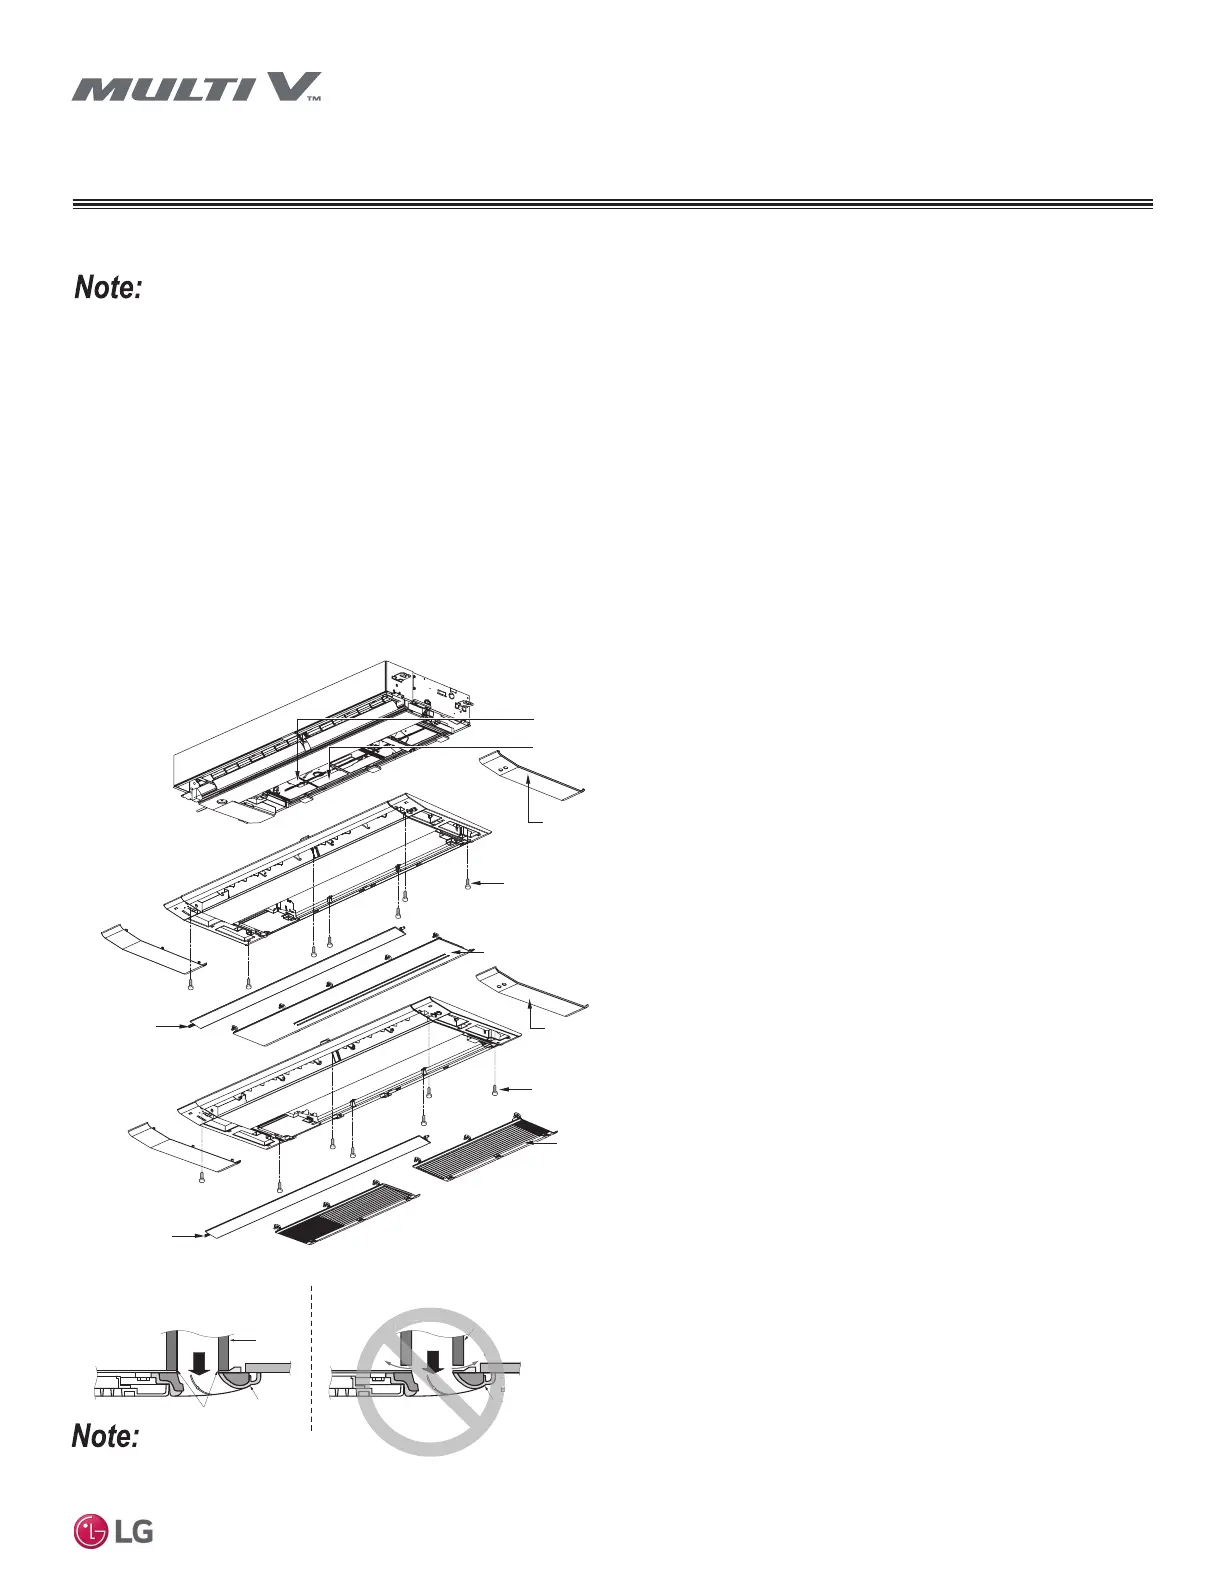
INSTALL DECORATIVE COVER
One-Way Decorative Cover Installation
• 'HFRUDWLYHFRYHULVDQRSWLRQDODFFHVVRU\WKDWLVVROGVHSDUDWHO\
• %HIRUHLQVWDOOLQJWKHGHFRUDWLYHSDQHODOZD\VUHPRYHWKHSDSHUWHPSODWHILUVW
1. Open the air outlet vane, and remove the side covers.
2. Remove the air inlet panel from the decoration cover.
3. Hook the decoration cover to indoor unit, using the hooks attached at the back of the decoration cover (hook on both sides).
4. Position the wires / cables so they do not get pinched between the decoration cover and indoor unit.
5. Install the six (6) or seven (7) screws (number of screws depends on the model).
6. Attach the vane motor connector, display connector, and air inlet.
7. Install the air inlet panel (including the air filter) and side covers.
Figure 33: One-Way Cassette Decorative Cover Installation.
,QVWDOOWKHGHFRUDWLYHFRYHUVQXJO\DQGZLWKRXWJDSV$Q\JDSVEHWZHHQWKHFHLOLQJDQGWKHFDVVHWWHIUDPHZLOOUHOHDVHFRRODLUZKLFKZLOOFDXVH
VZHDWLQJ:DWHUGURSVWKDWIDOOZLOOGDPDJHWKHVXUURXQGLQJFHLOLQJÀRRUDQGZDOOV
Figure 34: Properly Installing Decorative Cover Against the One-Way Cassette Indoor Unit Frame.
Decorative Cover
Side Cover
Side Cover
Air Inlet Panel
Air Outlet Vane
Mesh
Control Box Cover
Decorative Cover
Decorative Cover Installation
Screws (M6 Hexagon; Tighten
13/16 in.)
Air Inlet Grille
Air Outlet Vane
Cassette
Frame
Ceiling
Board
Decorative Cover
Decorative Cover against
Cassette Frame with No Gap
Air
Cool Air Leaking
through Gap
Ceiling
Board
Correct Installation Incorrect Installation
Cassette
Frame
Decorative Cover
Air
Decorative Cover Installation
Screws (M6 Hexagon; Tighten
13/16 in.)
 Loading...