Do you have a question about the LG V20 and is the answer not in the manual?
| Screen shape | Flat |
|---|---|
| Pixel density | 513 ppi |
| Second display | No |
| Display diagonal | 5.7 \ |
| Touch technology | Multi-touch |
| Touchscreen type | Capacitive |
| Display number of colors | 16 million colors |
| Processor cores | 2 |
| Processor family | Qualcomm Snapdragon |
| Processor frequency | 2.15 GHz |
| Coprocessor frequency | 1.6 GHz |
| RAM capacity | 4 GB |
| Compatible memory cards | MicroSD (TransFlash) |
| Maximum memory card size | 256 GB |
| Internal storage capacity | 64 GB |
| Flash type | LED |
| Rear camera type | Dual camera |
| Front camera type | Single camera |
| Maximum frame rate | 120 fps |
| Video recording modes | 720p, 1080p, 2160p |
| Rear camera resolution | 4656 x 3492 pixels |
| Rear camera aperture number | 2.6 |
| Resolution at capture speed | 1280x720@120fps, 1920x1080@30fps, 3840x2160@30fps |
| Front camera aperture number | 1.9 |
| Rear camera resolution (numeric) | 16 MP |
| Front camera resolution (numeric) | 5 MP |
| Second rear camera resolution (numeric) | 8 MP |
| 4G standard | LTE |
| 2G standards | GSM |
| 3G standards | CDMA, HSPA, HSPA+, UMTS, WCDMA |
| SIM card type | NanoSIM |
| Wi-Fi standards | 802.11a, Wi-Fi 5 (802.11ac), 802.11b, 802.11g, Wi-Fi 4 (802.11n) |
| Bluetooth version | 4.2 |
| Bluetooth profiles | A2DP |
| SIM card capability | - |
| 2G bands (primary SIM) | 850, 900, 1800, 1900 MHz |
| Mobile network generation | 4G |
| USB version | 2.0 |
| USB connector type | USB Type-C |
| HDMI ports quantity | 0 |
| Headphone connectivity | 3.5 mm |
| Multimedia Messaging Service (MMS) | Multimedia Messaging Service (MMS) is a standard way to send messages that include multimedia content to and from a mobile phone over a cellular network |
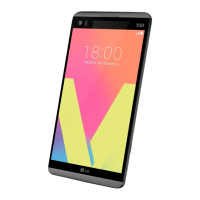
| Form factor | Bar |
| Product color | Silver |
| Themes | Wallpapers |
| Personalization | Icons, Menu, Shortcuts |
| Personal info management (PIM) | Alarm clock, Blacklist, Calculator, Calendar |
| Audio formats supported | AAC, AAC+, AMR, M4A, MIDI, MP3, OGG, WAV, WMA |
| Video formats supported | 3G2, 3GP, ASF, AVI, MP4, WEBM, WMV |
| Platform | Android |
| App distribution platform | Google Play |
| Operating system installed | Android 7.0 |
| Talk time (3G) | - h |
| Battery capacity | 3200 mAh |
| Depth | 7.6 mm |
|---|---|
| Width | 78.1 mm |
| Height | 159.7 mm |
| Weight | 174 g |
Thank you for purchasing your new LG V20. The following topics explain how best to use this guide to get the most out of your phone.
Read the Get Started guide and Important Information booklet that were packaged with your phone thoroughly for proper usage.
Note that most descriptions in this guide are based on your phone's setup at the time of purchase.
Screenshots in the user guide may appear differently on your phone. Key labels in the user guide are simplified.
In the user guide, the phone may be referred to either as "phone," "device," or "handset."
These topics illustrate your phone’s primary parts and key functions.
The following illustration outlines your phone’s primary external features and buttons.
The following topics explain how to insert and remove your phone’s battery.
Storage: Avoid storing or leaving battery with no charge remaining. Bulges: Depending on use, bulges may appear.
Follow these instructions to insert your phone’s battery safely and properly.
Follow these instructions to remove your phone’s battery. Always power the phone off before removing the battery.
Your phone is equipped with a Li-Ion battery. It allows you to recharge your battery before it is fully drained.
Plug the USB connector into the charger/accessory port at the bottom of your phone.
Before using a PC connection to charge your phone, ensure that the computer is turned on.
The Nano SIM card is an IC (Integrated Circuit) card containing the phone number and other customer information.
Keep the following in mind when handling a Nano SIM card.
Your phone supports the use of an optional microSD card (not included) to expand its storage capacity.
Data: Information stored on the microSD card can become lost or changed accidently or as a result of damage.
Follow these steps to insert an optional microSD card (not included). Make sure to turn off your phone.
Always unmount the microSD card before removing it from your phone.
Follow these instructions to remove a microSD card. Always turn off the phone before inserting or removing a microSD card.
When you insert a microSD card for the first time, it is recommended that you format it on your phone.
The instructions below explain how to turn your phone on and off.
Press and hold the Power/Lock Button.
Press and hold the Power/Lock Button to open the phone options menu.
Your phone’s touchscreen lets you control actions through a variety of touch gestures.
When you want to type using the onscreen keyboard, select items onscreen, such as application and settings icons.
To open the available options for an item (for example, a contact or link in a Web page), touch and hold the item.
To swipe or slide means to quickly drag your finger vertically or horizontally across the screen.
To drag, touch and hold your finger with some pressure before you start to move your finger.
Flicking the screen is similar to swiping, except that you need to swipe your finger in light, quick strokes.
For most screens, you can automatically change the screen orientation from portrait to landscape by turning the phone sideways.
“Pinch” the screen using your thumb and forefinger to zoom out or “spread” the screen to zoom in.
Follow the instructions below to activate your phone if it has not already been activated.
Go to sprint.com/activate and complete the online instructions to activate your phone.
Turn on your new phone. (Make sure the old one is turned off.) Your phone will automatically attempt Hands-Free Activation.
The setup screens help you set up certain features and preferences on your phone.
The following topics offer an overview of your phone’s basic operations.
Most of your phone’s operations originate from the home screen.
Tap icons, onscreen keys, and other items to open or activate the assigned function.
You can display options menus using the menu key, any app-specific menu icon, or by tapping and holding a screen area.
You can display a list of recently used applications using the Overview key.
You can customize your phone’s settings and options through the Settings menu.
The default orientation for your phone’s screen is portrait (vertical), but many apps will change to landscape.
Pull down the status bar to display the quick settings menu.
You can use your phone’s power and volume buttons to capture screenshots.
All installed apps can be accessed and launched from the home screen.
The following table outlines the primary apps that have been preinstalled on your phone.
Follow the instructions below to display your phone’s wireless phone number.
Airplane mode turns off all functions that emit or receive signals, while leaving your phone on.
Press and hold the Power/Lock Button to display the phone options menu.
Press and hold the Power/Lock Button to display the phone options menu.
You can type on your phone using one of the available touchscreen keyboards or Google voice typing.
Your phone offers you a choice of touchscreen keyboards for entering text. The keyboard appears automatically onscreen.
You can enter text using the on-screen keyboard. The on-screen keyboard appears on the screen when you tap an available text entry field.
When T9 is off, to enter text, tap the key labeled with the desired letter until it appears on the screen.
Your phone gives you many options to make entering text easier, including copying, cutting, and pasting text.
Touch and hold a word to highlight it. Drag the blue highlight markers to highlight the text you want.
Touch and hold the space bar and slide your finger to the left or right to move the cursor.
You will need a Google Account to access several phone features such as Gmail, Google Maps, Hangouts, and the Google Play applications.
Be sure not to forget your Google Account ID or password.
You must create and/or sign into a Google Account to use Gmail, Google Hangouts, Google Calendar, and other Google Apps.
From a computer, or from your phone's Browser, navigate to www.google.com.
Tap > Tools > Settings > General tab > Accounts & sync > ADD ACCOUNT.
If you synchronize your phone with your Exchange account, you can read, manage, and send email.
If you have a Google Account but have not yet signed in with your phone, follow these instructions.
Google Play™ is the place to go to find new Android apps, books, movies, and music for your phone.
Many different kinds of applications can be installed on your phone from Google Play.
When you install apps from Google Play app and use them on your phone, they may require access to your personal information.
Purchase apps at your own risk. Sprint is not responsible for any harm to you or third parties resulting from the use of purchased applications.
If you are not satisfied with an app, you can ask for a refund within 15 minutes of the purchase.
Depending on your settings, many apps will update automatically, or you can update apps directly from the Play Store app.
Tap > Play Store . Tap > My apps & games. Tap the app you want to update.
Tap > Play Store . Tap > Settings. Tap Auto-update apps and select an option.
You can uninstall any app that you have downloaded and installed from Google Play.
The Google Play store app offers an online help option if you have questions or want to know more about the app.
Your phone allows you to quickly turn the screen off when not in use and to turn it back on and unlock it.
To quickly turn the screen off, press the Power/Lock Button.
To turn the screen on, press the Power/Lock Button. The lock screen appears.
The Knock Code feature allows you to create your own unlock code using a combination of knocks (or taps) on the screen.
From time to time, updates may become available for your phone. You can download and apply updates.
During update: The phone cannot be used until the software update is complete. It may take time to update your phone’s software.
You can update your phone's software using the System Update option.
To back up your Gmail information: Tap > Tools > Settings > General tab > Accounts & sync.
Tap > Tools > Settings > General tab > About phone. Tap Software info.
This option allows you to automatically update your online user profile information.
This option allows you to download and update the PRL (preferred roaming list) automatically.
Second screen lets you open apps and see urgent info without searching for it on the main screen.
You can view the current time, date or notifications without turning on the device, and launch functions.
When a notification comes in, tap the expandable view icon on the right to view the notification.
When you receive a message, you can reply to the recipient from the Second screen without closing the current app.
The home screen is the starting point for your phone’s applications, functions, and menus.
Your home screen extends beyond the initial screen. Swipe the screen left or right to display additional screens.
In addition to the main home screen, your phone features extended home screens which provide more space for adding icons, widgets, and more.
Your phone’s status and notifications are available at a glance at the top of the screen.
The status bar at the top of the home screen provides phone and service status information on the right side.
Your phone’s notifications appear at the left side of the status bar, and you can access the full notification panel by pulling down the status bar.
Learn how to set the wallpaper and add, move, or remove shortcuts, widgets, and folders from the home screen.
Moving Widgets and Icons: From home, touch and hold an item and then drag it to the desired location.
Select and assign your phone’s background wallpaper.
You can add widgets to your phone’s home screen. Widgets are self-contained apps that display on a home screen.
You can group home screen shortcuts into folders for convenient access.
The following topics outline the use of your device’s phone app to place and receive calls, use voicemail, set up and manage contacts, and more.
The following topics describe how to directly dial calls, how to answer incoming calls, and how to use the in-call screen options.
Press the Volume Buttons during the call.
Check the questions and answers below for troubleshooting solutions for common phone issues.
The most "traditional" way to place a call is by using the phone's dialer screen.
You can place calls to 9-1-1 even if the phone’s screen is locked or your account is restricted.
The following information lets you know how to answer incoming calls, mute the ringer on incoming calls, reject incoming calls, and more.
When a call arrives, drag in any direction to answer it.
To mute the ringer without rejecting the call, you can do any of the following.
When a call arrives, drag in any direction to reject it.
You can reject an incoming call and automatically send a text message to the caller.
While you’re on a call, you will see a number of onscreen options. Tap an option to select it.
You can place phone calls directly from entries in your Contacts list.
The Call logs list lets you quickly place calls to recent incoming, outgoing, or missed numbers.
The following topics describe how to set up and use your phone's voicemail and visual voicemail features.
You should set up your voicemail and personal greeting as soon as your phone is activated.
This topic describes the Visual Voicemail feature of your phone's service, as well as the steps required to set up Visual Voicemail.
Visual Voicemail gives you a quick and easy way to access your voicemail. Now you can find exactly the message you are looking for.
Setting up Visual Voicemail follows many of the same procedures as setting up traditional voicemail.
Visual Voicemail lets you easily access and select which messages you want to review.
Use the following options to access and configure your Visual Voicemail options.
The Visual Voicemail settings menu lets you access settings for notifications, pictures, greetings, and more.
Your main greeting can be changed directly via the Visual Voicemail system.
From your Visual Voicemail menu, you can quickly change the name or number attached to your voice messages.
The following topics outline additional voice-related services available with your phone, including Wi-Fi calling, call services and more.
Wi-Fi Calling uses Wi-Fi networks to help improve voice and data coverage.
Tap > Tools > Settings > Networks tab.
Caller ID identifies a caller before you answer the phone by displaying the number of the incoming call.
When you’re on a call, Call Waiting alerts you to incoming calls by sounding two beeps.
With conference calling, also known as 3-way calling, you can talk to two people at the same time.
Call Forwarding lets you forward all your incoming calls to another phone number – even when your phone is turned off.
Your phone’s Call Settings menu lets you configure your voicemail options and a number of other settings for the phone application.
Use the Call Settings menu to adjust the following settings.
Information saved in Contacts may be lost or changed if the battery is removed for a long period or left uncharged.
You can add contacts on your phone and synchronize them with the contacts in your Google Account, Exchange account, or other accounts.
You can save a phone number to Contacts directly from the phone keypad.
View a contact’s details by displaying a contact entry.
The following illustration show’s your Contacts app layout and describes the various features.
Once you’ve added a contact, you can add or edit any of the information in the entry.
You can delete a contact from the contacts details page.
You can share contacts with others by sending as vCard files.
You can import contacts from your internal storage directly to your Contacts application.
You can back up and export all of the contacts on your phone, as vCard files.
With text messaging (SMS), you can send and receive instant text messages between your wireless phone and other messaging-ready phones.
Quickly compose and send text messages on your phone.
When you need to add a little more to a text message, you can send a multimedia message (MMS).
While composing a text or multimedia message, tap to automatically save your message as a draft.
Depending on your notification settings, the phone will play a ringtone, vibrate, or display the message briefly in the status bar.
Text and multimedia messages that are sent to and received from a contact are grouped into conversations.
Do one of the following: On the Messages screen, tap the message thread to open and read it.
On the Messaging screen, tap a message thread to open it.
On the Messages screen, tap a message thread to open it.
Tap > Messenger . On the Messaging screen, touch and hold a message that you want to delete.
While viewing a conversation, touch and hold the message that you want to delete.
When you have received a message from someone in your stored contacts, you can tap the contact’s photo or icon.
The messages settings menu lets you control options for your text and multimedia messages.
Use Google’s Gmail service and your Google Account to send, receive, and manage your Gmail messages.
Gmail is handled as email from a PC. Restricting email from PCs on your phone prevents your phone from receiving Gmail.
Use your phone to create and send Gmail messages.
Adding Cc/Bcc: In the mail composition window, tap and then add recipients.
Your phone allows you to access, read, and reply to all your Gmail messages.
When new Gmail arrives, you will see in the status bar.
You can also read and reply to all your Gmail messages from the Gmail inbox.
Replying to Gmail Messages: With the Gmail message open, tap Reply , compose your reply message.
Gmail saves all mail in one box, but you can add labels that allow you to sort your Gmail conversation threads.
Remove sent and received Gmail threads so they do not appear in the inbox.
If registered on a mailing list, mute the threads and they will no longer appear in the inbox.
If you no longer wish to keep a Gmail conversation thread, you can simply delete it from the inbox.
If you need to find a specific message or message thread, you can search Gmail from the inbox.
You can report spam Gmail messages from your phone’s Gmail inbox.
If you have multiple Gmail accounts you wish to view on your phone, you can add them from the Settings > Accounts & sync menu.
If you have multiple Exchange accounts you wish to view on your phone, you can add them from the Settings > Accounts & sync menu.
If you have more than one Gmail account set up, you can switch between them in the Gmail app.
You can access settings for the Gmail app and for your individual Gmail accounts from the Gmail Settings menu.
The following topics will help you learn the basics of using your data services, including managing your user name, launching a data connection.
The 4G enhanced LTE network provides your phone with wireless Internet access over greater distances than Wi-Fi.
Tap > Tools > Settings > Networks tab > More > Mobile networks > Network mode.
When you buy your phone and sign up for service, you’re automatically assigned a user name.
Your phone displays the current status of your data connection through indicators at the top of the screen.
The Chrome mobile Web browser gives you full access to both mobile and traditional websites on the go.
Launching the browser is as easy as tapping an icon.
Bookmark favorite sites using the browser menu options.
Editing Bookmarks: From the browser, tap > Bookmarks > > Edit.
Use the browser menu options to view your browsing history.
Use tabbed browsing to switch between websites quickly and easily.
Post updates, read what your friends are up to, upload pictures and check-ins, and more with on-the-go Facebook access.
Before you use Facebook on your phone, you must download and install the app from the Google Play store app.
Tap > Tools > Settings > General tab > Accounts & sync > ADD ACCOUNT.
Tweet (post messages) and view other people's tweets on Twitter. Login may be required to use Twitter.
Before you can use Twitter on your phone, you have to download and install the app from Google Play.
Read Twitter feeds, follow your friends, and tweet your own updates right from your phone.
Hangouts is Google's instant messaging service. Use to communicate with other Hangout users, and also use video calling.
Tap > Google > Hangouts .
Tap > Google > Hangouts . Tap and select an ongoing conversation or the type of conversation you want to start.
Before using your phone in global roaming mode, you must activate Sprint Worldwide service.
Your phone comes with a preinstalled SIM (Subscriber Identity Module) card to support roaming on compatible GSM networks.
Follow these instructions to insert a Nano SIM card. Remember to power off your phone before inserting a Nano SIM card.
Your phone is designed to enter global roaming mode automatically when you activate your Sprint Worldwide service.
Select a communications method for an overseas carrier as needed.
You can select a specific local carrier to use when traveling internationally.
When traveling on international networks, you can place and answer calls as you would on the Sprint network.
Placing calls from one country to another country is simple with the Plus (+) Code Dialing feature.
Your Sprint voicemail will follow you as you travel. All of your unanswered calls will be forwarded to your Sprint voicemail.
To simplify accessing your Sprint voicemail while traveling, you can set up your voicemail access number as a Contacts entry.
You will need to call your voicemail number to access your voicemail while roaming internationally.
The voicemail retrieval process while traveling is the same as on the Sprint Network.
Sprint Worldwide Wireless Service can also keep you connected via email and Web browsing when traveling in countries in which Sprint offers data service.
To use Sprint Worldwide Data Services, you will need to have these services activated on your account.
To access your email and browse the Web when traveling, you may need to manually select the carrier that provides Sprint service.
If data service is available on an international CDMA network, you only need to set the phone to CDMA.
If you experience any issues with voice or data services while outside of the United States, Sprint offers customer support 24 hours a day.
You can use the supplied USB connector to connect your phone directly to your computer and transfer music, pictures, and other content files.
If you want to save data to a microSD card on your phone, make sure the microSD card is installed and active.
To use your phone’s Wi-Fi, you need access to a wireless access point or “hotspot.”
Use the Wireless & networks setting menu to enable your phone’s Wi-Fi radio and connect to an available Wi-Fi network.
Use the Wi-Fi settings menu to manually set your Wi-Fi connection options.
You may wish to disconnect from a connected Wi-Fi network without turning Wi-Fi off.
Use Wi-Fi Direct to connect directly to other Wi-Fi Direct devices simply via Wi-Fi, without an access point or the Internet.
Wi-Fi Hotspot allows you to turn your phone into a Wi-Fi hotspot. When this feature is turned on, you can share your phone's mobile data services.
Tap > Tools > Settings > Networks tab. Tap Tethering > Wi-Fi hotspot.
Enable Wi-Fi (wireless) functionality on your target device (laptop, media device, etc.).
Use Tethering to share your device’s Internet connection with a computer that connects to your device via USB tethering, Wi-Fi hotspot or by Bluetooth.
Bluetooth® is a short-range communications technology that allows you to connect wirelessly to a number of Bluetooth devices.
Information may not appear correctly on connected devices depending on the transferred data.
Bluetooth is a technology that enables wireless connection with PCs, Bluetooth devices with hands-free features, etc.
Use the settings menu to enable or disable your phone’s Bluetooth capabilities.
Search for and pair nearby Bluetooth devices. Registered Bluetooth devices can be connected simply.
From the Bluetooth settings menu, tap Settings next to the paired device you wish to unpair.
You can listen to music over a Bluetooth stereo headset, or have hands-free conversations using a compatible Bluetooth headset or car kit.
You can use Bluetooth to transfer information between your phone and another Bluetooth-enabled device such as a phone or computer.
You can send the following types of information, depending on the device you are sending to.
Tap > Contacts . Tap > Share. Tap the contact(s) you want to send and then tap SHARE > Bluetooth.
Your phone is capable of receiving a wide variety of file types with Bluetooth, including pictures, music tracks, and documents.
Share your device’s data to another devices via various method.
You can share files between your device and another LG device, or a tablet or computer.
You can quickly send large files to your computer.
You can directly view the content saved on your cloud account, without downloading it to your device.
You can use the camera or camcorder to take and share pictures and videos.
You can select a camera mode that suits your environment to take a photo or record a video easily.
You can take photos or record videos by selecting a variety of camera modes and options.
For an overview of your phone's camera and its features, you can access more information through the phone's settings menu.
You can customize a variety of camera options to suit your preferences.
You can take various specialty shots while using the rear-facing camera in Auto camera mode.
You can take a photo or record a video by using both the standard and wide-angle of the dual camera at the back.
You can take multiple photos or videos in the form of a collage by using the front and rear cameras.
You can record short videos clips and assemble them into a 60-second short film.
You can create a panoramic photo by moving the camera in one direction to photograph and stitch continuous shots.
You can create an entertaining video by changing the moving speeds of subjects in your video.
You can take a sequence of frames at set intervals to record changes that take place slowly over time.
You can take continuous shots of photos to create moving pictures.
In the AUTO mode, tap > Simple view to hide the menus on the camera screen.
You can take high-resolution pictures using your phone’s camera.
File Format for Pictures: File format for pictures is JPEG. File Format for Videos: File format for videos is MPEG4.
If the Lens Becomes Dirty: Fingerprints/smudges on the lens prevent the capturing of clear still images/videos.
Do not shine the flash close to your eyes. Do not look directly at the flash when shining it.
Select a camera mode and tap the subject to focus the camera on.
Select a camera mode and tap the subject to focus the camera on.
You can create photos featuring professional touch by using a variety of advanced features.
You can customize a variety of camera options to suit your preferences.
You can record a video by manually customizing various options. Adjust values for the white balance, focus, brightness, ISO, shutter speed and more.
You can customize a variety of camera options to suit your preferences.
You can take advantage of other useful features while using the camera app.
You can control the zoom on the Second screen while recording a video.
You can fix the current exposure level and focus position by touching and holding the screen in the AUTO mode.
You can check the focus status easily and visually.
You can switch between the front and rear cameras to suit your environment.
Switch between the standard and wide-angle cameras to take photos or record videos to suit your preferences.
You can use zoom in or out on the camera screen while taking a photo or recording a video.
You can use the front camera to view your face on the screen and take selfies.
You can take selfies by using gestures.
You can use the face detection feature to take selfies easily and conveniently.
You can take selfies at an interval.
After taking a selfie with the front camera, you can preview the selfie immediately by placing the screen close to your face.
Before taking a photo or recording a video with the front camera, tap > Save as flipped.
Using the Photos application, you can view pictures and watch videos that you’ve taken with your phone’s camera.
You can access and view all your stored pictures and videos from your phone’s Gallery.
After capturing a picture or video, tap the thumbnail image at the bottom right corner of the screen.
Zoom In or Out on a Picture: Tap the screen twice or pinch the screen to zoom in or out.
Whether you’re browsing pictures in filmstrip or grid view, you can touch and hold on a picture to open a selection menu.
Tap > Photos . Tap an album (such as Camera). Tap the picture you want to rotate.
Tap > Photos . Tap an album (such as Camera). Tap the picture you want to crop.
The Photos application lets you send pictures and videos using email or multimedia messages.
You can send several pictures, videos, or both in an email or Gmail message.
Multimedia Messaging (MMS) lets you send pictures and videos using your phone’s messaging app.
You can select several pictures, videos, or both and send them to someone’s phone or your computer using Bluetooth.
From Photos, you can share your pictures and videos from a variety of apps and social media sites.
You can share your videos by uploading them to YouTube™. Before you do this, you must create a YouTube account.
Your phone offers a number of location-based navigation programs to help you figure out where you are and get you where you’re going.
Before using any location-based services, you must enable your phone’s location feature.
Use the Google Maps app to determine your location, find directions, browse local businesses and attractions, rate and review places.
Use Google Maps to locate and map a specific address or destination.
Scout™ by Telenav is a daily personal navigator that helps you get where you’re going.
Before you use Scout on your phone, you may need to download and install the app from the Google Play Store app.
Search information saved on the phone and in phone applications as well as on the Internet.
Type search terms in the Google Search bar to find information on your phone and around the globe.
Use your voice to search instead of typing, with Google Voice Search.
You can use two types of calculators: the simple calculator and the scientific calculator.
Your phone has a clock app that lets you set alarms, view time in time zones around the world, use a stopwatch, set a timer.
You can check the phone any time on your phone. The current time displays in the upper right corner of the status bar.
Set multiple alarms using your phone’s Clock app.
Your phone’s clock app provides additional useful features including world clock, stopwatch, and timer functions.
The world clock lets you keep track of the current time in multiple cities around the globe.
The timer provides a countdown timer.
The stopwatch lets you time events down to the hundredth of a second.
The Capture+ feature allows you to create memos and capture screen shots. You can use Capture+ to easily and efficiently create memos.
Tap to save the current memo. Tap to add freehand notations to the memo.
Your memo can be saved in the QuickMemo+ application or in the Photos application.
Use your phone’s QuickMemo+ app to save text, memos, lists, and more.
View files stored on your phone.
You can configure the audio settings manually so that you can record audio based on the settings optimized for the selected mode.
You can record a highly defined audio file by selecting and configuring the audio mode to suit the recording environment.
With Studio mode, you can play an audio file and record your voice at the same time.
GAIN: You can adjust the sensitivity of the sound recorded by the microphone.
You can view the uninstalled apps on the home screen. You can also reinstall apps which were uninstalled within 24 hours from now.
You can set a daily exercise goal and check the amount of physical exercise to monitor your health and fitness information.
You can configure LG Health when launching the app for the first time or after having already used it.
Display your exercise log. Begin tracking an exercise. Set various LG Health settings, including your profile and goals.
You can control many electronic devices in different locations by using your device as a remote control.
You can register a device you want to control remotely with your device.
You can create a customized universal remote control by assigning remote control functions to your device.
The Google Play Music app lets you browse, shop, and play back songs purchased from Google Play as well as songs you have loaded from your own music library.
Use the Google Play Music app to listen to all your music on your phone.
The following diagram outlines the main features of the Play Music app player screen.
Organize music into playlists to fit every occasion.
From the player view, tap More options > Add to playlist > [playlist name].
With Sprint Music Plus and the Music Store, Ringtone Store, and Ringback Tone Store, you can purchase, download, and play music, ringtones, and ringback tones.
Before you use Sprint Music Plus on your phone, you must download and install the app from the Google Play store app.
Tap > Sprint Music Plus . The app opens.
From the Sprint Music Plus Store, you can shop for songs to purchase and download to your phone.
View videos uploaded to YouTube and upload your own videos to your YouTube account.
You can use the YouTube app to view videos on YouTube even if you aren’t signed in to a YouTube account.
You can post videos to your YouTube account from your phone. Before posting, you must set up a YouTube account.
Access your Sprint account, get phone information and help, find recommended apps, and more.
Now you have the ability to get every bit of NASCAR coverage, news, and stats right on your phone.
Before you use the NASCAR Mobile app on your phone, you must download and install the app from Google Play.
Follow the prompts to customize your app and begin following your favorite racers.
Tap > Tools > Settings to access your phone’s settings menu.
Use Networks Settings to configure your phone's Wi-Fi settings, Bluetooth, Tethering, VPN, Mobile networks, and more.
The Network settings menu allows you to configure the following options.
Airplane Mode (flight mode) allows you to use many of your phone’s features, such as games, and music, when you are in an airplane.
Tap > Tools > Settings > Networks tab.
Your phone lets you take advantage of Wi-Fi hotspots for high-speed data access using available computer networks.
Your phone’s Bluetooth capabilities let you use wireless headsets, send and receive pictures and files, and more.
You can check the current data usage, set to enable/disable mobile data, or set the mobile data limit.
Tap > Tools > Settings > Networks tab > Mobile data.
Your phone's Call settings menu lets you configure options.
Your phone lets you use the wireless technology that enables data transmission between devices.
NFC (Near Field Communication) is a wireless technology that enables data transmission between two objects when they are brought within a few inches of each other.
When this feature is turned on, you can beam app content to another NFC-capable device by holding the devices close together.
Send and receive files with computers and LG devices.
Share media content with nearby DLNA-compatible devices.
You can play the screen and sound of the device on a different device, such as a TV.
You can connect your device to an automobile via USB and use the automobile's head unit to run MirrorLink apps on the device.
Connect to your PC to manage your phone. Download LG Bridge from the LG Electronics website on your PC.
The Printing menu allows you to manage your Google Cloud Print settings and print jobs.
Use Tethering to share your device’s Internet connection with a computer that connects to your device via USB tethering, Wi-Fi hotspot, or by Bluetooth.
This menu allows you to personalize additional wireless feature settings.
This menu allows you to configure various mobile network settings.
Enable and disable data access over the mobile network.
With your phone and global roaming service, you can make phone calls and use wireless data services around the globe.
View your 4G network provider and IP address.
Choose your preferred network mode.
Manage APN information.
From your phone, you can add, set up, and manage virtual private networks (VPNs).
Depending on the type of VPN you are using at work, you may be required to enter your login credentials or install security certificates.
If your network administrator instructs you to download and install security certificates, follow the instructions below.
Use the Wireless & networks settings menu to add a VPN connection to your phone.
Once you have set up a VPN connection, use the Wireless networks settings menu to connect to or disconnect from the VPN.
In the Sound settings menu, you can configure call and notification ringtones, audio volume, as well as some related settings.
The sound settings menu allows you to configure the following options.
Set your phone's sound profile.
Adjust your phone's volume settings to suit your needs and your environment.
The phone ringtones alert you of incoming calls.
Set incoming calls with ringtones composed automatically from their phone number.
Set vibrate strength for incoming calls, notifications and touch feedback.
Set the phone to vibrate in addition to ringing when you receive a call.
Set a vibrate type for incoming calls, incoming messages and email, alarms, and calendar events.
Set a schedule when to prevent interruptions from notifications.
Allows you to choose if you want to show or hide notifications on the lock screen.
Allows you to prevent apps from displaying notifications or set apps to show notifications with priority.
Connect to the earpiece, speaker or other external audio devices and use any of them as a Hi-Fi Quad DAC.
This menu allows you to adjust additional sound settings.
When you receive a notification such as the arrival of new messages, calendar events, or alarms, the phone sounds a ringtone.
Vibrate when tapping the Home touch buttons and during other UI interactions.
This menu lets you select whether you hear tones when touching numbers on the dialpad, selecting on-screen options, and more.
To read out the incoming call and the message event automatically.
Adjusting your phone's display settings not only helps you see what you want, it can also help increase battery life.
The display settings menu allows you to configure the following options.
To customize the settings and options for the Second screen, see Second Screen.
Configure your phone's home screen settings.
Choose the desired Home theme.
Choose the desired wallpaper for the home screen.
Choose the desired type of effect to display when you swipe from one home screen canvas to the next.
Sort apps by name or download date or download date on the home screen.
Set the layout of the home screen.
Choose if you want to show or hide apps on the home screen.
Include an additional Home screen showing customized info.
Lock screen menu lets you configure screen lock options.
You can increase your phone's security by setting up a Knock Code, pattern, PIN, or Password.
Choose the desired font type.
Choose the desired font size.
Choose whether the phone displays bold text.
Adjust your screen’s contrast (brightness) to suit your surroundings.
Set to reduce the amount of blue light on screen to reduce eye strain.
Choose whether the phone automatically switches the orientation of the screen as you turn it sideways or even upside down.
Select how long the display screen remains backlit after you touch the screen or press a key.
The More settings menu allows you to adjust additional display settings.
Set the items on the screen to a size that is easy for you to see.
Turn on or off the screen by tapping the screen twice.
Screensaver will be on when the phone is sleeping while docked and/or charging.
Turn on this menu to shrink the screen for use with one hand by swiping left or right across the Home touch buttons.
Improve the accuracy of the tilt and speed of the sensor.
You can set the following options in the General settings menu.
Set the language and keyboard type.
Enable location service. Your phone determines your approximate location using GPS, Wi-Fi and mobile networks.
Manage and sync your accounts. Control how applications send, receive, and sync data.
Manage the cloud accounts for LG apps.
Configure any accessibility plug-ins you have installed on your phone.
Access to apps by pressing the Volume Buttons twice when the screen is off or locked.
Use Google Settings to manage your Google apps and account settings.
Use the Fingerprints & security settings to help secure your phone and its data.
Turn on/off, open or change something such as Wi-Fi, Music, Sound profile according to where you are or what you do.
Select the apps to be used directly on the cover in small view using Quick Cover.
Set your preferences for how the date and time is displayed. You can also select a time zone.
Manage unused apps and data.
Monitor the used and available internal memory and SD card (if available).
Show any battery information and configure options.
Monitor the memory used on average and the memory used by apps in the device.
From time to time, updates may become available for your phone. You can download and apply updates.
View details about installed apps, manage their data, force them to stop.
You can make payments with your device instead of a credit card.
Back-up your data, automatically restore data, and erase all the data on your phone.
Backs up all information on the device and restores it in the event of data loss or replacement.
Allows you to back up app data, Wi-Fi passwords, and other settings to Google servers.
Allows you to choose an account to back up data.
When reinstalling an app, enabling this option restores backed up settings and data.
Reset all network settings.
Resetting the phone restores all the factory defaults, including personal data from phone storage.
The About Phone menu lets you access important phone information.
The following About Phone items may be reviewed or set.
Tap > Tools > Settings > General tab > About phone.
Your phone's Language & keyboard settings let you select a language for the devices screens and menus.
You can choose to display your device's on-screen menus in multiple languages.
Allows spelling correction when using the on-screen keyboard.
Shows the current keyboard type and the available input methods. Tap the options to configure each keyboard’s settings.
Tap to set the preferred engine or general settings for text-to-speech output.
Adjust the pointer speed.
Reverse the mouse buttons to use the primary button on the right side.
Allows you to turn on location service. Your phone determines your approximate location using GPS, Wi-Fi and mobile networks.
Use the Accounts & sync settings menu to add, remove, and manage your Google and other supported accounts.
The Cloud menu allows you to manage the cloud accounts for LG apps.
Use the Accessibility settings to configure any accessibility plug-ins you have installed on your phone.
The Vision setting allows you to configure the visual options.
The Hearing setting allows you to configure hearing options.
The Motor & cognition setting allows you to configure physical and motor options.
The General settings allows you to configure general system options.
The Services setting allows you to configure the service option.
Shortcuty Key provides quick access to apps by pressing the Volume Buttons twice when the screen is off or locked.
Use Google Services to manage your Google apps and account settings.
Use the Fingerprints & security settings to help secure your phone and its data.
Use your fingerprint to unlock the screen or content.
Select lock types to lock files in the QuickMemo+ app.
Encrypt SD card storage and keep data unavailable for other devices.
When you power on your device, you will be required to enter your screen lock.
Checkmark to briefly show each character of passwords as you enter them so that you can see what you enter.
Allows you to view or deactivate device administrators.
Allows installation of non-Play Store applications.
Displays the storage type for credentials.
Allows you to manage the certificate.
View or deactivate Trust agents.
This feature allows you to lock your device so that the current user can only access the pinned app.
Allows you to set access to App usage.
Allows you to turn on/off, open or change something such as Wi-Fi, Music, Sound profile according to where you are or what you do.
Select the apps to be used directly on the cover in small view using Quick Cover.
Set your preferences for how the date and time is displayed. You can also select a time zone.
Allows you to manage unused apps and data.
Monitor the used and available internal memory and SD card (if available).
The Battery menu lets you show any battery information and configure options.
You can monitor the memory used on average and the memory used by apps in the device.
From time to time, updates may become available for your phone. You can download and apply updates.
View details about installed apps, manage their data, force them to stop.
You can make payments with your device instead of a credit card.
Back-up your data, automatically restore data, and erase all the data on your phone.
Backs up all information on the device and restores it in the event of data loss or replacement.
Allows you to back up app data, Wi-Fi passwords, and other settings to Google servers.
Allows you to choose an account to back up data.
When reinstalling an app, enabling this option restores backed up settings and data.
Reset all network settings.
Resetting the phone restores all the factory defaults, including personal data from phone storage.
The About Phone menu lets you access important phone information.
The following About Phone items may be reviewed or set.
Tap > Tools > Settings > General tab > About phone.
The following topics address areas of support for your device, such as account information.
Check the questions and answers below for troubleshooting solutions for common phone issues.
Issue: Phone freezes/operation is unstable. Solution: Turn the phone on again.
Solution: The newly installed application may be the cause. Uninstall the application in Safe mode.
Solution 1: Check whether you are where signal is weak or out of service area.
Solution 2: Power the phone on again.
To check that Airplane mode is canceled: Tap > Tools > Settings > Networks tab.
To check that data communication is enabled: Tap > Tools > Settings > Networks tab > Mobile data.
To reset to initial settings: Tap > Tools > Settings > Networks tab > More.
Solution: Are you where signal is weak or have been out of service area for a long period? Calling where signal is weak or being out of service area uses a lot of Battery.
Solution: Applications cannot be installed with only a little free space on the phone or SD card.
Solution: Power the phone on again. If you are unable to turn the phone off, remove and replace the Battery.
Find out about account passwords and information about managing your account and finding help.
You will need to create passwords to protect access to your personal account information, your voicemail account, and your data services account.
If you are the account owner, you will create an account user name and password when you sign on to sprint.com/mysprint.
You’ll create your voicemail passcode when you set up your voicemail.
With your Sprint phone, you may elect to set up an optional data services password to control access and authorize purchases.
Manage your Sprint account from your computer, your Sprint phone, or any other phone.
Tap > Phone > Dial tab. Do any of the following.
Sprint 411 and Sprint Operator Services let you easily access information and calling assistance from your Sprint phone.
Sprint 411 gives you access to a variety of services and information, including residential, business, and government listings.
Sprint Operator Services provides assistance when you place collect calls or when you place calls billed to a local telephone calling card.
You can set up your device to prevent other people from using it if it’s been reset to factory settings without your permission.
Set a screen lock: If your device is lost or stolen but you have a screen lock set, the device can’t be erased.
If your device is wiped but you have your Google Account on it, the device can’t finish the setup process until your Google Account information is entered again.
© 2016 Sprint. Sprint and the logo are trademarks of Sprint. Other marks are trademarks of their respective owners.
To obtain the source code under GPL, LGPL, MPL, and other open source licenses, that is contained in this product, please visit http://opensource.lge.com.