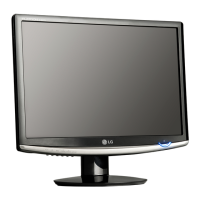
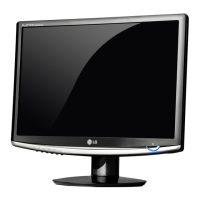
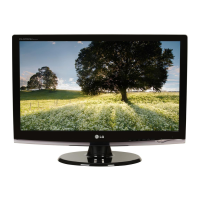
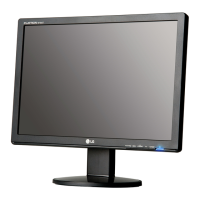
This document is a user's guide for the LG W1952TQ and W2252TQ monitors, providing essential information for safe installation, operation, and maintenance.
Function Description
The LG W1952TQ and W2252TQ are flat panel active matrix-TFT LCD monitors designed for displaying computer output. They feature an On Screen Display (OSD) control system for adjusting image parameters, including size, position, brightness, contrast, and color. The monitors support both analog (D-Sub) and digital (DVI-D) input signals, allowing connection to various computer systems. A key feature is the "Self Image Setting Function" (for Analog Mode only), which automatically adjusts display settings to optimal levels upon initial connection or after resolution changes, addressing issues like blurry screens or flickering. The monitors also include an f-ENGINE feature that allows users to select optimized image conditions based on the viewing environment and content type (e.g., movie or internet). Additionally, a "FUN" button provides access to features like EZ ZOOMING, 4:3 IN WIDE, PHOTO EFFECT, and JINGLE.
Usage Features
The monitors are designed for user convenience with several adjustable features:
- Stand Assembly and Disassembly: The guide provides clear instructions for connecting and disassembling the stand, ensuring proper setup and portability.
- Display Positioning: Users can adjust the panel's tilt within a range of -5° to 20° for maximum comfort. An ergonomic recommendation suggests keeping the forward tilt angle within 5 degrees.
- Computer Connection: Detailed steps are provided for connecting the monitor to a computer using either DVI or D-Sub cables, including specific instructions for Mac users requiring an adapter. The guide emphasizes turning off all devices before connection.
- Front Panel Controls: The monitor features several front panel buttons:
- FUN Button: Accesses special display features like EZ ZOOMING, 4:3 IN WIDE, PHOTO EFFECT, and JINGLE.
- Brightness Adjustment: Allows direct adjustment of screen brightness.
- MENU Button: Used to enter or exit the OSD, and also to lock/unlock OSD settings to prevent accidental changes.
- Navigation Buttons (▼▲): Used to select and adjust functions within the OSD.
- SOURCE Hot Key: Switches between D-Sub and DVI inputs when two computers are connected.
- AUTO/SET Button: Selects icons in the OSD and initiates the "Auto Image Adjustment" for optimal settings, especially useful for analog signals.
- Power Button: Turns the display on or off.
- Power Indicator: Lights up blue for normal operation and amber for sleep mode (energy saving).
- On Screen Display (OSD) Adjustments: The OSD provides comprehensive control over image quality:
- Picture Menu: Adjusts brightness, contrast, and gamma.
- Color Menu: Allows customization of red, green, and blue color levels, and offers preset color temperatures (sRGB, 6500K, 9300K).
- Tracking Menu: Controls horizontal and vertical position, clock (to minimize vertical bars/stripes), phase (to adjust focus and remove horizontal noise), and sharpness.
- Setup Menu: Includes options for language selection, OSD position, white balance (to adjust color levels for optimal image), RTC (Response Time Control for enabling/disabling), power indicator settings (on/off), and factory reset.
- f-ENGINE Menu: Offers image settings optimized for different content types (Movie/Internet, User, Normal, Demo).
- Special Features (FUN Button):
- EZ ZOOMING: Adjusts display resolution to a lower step or returns to original, useful for magnifying text and images. Requires forteManager software.
- 4:3 IN WIDE: Selects the image size of the screen, automatically adjusting to an optimized screen ratio based on input video signal.
- PHOTO EFFECT: Applies visual effects like Gaussian Blur, Sepia, or Monochrome to the screen.
- JINGLE: Controls the buzzer sound for various monitor events (power on/off, menu access).
Maintenance Features
The user's guide emphasizes several maintenance and safety precautions:
- Safety Precautions:
- Use only the supplied power cord; ensure it's easily accessible.
- Operate from the specified power source.
- Avoid overloaded outlets, frayed cords, and broken plugs.
- Do not open the display as it contains dangerous high voltages.
- Do not place the display on unstable surfaces or drop objects on it.
- Turn off the display when leaving the room for extended periods.
- Keep children from inserting objects into cabinet openings.
- Unplug the display during thunderstorms or when left unattended for a long time.
- Installation Precautions:
- Prevent anything from resting on or damaging the power cord.
- Avoid using near water sources.
- Ensure proper ventilation by not blocking cabinet openings or placing near heat sources.
- Do not rub or strike the LCD screen with hard objects.
- Avoid pressing the LCD screen with a finger for extended periods to prevent afterimages.
- Cleaning:
- Unplug the display before cleaning.
- Use a slightly damp (not wet) cloth.
- Do not spray aerosol directly onto the screen to avoid electrical shock.
- Repacking:
- Retain the original carton and packing materials for safe transport.
- Disposal:
- The fluorescent lamp contains mercury; dispose of the product according to local regulations, not with general household waste.
- Troubleshooting: The guide includes a section to help users diagnose and resolve common issues such as no image, OSD locked messages, incorrect display image (position, bars, noise, color), and display driver problems. It advises checking cable connections, power, brightness/contrast, OSD settings, and installing the correct display driver. For image quality issues, it recommends using the AUTO button and adjusting OSD settings like H/V position, clock, and phase. It also highlights the importance of using the recommended resolution (16:10 aspect ratio) to avoid display problems.