22
INSTALLATION
a
Terminal block
b
UL-listed strain relief
c
UL-listed 3-wire power cord
5
Attach the two hot leads (black and red) of the
power cord to the outer terminal block screws.
6
Attach the neutral (white) wire to the center
terminal block screw.
7
Connect the external ground (if required by
local codes) to the green ground screw.
8
Tighten all screws securely.
9
Reinstall the terminal block access cover.
a
Hot lead (black and red)
b
Neutral wire (white)
c
External ground wire (if required by local
codes)
d
Wire from the appliance harness
e
Ground screw (green)
Installing the Vent Kit of
Dryer
The appliance is configured to vent to the rear. It
can also vent to the side.
• Use long-sleeved gloves and safety glasses.
• Use a heavy metal vent.
• Do not use plastic or thin foil ducts.
• Clean old ducts before installing the appliance.
• An adapter kit, part number 383EEL9001B, may
be purchased from your LG retailer. This kit
contains duct components necessary to change
the appliance vent location.
• Right-side venting is not available on gas
models.
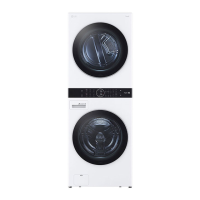
• Bottom venting is not available on stacked or
integrated stacked models.
Side Venting
1
Remove the rear exhust duct retaining screw
a
and pull out the exhaust duct
b
.
2
Press the tabs on the knockout
c
and carefully
remove the knockout for the desired vent
opening. (Right-side venting is not available on
gas models.) Press the adapter duct
d
onto the
 Loading...