6 PawRunner User Manual Lifepro Endurance Training Collection 7
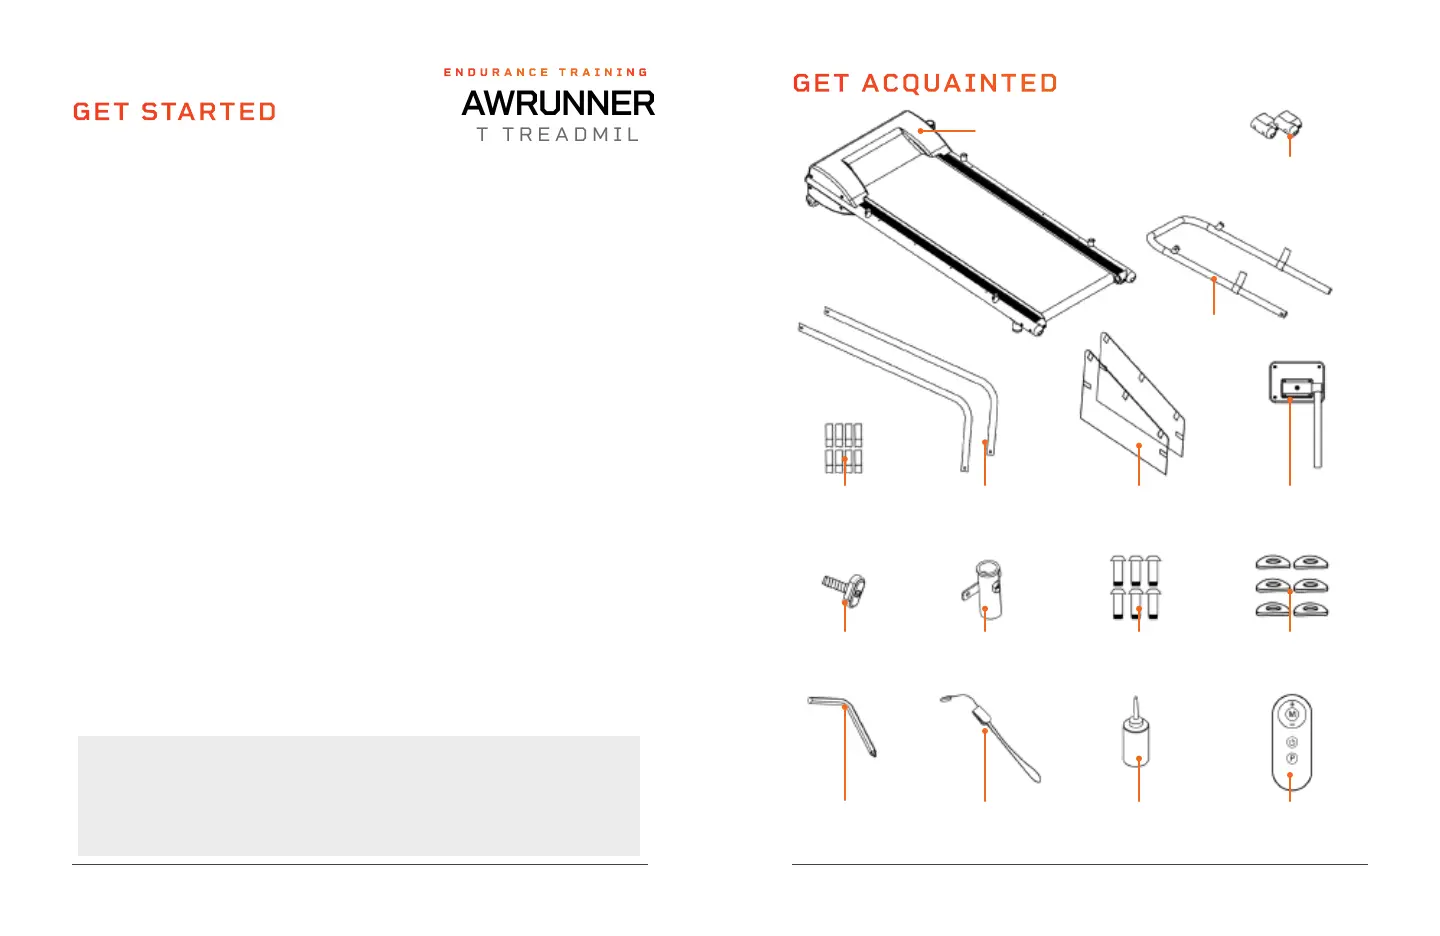
GET ACQUAINTED
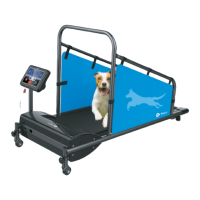
Lifepro PawRunner
Pet Treadmill
Baseframe (A)
Two Baseframe
End Caps (B)
Crossbar (C)
Ten Velcro
®
Strips (D)
Six Curved
Washers (M)
Magnetic
Safety Key (O)
Bottle of
Maintenance Oil (P)
T-Knob (J) T-Knob Post (K) Six M6×6mm
Screws (L)
Console &
Adjustment Post (I)
Remote
Control (Q)
Hex Key (N)
Left (G) & Right (H)
Side Panels
Left (E) & Right (F)
Sidebars
GET STARTED
WHAT’S IN THE BOX
A. Treadmill Baseframe
B. Baseframe End Caps (2)
C. Crossbar
D. Velcro
®
Strips (10)
E. Left Sidebar
F. Right Sidebar
G. Left Fabric Side Panel
H. Right Fabric Side Panel
I. Console and Adjustment Post
CUSTOMER SUPPORT
If you have any questions about assembling and using your PawRunner
treadmill, we’re here to help. Call or email us and an experienced
customer support representative will be happy to assist you:
support@lifeprofitness.com or (732) 456-6063.
PAWRUNNER
PET TREADMILL
ENDURANCE TRAINING
FIRST STEP
1. Remove all packaging from the treadmill baseframe, parts, and hardware.
Have someone to assist you with lifting the treadmill baseframe from the
packaging , it is heavy and bulky.
2. Confirm that all parts and hardware listed above are included.
3. Read carefully through this user manual, especially USING THE MAGNETIC
SAFETY KEY on page 9 , GETTING YOUR PET READY on page 20, PET
EXERCISE SAFETY on pages 23–25, and SAFETY INSTRUCTIONS on
pages 44–46 before assembling and using the treadmill.
4. Go to pawrunner.lifeprofitness.com and register your product within
14 days of purchase to activate your lifetime warranty.
5. Complete the steps in the 10MINUTE ASSEMBLY GUIDE on page 11 to
assemble your PawRunner.
6. Then, see GETTING YOUR PET READY, EXERCISE RECOMMENDATIONS,
and OPERATING INSTRUCTIONS to get started using the PawRunner.
J. T-Knob
K. T-Knob Post
L. M6×6mm Socket Head Screws (6)
M. Curved Washers (6)
N. Hex Key
O. Magnetic Safety Key
P. Bottle of Maintenance Oil
Q. Remote Control
R. User Manual