13
17
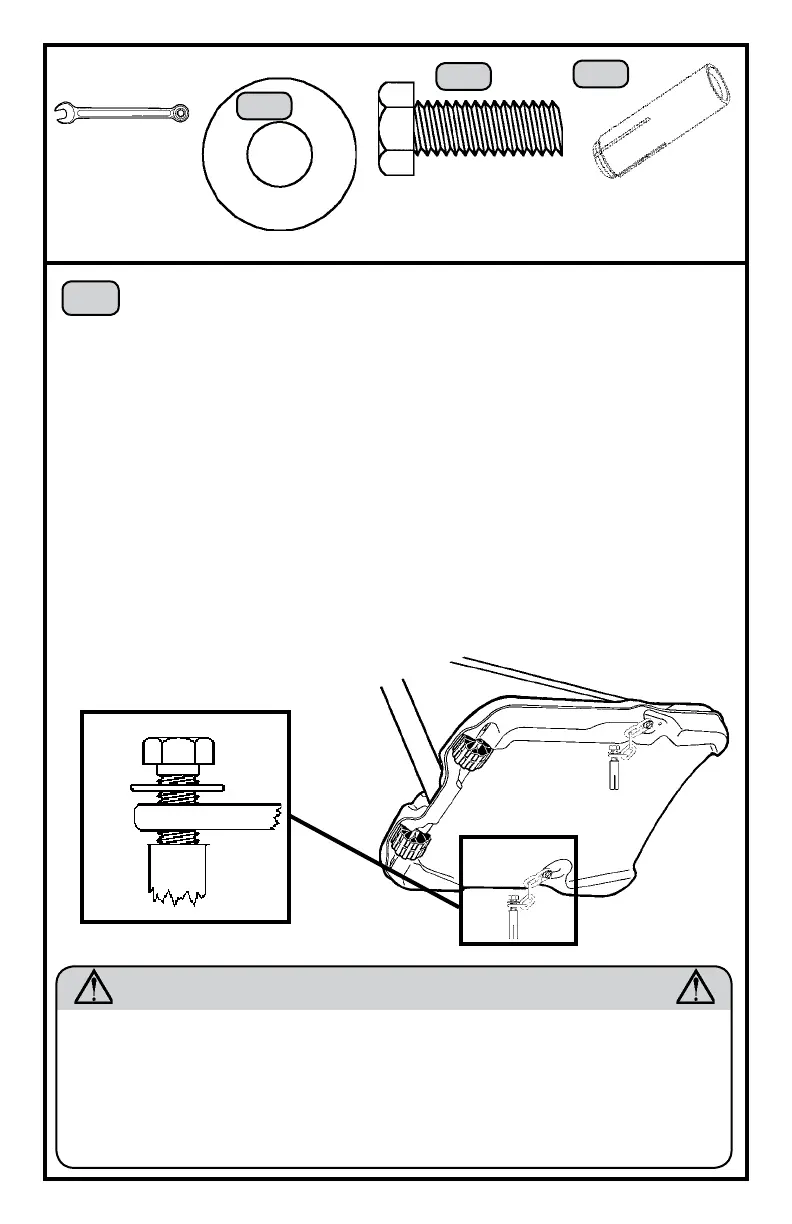
a. With the Base in the desired location, pull out the end links of the Chains (AF) so
they are away from the sides of the Base. Mark the location of the last links in the
Chain and drill a hole 13 mm (1/2 inch) in diameter and 39 mm (1 1/2 inches) deep
in the cement in each spot.
b. Place the Cement Anchors (AD) in the drilled holes and use a 5/16” Hex Bolt and
a hammer to tap down the anchor tab located inside each Anchor. Tap with force
at least ve or six times until the sides of the Anchor begin to are.
c. Slide a 3/8” x 1” Hex Bolt (AB) through a 3/8” Flat Washer (AA) and through the
end links of each Chain (AF).
d. Secure the 3/8” x 1” Hex Bolts (AB) into the Cement Anchors (See illustration).
Note: Using the Cement Anchors can not replace lling the Base with water.
The Base must be lled with water and secured with the Cement Anchors.
Both are necessary for a secure and stable system.
AB
AA
AF
AD
INSTALLING THE CEMENT ANCHORS
AA
AB
AD
(2)
(2)
HD9102B
(2)
To prevent the Base from being punctured, install the cement anchors in a way that
will not permit them to come in contact with the Base. The hardware used with the
cement anchor could puncture the Base, resulting in leakage, which could cause the
system to tip over, potentially resulting in serious personal injuries. Do not attempt to
use the portable unit without rst lling the Base with weight and securing the cement
anchors. The system may fall over without being secured to the ground and could
cause serious personal injuries.
WARNING
9/16” Wrench
Pencil/Marker
Electric Drill
Hammer
Tape Measure
5/16” Hex Bolt
Required For This Page:
(Not actual size)